
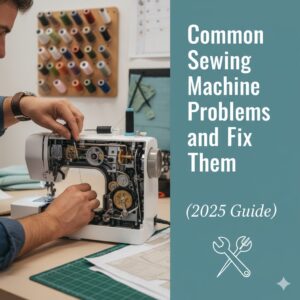
11 Common Sewing Machine Problems and How to Fix Them (2025 Guide)
It’s a familiar story: you’re in the creative zone, your project is coming together beautifully, and then… it happens. The unmistakable sound of a jammed machine, the sight of a tangled “bird’s nest” of thread, or stitches that mysteriously start skipping. It’s enough to make even the most seasoned sewist want to throw in the towel.
But here’s a secret I’ve learned over 25 years at the sewing table: 95% of all sewing machine problems are not major mechanical failures. They are simple, recurring issues that you can absolutely fix yourself in minutes. As an avid sewer and machine maintenance enthusiast, I’ve compiled the ultimate troubleshooting guide. This is your step-by-step roadmap to diagnose and solve virtually any problem your machine throws at you, turning frustration into empowerment.
Disclosure: This post contains affiliate links. If you make a purchase through these links, we may earn a small commission at no extra cost to you. This helps us continue to provide high-quality, free content. We only recommend products we’ve used and trust.
Quick Jumps to Your Problem
- 1. Thread Bunching Under Fabric
- 2. Skipped Stitches
- 3. Breaking Top Thread
- 4. Breaking Bobbin Thread
- 5. Breaking Needles
- 6. Tension Problems
- 7. Fabric Not Feeding
- 8. Fabric Puckering/Wavy Seams
- 9. Loud, Grinding Noises
- 10. Stitches are Uneven or Loose
- 11. Machine is Jammed/Won’t Sew
- My Essential Troubleshooter’s Toolkit
The Golden Rule of Troubleshooting: Start Here!
Before you dive into specific problems, remember the #1 rule that solves more than half of all issues: Rethread your machine completely. Don’t just snip the thread at the needle and pull it through. Take both the top thread and the bobbin out. Raise the presser foot (this is crucial, as it opens the tension discs!), and rethread the entire machine from the spool downwards, following the numbered guides. This simple act often magically fixes the problem.
If that doesn’t work, let’s get specific. Our guide to sewing machine setup for beginners is a great refresher if you’re unsure about any step.
Problem 1: Thread Bunching or “Nesting” Under the Fabric
The Symptom:
You finish a seam, lift the presser foot, and find a giant, tangled nest of thread on the bottom side of your fabric. This is the single most common sewing machine problem.
The Misconception:
Everyone assumes this is a bobbin issue because the nest is on the bottom. 99% of the time, it is NOT a bobbin issue. The nest is formed by the top thread being pulled down in loops because there’s a problem with the upper threading or tension.
The Fix: A Step-by-Step Checklist
- Rethread the Top Thread: Stop. Unthread the machine completely. Raise the presser foot lifter to open the tension discs. Rethread the machine carefully, making sure the thread is seated correctly in the tension discs and the take-up lever.
- Check the Presser Foot: Did you forget to lower the presser foot before you started sewing? Sewing with the presser foot up is a guaranteed way to create a thread nest because no tension is applied to the top thread.
- Check the Spool: Is the thread coming off the spool smoothly? Sometimes it can get caught on a slit in the spool itself, causing a sudden jerk in tension. Make sure you are using the correct size spool cap to hold it in place.
Problem 2: Skipped Stitches
The Symptom:
Your machine is sewing along, but there are intermittent gaps in the seam where the top and bobbin threads failed to form a stitch.
The Likely Causes & Fixes:
This is almost always a needle issue.
- Change Your Needle (The #1 Fix): Needles are not immortal. They get dull, bent, or develop tiny burrs after just 8-10 hours of sewing. A dull needle doesn’t pierce the fabric cleanly; it pushes the fabric down into the machine, causing the hook to miss the thread loop. The first and best solution for skipped stitches is to insert a brand new needle.
- Use the Right Type of Needle: Are you sewing knit fabric with a universal needle? That’s your problem. Knits require a Ballpoint or Stretch needle, which has a rounded tip designed to slide between the fabric fibers instead of cutting them. Using the wrong needle type is a primary cause of skipped stitches on specific fabrics.
- Check Needle Insertion: Is the needle pushed all the way up into the clamp? Is the flat side of the shank facing the back (on most machines)? An improperly inserted needle won’t be at the correct height to meet the bobbin hook.
- Rethread (Again!): It’s always worth a quick rethread, just in case the thread has slipped out of a guide.
Needle Knowledge is Power
I keep a multi-pack of Schmetz needles with Universal, Ballpoint, and Jeans/Denim needles on hand at all times. Matching the needle to the fabric is not an optional step; it’s a fundamental part of learning how to use a sewing machine correctly and will prevent countless headaches.
Problem 3: The Top Thread Keeps Breaking
The Symptom:
You sew a few inches, and *snap*—the top thread breaks. You rethread, and it happens again. Infuriating!
The Likely Causes & Fixes:
- Check the Thread Path for Snags: Slowly pull the thread through the machine by hand (with the presser foot up). Do you feel any resistance or snagging? The thread could be caught on the spool itself, a thread guide, or even wrapped around the spool pin.
- Lower the Top Tension: The most obvious cause. If your top tension is set too high (a larger number), it puts too much stress on the thread. Try lowering it by one full number (e.g., from 4 to 3) and test on a scrap.
- Change the Needle: A dull or burred needle can shred or weaken the thread as it passes through the eye, causing it to break. Install a fresh needle.
- Check Thread Quality: This is a big one. Old, cheap, or low-quality thread is weaker and produces more lint, which can clog your tension discs. If you inherited grandma’s vintage thread, save it for display. For sewing, invest in good quality thread like Gutermann or Coats & Clark. It makes a world of difference.
- Is the Needle/Thread Match Correct?: Are you trying to use a thick, heavy-duty thread with a small size 70/10 needle? The eye of the needle might be too small, causing friction and shredding. Use a larger needle (e.g., 90/14 or 100/16) for thicker threads.
Problem 4: The Bobbin Thread Keeps Breaking
The Symptom:
The top thread is fine, but the thread from the bobbin is snapping, often causing the machine to jam.
The Likely Causes & Fixes:
- Rewind the Bobbin: An unevenly wound or overly full bobbin is the most common culprit. If the thread is wound in messy humps or is so full it’s touching the sides of the bobbin housing, it can’t spin freely. Remove the thread and rewind a new bobbin, making sure the thread feeds through the winder’s tensioner for a smooth, even wind.
- Check Bobbin Insertion: Is the bobbin inserted correctly? For drop-in bobbins, make sure it’s spinning in the correct direction (usually counter-clockwise). For front-loading cases, ensure the thread is pulled through the little tension slit on the case.
- Clean the Bobbin Area: Take out the bobbin and bobbin case. Use a small lint brush to clean out all the impacted fuzz and lint. A buildup of lint can impede the bobbin’s movement and cause thread to snag and break.
Problem 5: Breaking Needles
The Symptom:
A loud *thwack* and your needle is now in two pieces. This can be startling and dangerous.
The Likely Causes & Fixes:
- Don’t Pull the Fabric: You should only be guiding the fabric, not pushing or pulling it. Forcing the fabric can cause the needle to deflect and strike the metal throat plate, causing it to snap. Let the machine’s feed dogs do the work.
- Use the Right Needle for the Job: Trying to sew thick denim with a lightweight 70/10 universal needle is asking for trouble. The needle will bend and eventually break under the strain. Switch to a heavy-duty Jeans/Denim needle (size 90/14 or 100/16).
- Check the Presser Foot: Ensure you’re using the correct presser foot. If you have a straight stitch plate on and accidentally select a zigzag stitch, the needle will hit the plate and break on its first side-to-side motion.
- Insert the Needle Correctly: A loose needle that isn’t fully inserted into the clamp can wobble and hit the bobbin case or throat plate. Loosen the screw, push the needle all the way up, and tighten it securely.
A Critical Safety Warning
When a needle breaks, tiny metal shards can fly. Always wear safety glasses when sewing, especially on heavy-duty projects. Immediately stop the machine, turn it off, and locate all pieces of the broken needle before inserting a new one. For more essential advice, review our complete guide on sewing machine safety tips.
Problem 6: My Stitches Look Bad (Tension Problems)
The Symptom:
You see loops of thread on either the top or bottom of your fabric. A balanced stitch should look the same on both sides, with the threads locking neatly between the fabric layers.
How to Diagnose and Fix:
- If you see loops of the TOP thread on the BOTTOM of the fabric: This means your top tension is too low (or bobbin tension is too high). The bobbin thread is winning the tug-of-war and pulling the top thread down.
- The Fix: First, rethread the top of the machine completely with the presser foot UP. This is the most common cause. If that doesn’t work, increase the top tension dial to a higher number (e.g., from 3 to 4).
- If you see loops of the BOBBIN thread on the TOP of the fabric: This means your top tension is too high (or bobbin tension is too low). The top thread is winning the tug-of-war.
- The Fix: Decrease the top tension dial to a lower number (e.g., from 4 to 3). Also, ensure the bobbin thread is correctly seated in its tension spring (for both drop-in and front-load cases).
Understanding this balance is a core concept, and we dive even deeper in our guide explaining all sewing machine features.
Problem 7: Fabric Isn’t Feeding or is Feeding Unevenly
The Symptom:
The machine is making stitches, but the fabric isn’t moving, or it’s moving crookedly. You have to push it through manually.
The Likely Causes & Fixes:
- Check the Feed Dogs: Many machines have a switch or lever to “drop” the feed dogs for free-motion sewing. You may have accidentally engaged it. Find the switch (check your manual) and re-engage the feed dogs so they are up.
- Clean the Feed Dogs: Lint and fuzz can get packed so tightly between the feed dog teeth that they can’t grip the fabric. Use a stiff lint brush or a dental pick to meticulously clean them out.
- Check Stitch Length: Have you accidentally set your stitch length to zero? A stitch length of `0` means the needle will go up and down in the same place, and the fabric won’t move. Increase it to a normal length (e.g., `2.5`).
- Check Presser Foot Pressure: Some higher-end machines allow you to adjust the presser foot pressure. If it’s too light, it won’t have enough grip to hold the fabric against the feed dogs. Increase the pressure.
Problem 8: Fabric is Puckering or Seams are Wavy
The Symptom:
Your seam is not lying flat. The fabric along the stitch line is gathered, puckered, or looks stretched and wavy (especially on knits).
The Likely Causes & Fixes:
- Lower the Top Tension: This is the #1 cause of puckering on woven fabrics. A top tension that is too tight will pull on the fabric with every stitch, causing it to gather. Lower the tension setting and test on a scrap until the seam lies flat.
- Use the Right Needle: A dull needle or a needle that is too large for a delicate fabric (like silk or chiffon) will cause puckering. Switch to a new, smaller needle (like a 60/8 or 70/10 Microtex). For knits, a Ballpoint needle is essential to prevent stretching and wavy seams.
- Shorten the Stitch Length (for some fabrics): On very fine, lightweight fabrics, a shorter stitch length (e.g., `2.0`) can sometimes help reduce puckering.
- Use a Walking Foot: For quilts, slippery fabrics, or tricky knits, a walking foot is a lifesaver. It has its own set of feed dogs on top that work with the machine’s feed dogs to pull all layers of fabric through evenly, eliminating puckers and waves.
Problem 9: Machine is Making Loud, Grinding, or Clunking Noises
The Symptom:
Your machine, which is normally a gentle hum, suddenly sounds like a cement mixer. This is a sign to STOP immediately.
The Likely Causes & Fixes:
- STOP SEWING! Do not try to “sew through it.” You can cause serious damage. Turn off the machine.
- Check the Needle: A bent needle is a common cause of a clunking sound as it strikes the bobbin case or throat plate. Remove it and insert a new one.
- Clean the Machine: This is the most likely culprit. A massive buildup of lint and thread scraps in the bobbin area can jam the mechanism. Remove the throat plate and the bobbin case and give the entire area a thorough cleaning with a lint brush. A blast of canned air can help dislodge stubborn bits.
- Check for Thread Jams: You may have a small piece of thread caught in the take-up lever or deep within the bobbin mechanism. Use tweezers and a bright light to inspect and remove any stray threads.
- Time for a Tune-up: If you’ve done all of the above and the noise persists, it could be a sign of a more serious internal issue, like the machine’s timing being off. This is when it’s time to take it to a professional for servicing. Regular oiling (if your manual calls for it) can prevent many of these issues.
Problem 10: Stitches are Uneven, Wobbly, or Loose
The Symptom:
The stitches are technically forming, but they look sloppy. They aren’t uniform in size or they seem loose and weak.
The Likely Causes & Fixes:
- Check the Bobbin Winding: A poorly wound bobbin that is loose or uneven will create messy-looking stitches from the bottom. Rewind a fresh, evenly wound bobbin.
- Rethread the Top: Ensure the thread is correctly seated in the take-up lever. If the thread misses this crucial step, the stitches will be extremely loose.
- Stabilize Your Fabric: On very lightweight or stretchy fabrics, the material itself can be the problem. Try adding a stabilizer (like a tear-away or wash-away backing) to give the machine a more solid foundation to form stitches on.
Problem 11: Machine is Jammed, Frozen, or Won’t Sew
The Symptom:
The handwheel is stuck solid, or the motor just hums when you press the foot pedal.
The Likely Causes & Fixes:
- Look for a Thread Jam: This is the cause 9 times out of 10. A thread has become tangled around the bobbin case or the hook mechanism, locking it up completely.
- The Fix: Turn off the machine. Remove the needle and presser foot. Remove the throat plate and the bobbin case. Use tweezers and small scissors to carefully snip and pull out all tangled threads. This can take patience. Gently rock the handwheel back and forth (never force it!) to help loosen the jam as you pull out the threads.
- Check the Bobbin Winder: On many machines, the needle bar is disengaged when the bobbin winder is activated. Make sure your bobbin winder has been pushed back to the sewing position.
Mechanical vs. Computerized Machines
While most of these fixes apply to both, a computerized sewing machine might display an error code (like “E6” or “C4”) when it jams. Check your manual for that specific code! A mechanical sewing machine requires a bit more manual investigation, but often has fewer complex parts to fail.
My Essential Troubleshooter’s Toolkit
Having the right tools on hand makes fixing these problems a breeze. Here are the non-negotiables I keep right next to my machine, all readily available on Amazon.

1. High-Quality Needles
Schmetz Needle Variety Pack: Stop guessing. This pack gives you Universal, Ballpoint (for knits), and Jeans needles. Changing your needle is the #1 fix for so many problems, and Schmetz is the gold standard.
Check Price on Amazon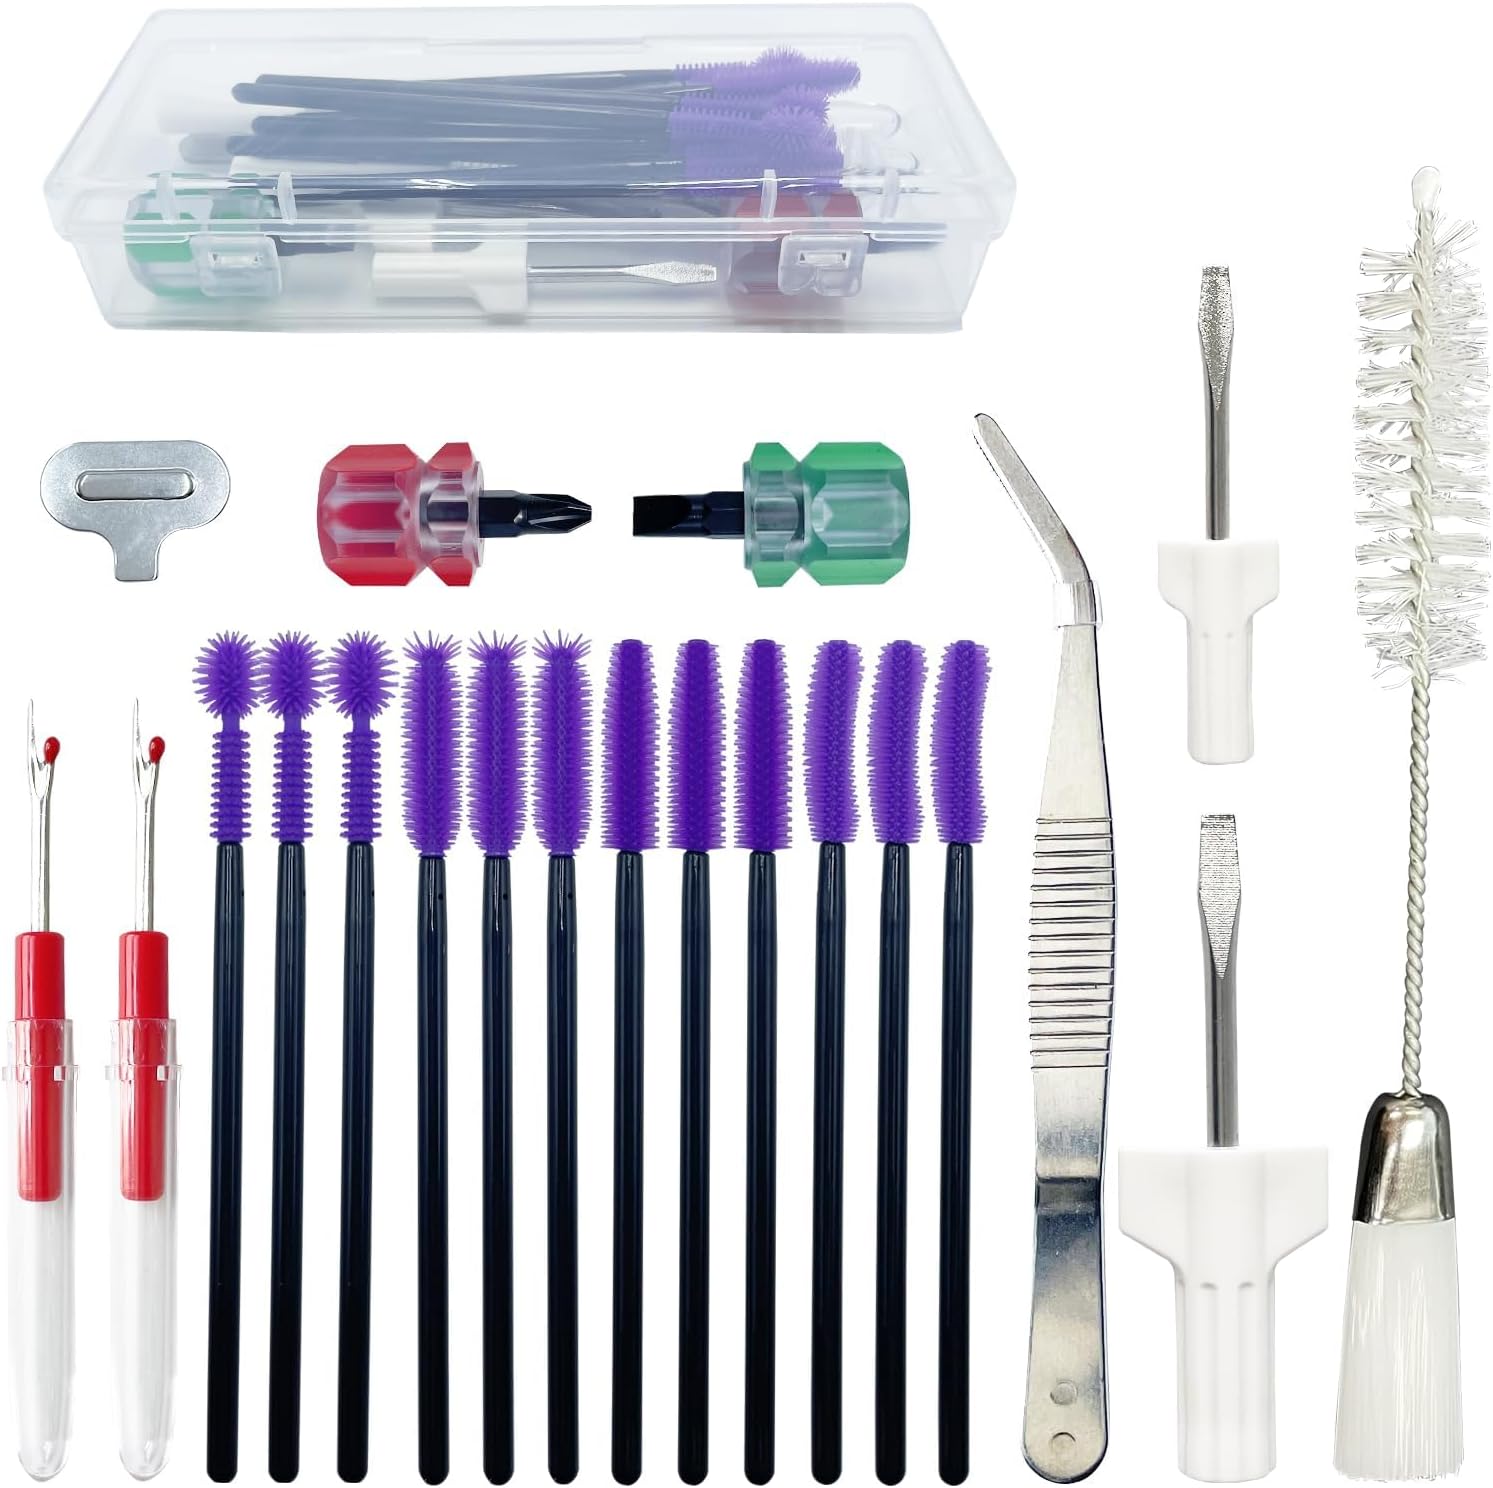
2. Machine Cleaning Kit
Sewing Machine Maintenance Kit: A good kit with various sizes of lint brushes and screwdrivers is essential. Regular cleaning of your bobbin area and feed dogs will prevent 50% of these problems from ever happening.
Check Price on Amazon
3. Quality Thread
Gutermann Sew-All Polyester Thread: Don’t let cheap, linty thread ruin your project and your machine. Gutermann is strong, smooth, and low-lint, which helps keep your tension consistent and your machine clean. This is a simple upgrade with a huge impact.
Check Price on AmazonConclusion: When in Doubt, Start Over
The running theme through almost every solution is a return to basics: a new needle, quality thread, a clean machine, and proper threading. By methodically checking these four things, you can solve the vast majority of sewing machine issues without a trip to the repair shop.
If you find that you’re constantly fighting with your machine and none of these fixes provide lasting relief, it might be time to consider if your machine is still the right fit for your projects. A machine that is underpowered or lacks key features can be a source of endless frustration. Our comprehensive sewing machine buying guide can help you assess your needs, whether you’re a beginner or looking for the best sewing machines for intermediate sewers.
Happy (and frustration-free) sewing!


