

Why Is My Sewing Machine Not Sewing? The Ultimate Troubleshooting Guide
You’ve threaded your machine, you’re excited to start your project, you press the foot pedal… the motor hums, the needle moves up and down perfectly, but when you check your fabric, there are no stitches. This frustrating scenario has bewildered sewists for generations, from complete beginners to seasoned professionals. The experience can make you question your skills, your machine, or both.
The good news is that this issue almost never means your machine is broken. Modern sewing machines are marvels of mechanical engineering designed for longevity and reliability. A sewing machine creates a stitch by forming a precise “lock” between the top thread and the bottom thread in a beautifully synchronized dance. When no stitches are forming, it simply means this essential “handshake” between threads isn’t happening. Understanding this fundamental principle is your first step toward troubleshooting any sewing machine problem.
Quick Diagnosis Tip: Before diving deep into troubleshooting, perform this simple test: Thread your machine with contrasting colors in the top thread and bobbin (like black on top, white in the bobbin). This makes it immediately apparent which part of the stitch formation is failing when you attempt to sew.
Understanding How Your Sewing Machine Works
To effectively troubleshoot, you need to understand the basic mechanics of stitch formation. Unlike hand sewing where a single thread creates stitches, sewing machines use two threads that interlock in the middle of the fabric. This creates the distinctive look of machine stitches and provides strength that prevents unraveling if a thread breaks.
The Stitch Formation Process
Step 1: Needle Penetration
The needle, carrying the top thread, penetrates the fabric from above. As it descends, a small loop of thread forms on the back side of the needle (the side facing the bobbin area).
Step 2: Hook Engagement
Just as the needle begins its upward movement, the rotating hook (or oscillating shuttle in older machines) catches the thread loop. The timing here is critical – about 2-3 millimeters from the bottom of the needle’s stroke.
Step 3: Loop Expansion
The hook pulls the loop wider, allowing it to pass completely around the bobbin case. This is where the top thread essentially “hugs” the bobbin case.
Step 4: Bobbin Thread Pickup
As the loop expands around the bobbin case, it catches the bobbin thread. The two threads meet at this precise moment.
Step 5: Interlocking
The take-up lever above now pulls the top thread upward, tightening the interlock between the two threads exactly in the middle of the fabric layers.
Step 6: Stitch Completion
The feed dogs advance the fabric exactly one stitch length, and the process repeats at speeds up to 1,500 stitches per minute on industrial machines.
When any part of this delicate synchronization fails, stitches won’t form. The most common failure points are in steps 2 and 4 – the hook missing the thread loop or failing to pick up the bobbin thread.
The #1 Culprit: A Problem with the Bobbin
Nine times out of ten, if the needle is moving but not forming stitches, the issue lies with the bobbin system. The hook mechanism underneath the machine is failing to pick up the bobbin thread to create the stitch. This section will explore bobbin-related issues in exhaustive detail, covering all types of bobbin systems.
Your Comprehensive Bobbin Troubleshooting Checklist
- Is the Bobbin Inserted Correctly? This is the most common cause. Every machine is designed for the bobbin to spin in a specific direction. For most top-loading (drop-in) bobbins, the thread must come off the bobbin in a counter-clockwise direction (it should look like the letter ‘P’ for Perfect). If it’s inserted backward, the hook will miss the thread every time. Check your manual’s diagram. For front-loading bobbins, the direction matters just as much but follows different rules.
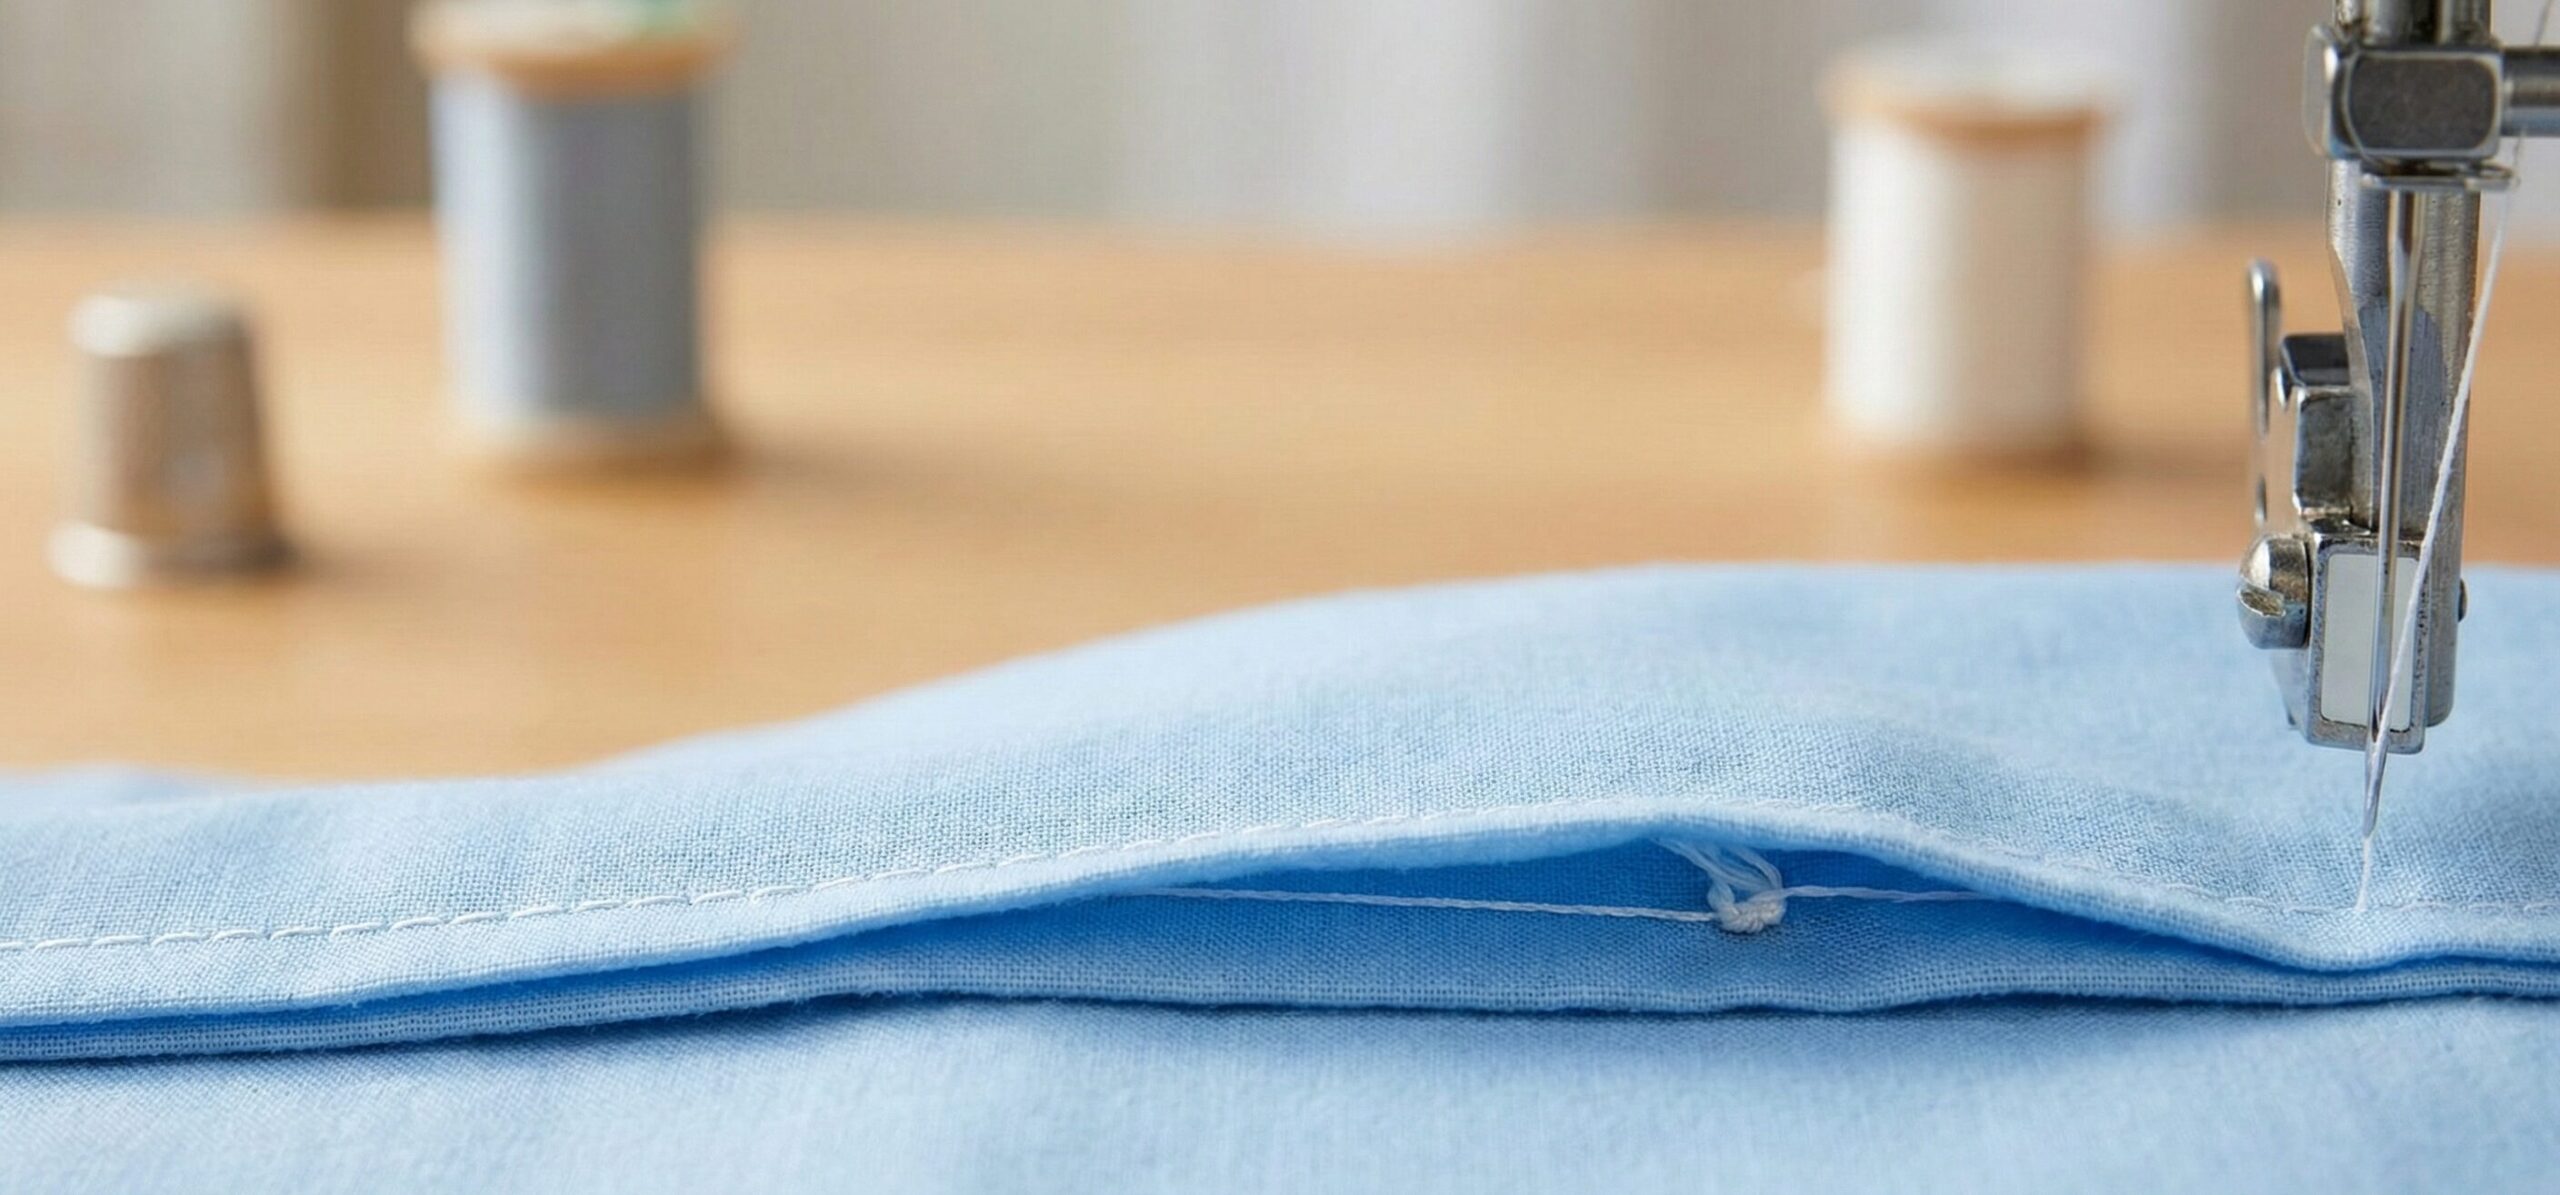
- Did You Bring Up the Bobbin Thread? Before you start sewing, both the top thread and bobbin thread must be brought to the surface. After threading the machine and inserting the bobbin, hold the top thread tail, turn the handwheel one full rotation towards you, and gently pull the top thread. This will pull up a loop of the bobbin thread. Pull both threads under the presser foot and to the back. Many beginners skip this step and wonder why their first stitches are messy or non-existent.
-
Are You Using the Correct Bobbin? Bobbins are not one-size-fits-all. Using a bobbin designed for a different brand—even if it looks identical—can be just different enough to prevent the hook from picking up the thread. Only use bobbins specifically recommended for your machine’s make and model. The differences can be subtle:
- Class 15 bobbins (used by most Brother, Janome, and some Kenmore machines)
- Class 66 bobbins (used by many Singer and White machines)
- M-style bobbins (used by many European machines like Bernina and Husqvarna)
- Transparent vs. metal bobbins (affects weight and tension consistency)
- Is the Bobbin Wound Correctly? Improperly wound bobbins cause countless problems. The thread should be wound evenly and tightly without bulging at the edges or loose loops. Most modern machines have automatic bobbin winders that stop when full, but if you’re winding manually or using an older machine, ensure you don’t overfill the bobbin. A bobbin that’s too full won’t fit properly in its case, while an underfilled bobbin may not have enough thread tension.
- Is the Bobbin Case or Area Clean? Lint, dust, and thread fragments accumulate in the bobbin area faster than anywhere else in your machine. This debris can physically obstruct the bobbin’s rotation or the hook’s movement. Clean this area after every 8-10 hours of sewing, or immediately if you’ve been working with fuzzy fabrics like fleece, velvet, or felt.
- Is the Bobbin Tension Correct? While top thread tension gets most of the attention, bobbin tension is equally important. Most home machines have a fixed bobbin tension, but some allow adjustment via a small screw on the bobbin case. If this tension is too tight, the hook can’t pull the thread; if too loose, the thread won’t form a proper loop.
- Has the Bobbin Case Been Damaged? Dropping a bobbin case or forcing an incorrectly sized bobbin can cause tiny burrs or bends that disrupt thread flow. Inspect the bobbin case for scratches, dents, or rough spots that could catch the thread.
Pro Tip: Keep a small notebook with your sewing machine where you record which bobbin type works best, any tension adjustments you’ve made, and when you last cleaned the bobbin area. This simple habit can save hours of troubleshooting.
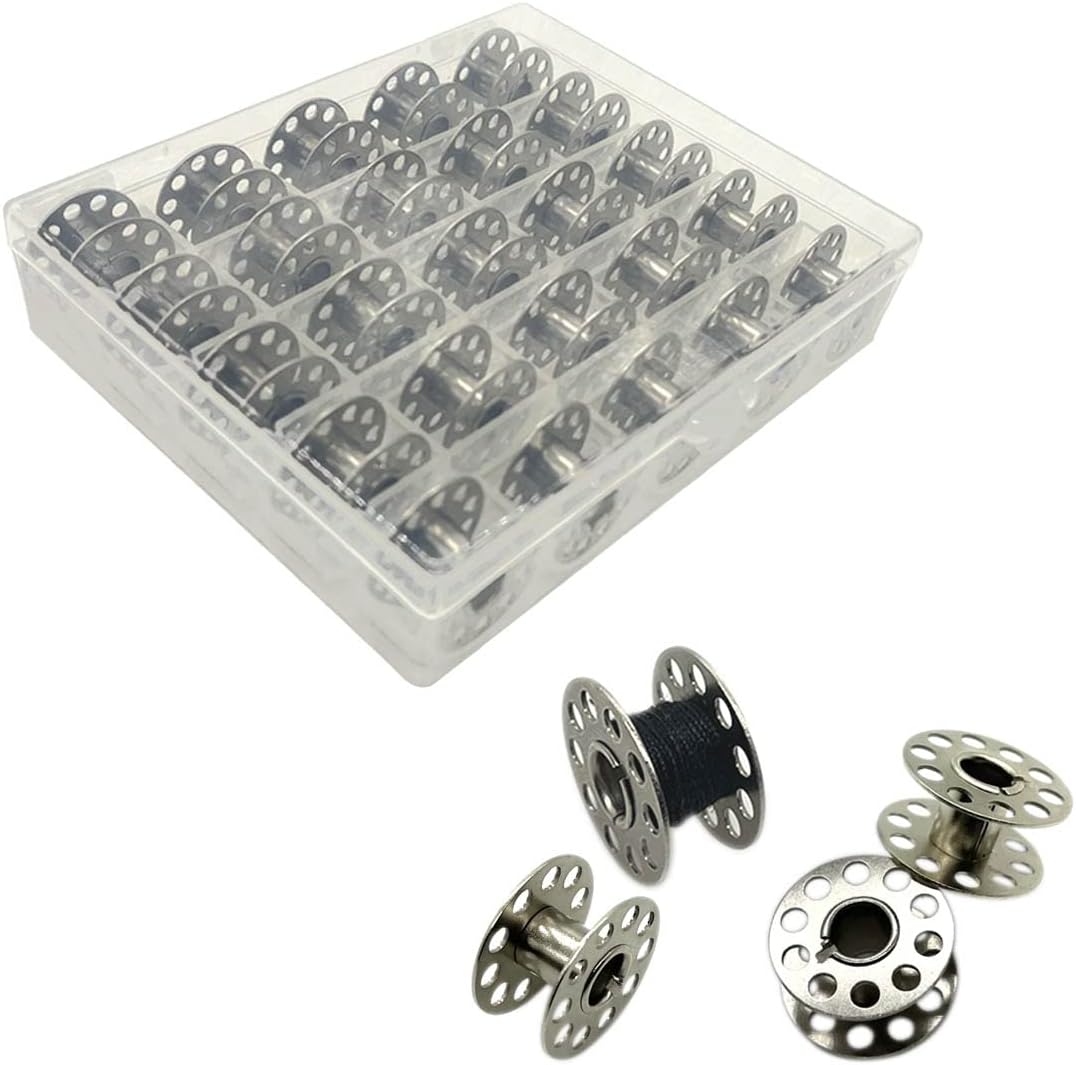
1. Brand-Specific Sewing Machine Bobbins
Using the wrong bobbin is a primary cause of stitch formation issues. Universal bobbins don’t always work. Investing in a pack of genuine bobbins recommended by your machine’s manufacturer (e.g., Class 15 for most Brother/Janome, Class 66 for some Singers) is a simple way to eliminate a major source of frustration. High-quality bobbins have precisely machined edges that ensure consistent rotation and thread release.
Check Price on AmazonBobbin System Variations by Brand
Understanding your specific machine’s bobbin system can dramatically improve your troubleshooting accuracy:
| Brand | Common Bobbin Type | Thread Direction | Special Considerations |
|---|---|---|---|
| Singer | Class 66 (metal) or 15 (plastic) | Clockwise for older models, counter-clockwise for newer | Many vintage Singers use oscillating shuttles instead of rotating hooks |
| Brother | Class 15 (plastic) | Counter-clockwise | Most have top-loading bobbin systems with clear covers |
| Janome | Class 15 (plastic) | Counter-clockwise | Some higher-end models use proprietary horizontal systems |
| Bernina | M-style (proprietary) | Varies by model | Uses a unique drop-in system with built-in tension |
| Husqvarna/Viking | M-style or Class 15 | Counter-clockwise | Many models have sensor systems that detect empty bobbins |
| Pfaff | Class 15 or proprietary | Clockwise for many models | Known for IDT (Integrated Dual Feed) systems |
Next Steps: Checking the Needle and Top Threading
If you are certain your bobbin is perfect, the issue could be on the top half of the machine. The needle and threading path are responsible for delivering the top thread to precisely the right location at the right time for the hook to catch it.
Your Comprehensive Needle and Threading Checklist
- Is the Needle Fully Inserted? This is the second most common cause. The needle must be pushed all the way up into the needle clamp as far as it will go. If it’s even a millimeter too low, it won’t dip down far enough to interact with the bobbin hook. Loosen the clamp screw, push the needle up firmly until it stops, and re-tighten securely. On many machines, there’s a visual indicator line showing proper insertion depth.
- Is the Needle Facing the Right Way? The shank of a sewing machine needle has a flat side. This flat side must face the correct direction (usually to the back of the machine, but consult your manual). If it’s facing forward, stitches will not form because the hook can’t catch the thread loop properly. Some specialty needles (like twin needles or hemstitch needles) have different orientation requirements.
-
Is the Take-Up Lever Threaded? Double-check your entire top threading path. The most critical point is the take-up lever (the moving arm that goes up and down with a small hole or hook). If the thread is not correctly seated in this lever, the machine cannot form a stitch. Thread should follow this precise path on most machines:
- Spool pin → first thread guide → tension discs → take-up lever → second thread guide → needle clamp guide → needle eye
-
Is the Needle Damaged or Dull? Examine the needle under good light. Look for:
- Bent tip or shaft (even slightly)
- Burrs or rough spots near the eye
- Discoloration or rust
- A blunt point (should be sharp unless it’s a ballpoint needle)
-
Is It the Right Needle for Your Fabric? Needle-fabric mismatch causes countless issues:
Fabric Type Recommended Needle Size Range Lightweight (silk, chiffon) Microtex/Sharp 60/8 – 70/10 Medium (cotton, linen) Universal 80/12 Heavy (denim, canvas) Denim/Jeans 90/14 – 110/18 Knits (jersey, fleece) Ballpoint/Stretch 75/11 – 90/14 Leather/Vinyl Leather (wedge point) 90/14 – 110/18 - Is the Thread Passing Through All Guides? Modern machines have multiple thread guides that control thread flow. Missing just one guide can alter the thread’s timing enough to prevent stitch formation. Trace the entire path from spool to needle, ensuring the thread is seated in every guide, disc, and lever.
- Is the Thread Itself Problematic? Old, brittle, or poor-quality thread can break or fray mid-stitch. Test with a fresh spool of quality thread (Gutermann, Mettler, or Coats & Clark are reliable brands). Avoid bargain-bin threads that may have inconsistent thickness or weak spots.
Warning: Never sew without a needle in the machine! The thread must pass through the needle eye to maintain proper tension. Sewing without a needle allows thread to wrap around the hook mechanism, potentially causing serious damage requiring professional repair.
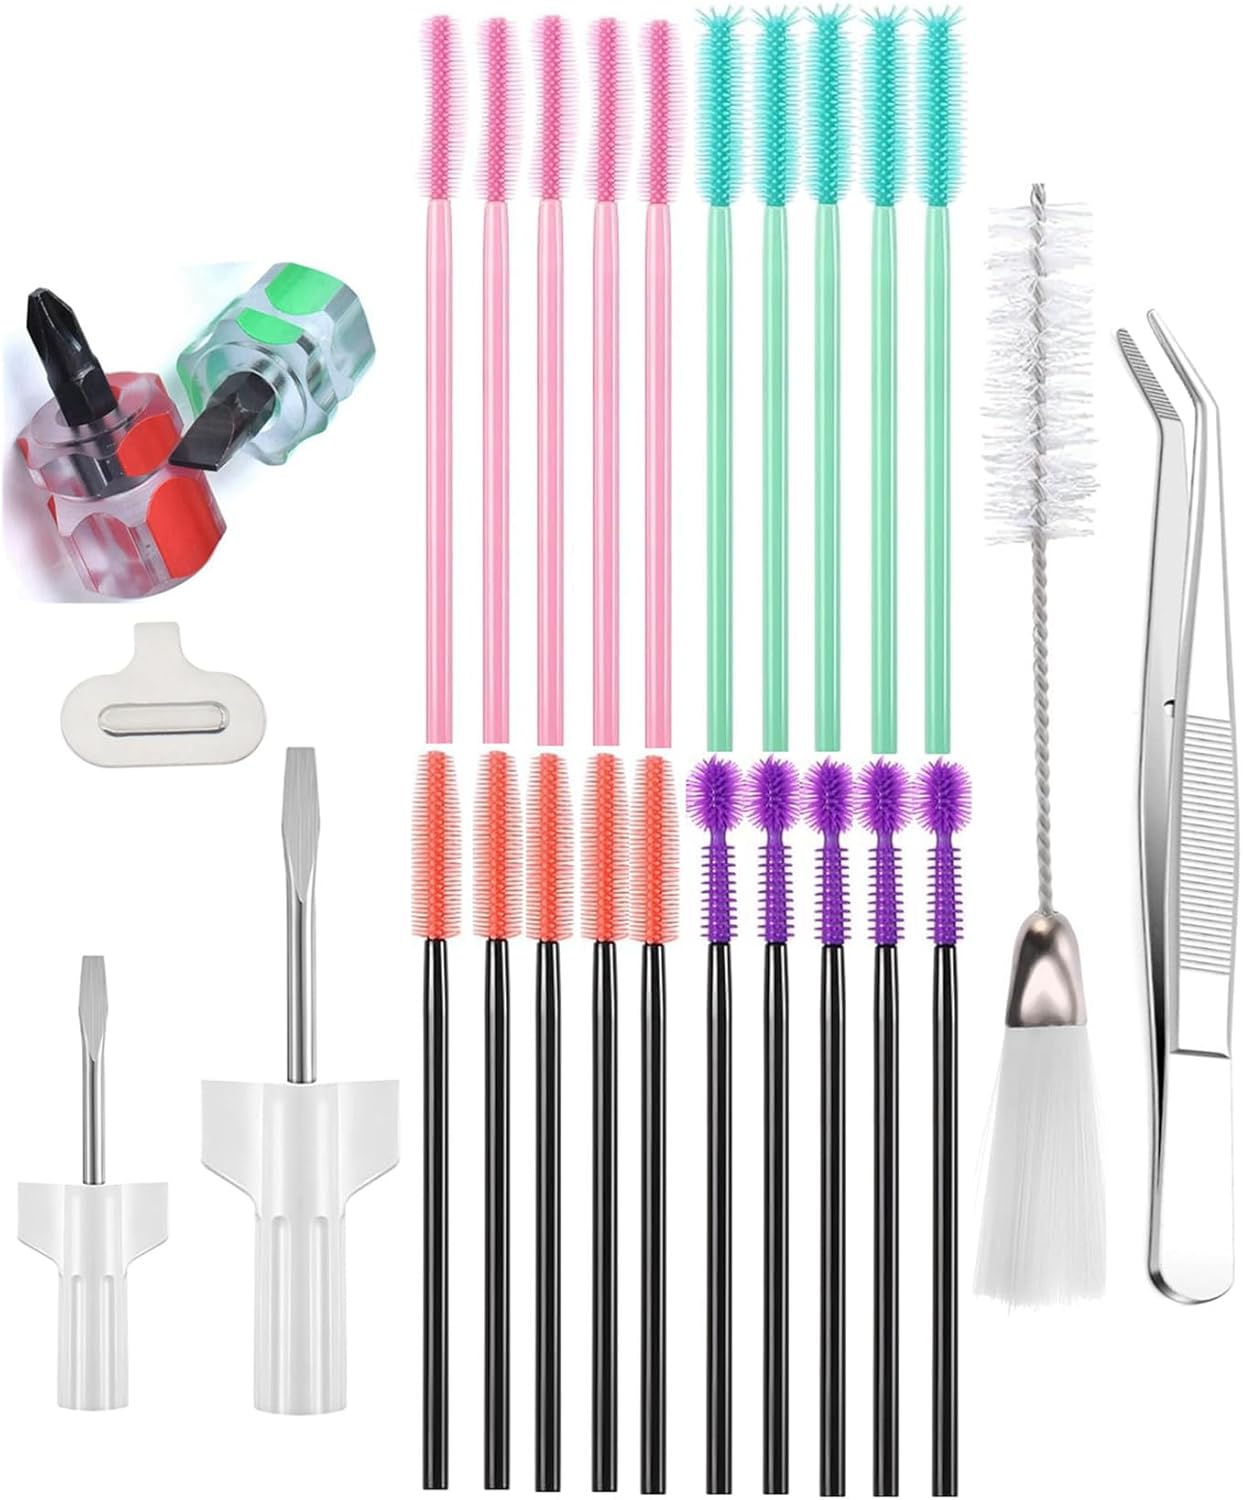
2. Sewing Machine Maintenance & Cleaning Kit
Sometimes, a severe buildup of lint can physically obstruct the hook mechanism from moving properly and picking up the bobbin thread. A dedicated kit with small brushes, tweezers, and specialized lubricants allows you to perform the essential cleaning needed to keep your machine in top working order. Regular maintenance prevents 80% of sewing machine problems.
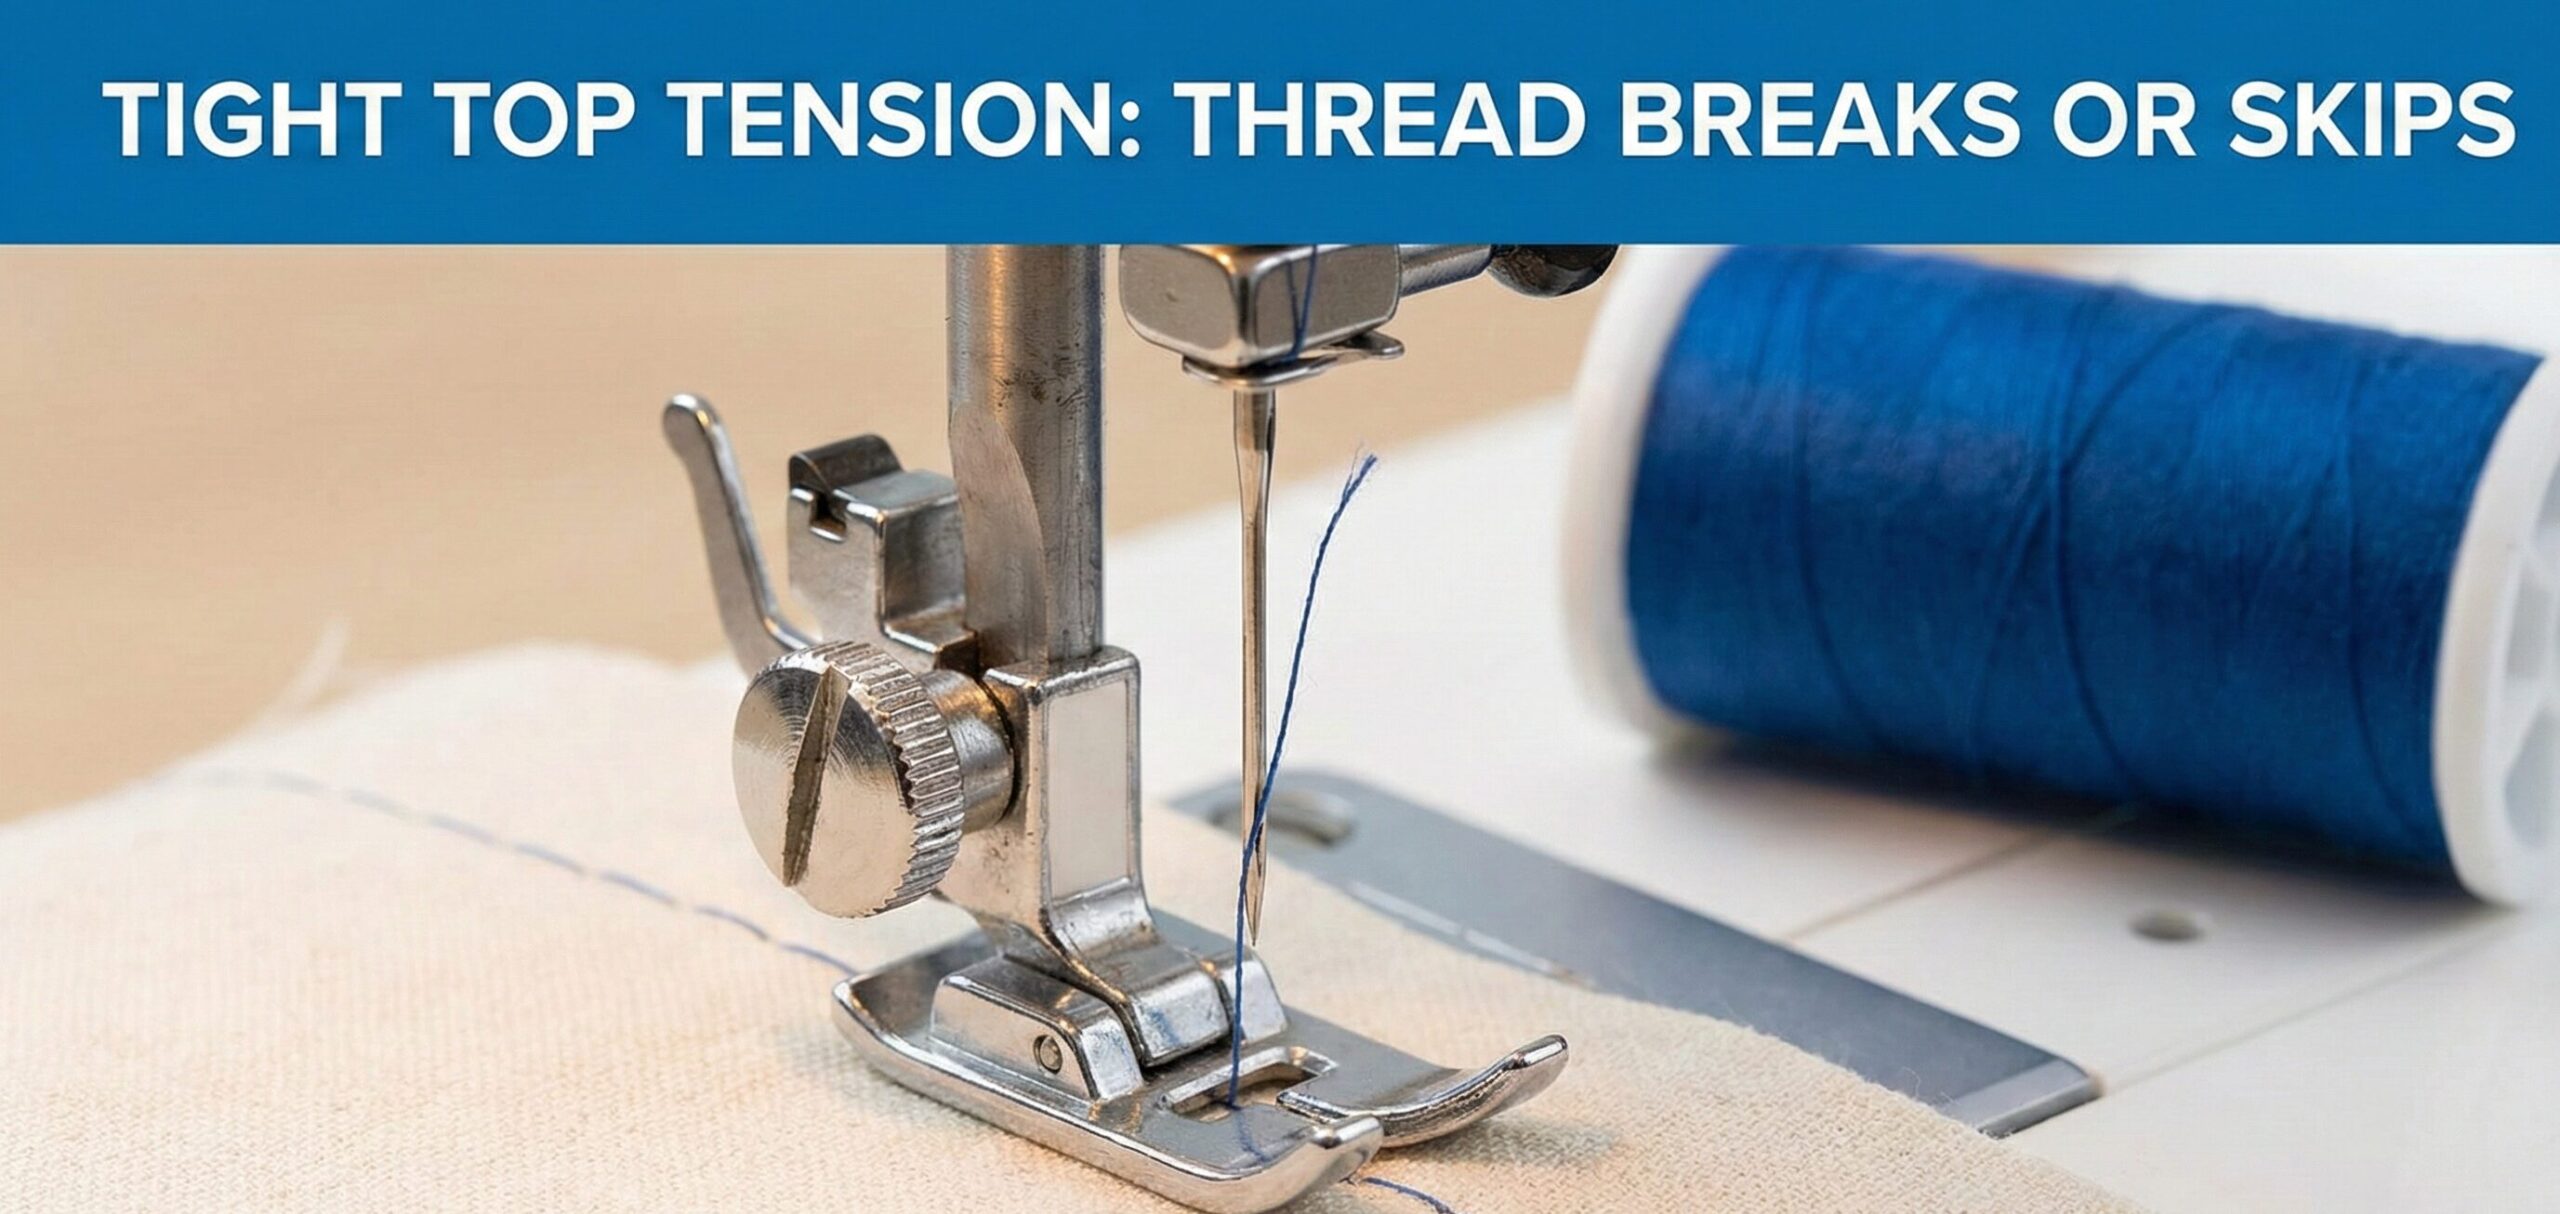
Check Price on AmazonThread Tension: The Delicate Balance
Proper thread tension is arguably the most misunderstood aspect of machine sewing. When balanced correctly, stitches lock perfectly in the middle of the fabric layers. When unbalanced, you might get loops on one side, thread breakage, or no stitches at all.
Understanding Tension Systems
Most home sewing machines have two tension systems:
- Top Tension: Controlled by numbered dials (usually 0-9) that adjust spring pressure on the tension discs. Higher numbers = tighter tension.
- Bobbin Tension: Usually fixed but adjustable via a tiny screw on the bobbin case in some machines. This should be adjusted only as a last resort.
Diagnosing Tension Problems
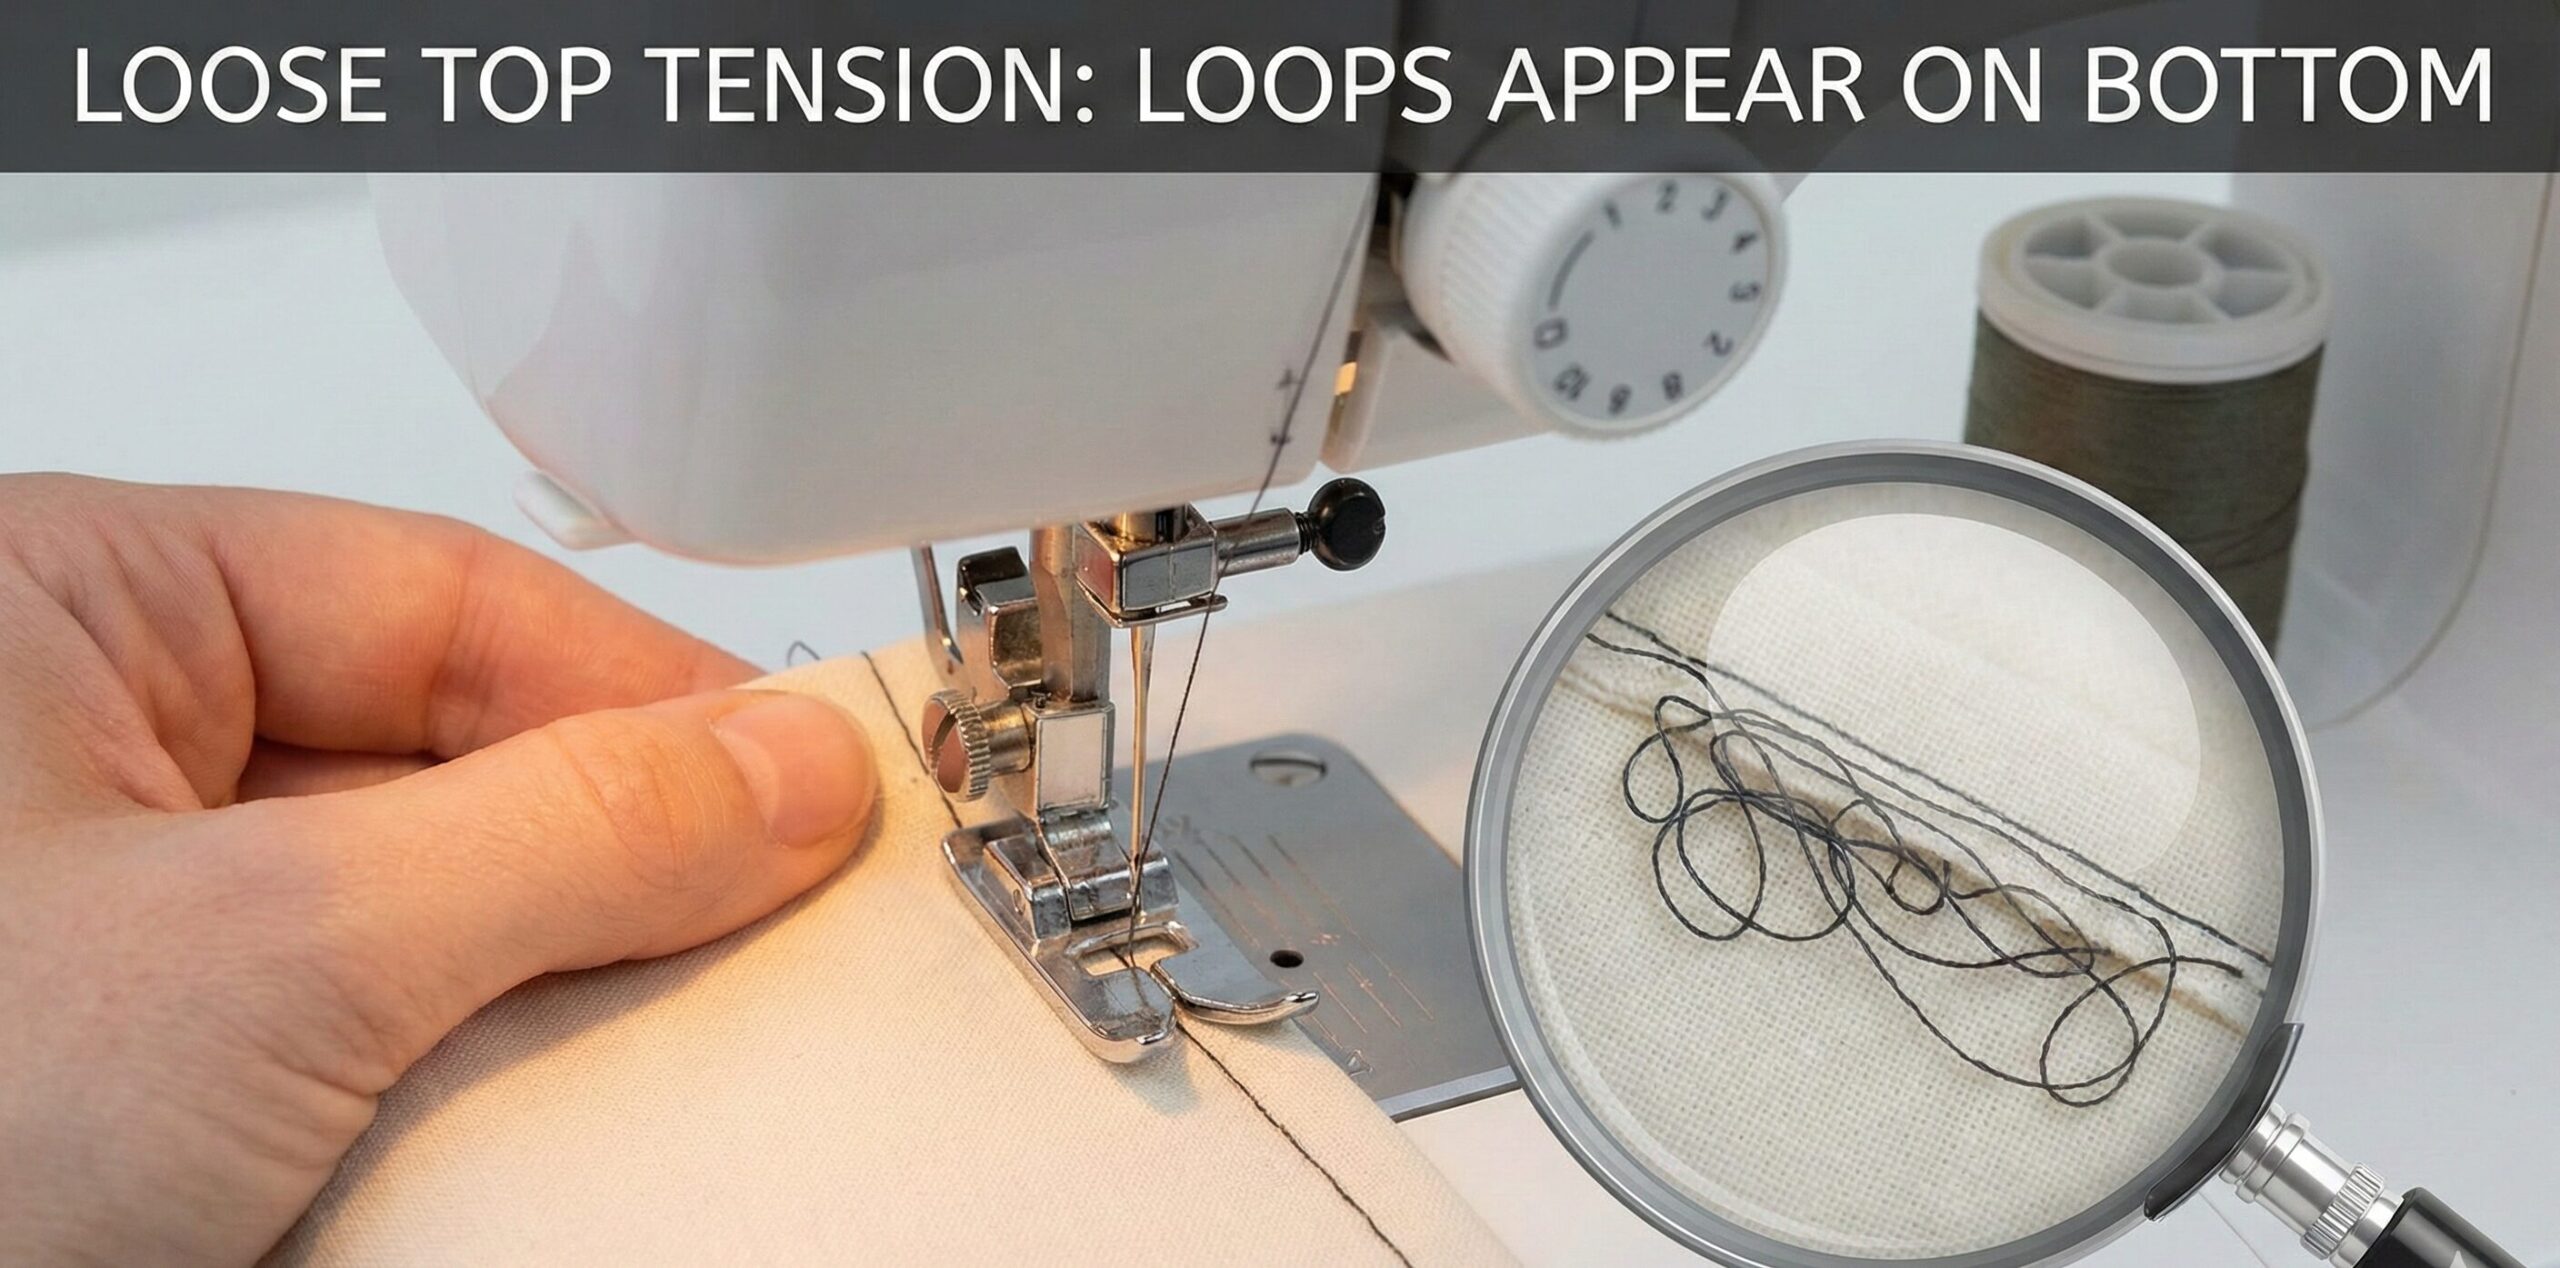
To test your tension, sew a sample on two layers of medium-weight fabric using contrasting thread colors top and bottom. Examine both sides:
- Balanced: Stitches look identical on both sides, knots hidden between layers
- Top too tight: Bobbin thread pulled to top, top thread straight
- Top too loose: Top thread loops on bottom, bobbin thread straight
- Both too tight: Fabric puckers, thread may break
- Both too loose: Stitches look loose and loopy on both sides

3. Comprehensive Needle Assortment Kit
Having the right needle for your fabric solves more problems than any other single factor. This comprehensive kit includes universal, ballpoint, denim, microtex, and stretch needles in the most common sizes. Each needle type is designed for specific fabrics, ensuring clean stitches without skipped stitches, pulls, or runs.
Check Price on AmazonMachine-Specific Troubleshooting
Different sewing machine types and brands have unique characteristics that affect troubleshooting. What works for a computerized Brother may not apply to a vintage Singer or an industrial Juki.
Computerized vs. Mechanical Machines
| Issue | Computerized Machine Solution | Mechanical Machine Solution |
|---|---|---|
| No Stitches Forming | Check for error codes on display; reset machine by turning off/on; check sensor functions | Physical inspection of all moving parts; check for mechanical jams |
| Inconsistent Stitch Length | Update firmware; recalibrate stitch length sensor | Clean feed dog mechanism; check feed dog height adjustment |
| Thread Breaking Frequently | Check automatic thread cutter alignment; verify sensor readings | Manually inspect tension discs for burrs; check all thread path edges |
| Machine Jams/Locks | Follow manufacturer’s electronic reset procedure | Manually turn handwheel to free mechanism; remove throat plate |
| Unusual Noises | Listen for specific beep patterns indicating errors | Identify which mechanical component is making noise |
Brand-Specific Common Issues
Singer Machines
Many Singer machines, especially vintage models, use an oscillating shuttle system rather than a rotating hook. This changes troubleshooting significantly:
- The shuttle must be precisely positioned when inserted
- Timing is less forgiving than rotating hook systems
- Older models may require specific oil types not compatible with modern synthetics
Brother Machines
Brother’s modern computerized machines often have helpful diagnostic features:
- Many display error codes that can be looked up in the manual
- Automatic needle threaders that can misalign and cause threading issues
- Sensors that detect improper bobbin insertion
Bernina Machines
Bernina’s Swiss engineering means precision but also specific requirements:
- Proprietary bobbin system requires specific bobbins
- Hook race must be perfectly clean for proper operation
- Built-in dual feed systems (like the patented BERNINA Stitch Regulator) require calibration
Fabric-Specific Troubleshooting
The fabric you’re sewing can be the source of your problems. Different materials present unique challenges that require specific solutions.
Problem Fabrics and Solutions
Slippery Fabrics (Silk, Satin, Chiffon)
Problem: Fabric shifts, causing inconsistent feed and skipped stitches.
Solution: Use a walking foot, tissue paper between layers, or spray starch to stabilize. Choose a sharp (microtex) needle size 60/8-70/10.
Stretchy Knits (Jersey, Interlock, Lycra)
Problem: Fabric stretches as you sew, causing wavy seams and skipped stitches.
Solution: Use ballpoint or stretch needles, reduce presser foot pressure, use a walking foot or dual feed system. Consider a narrow zigzag stitch instead of straight stitch.
Heavy Fabrics (Denim, Canvas, Upholstery)
Problem: Needle deflection or breakage, motor strain, skipped stitches.
Solution: Use heavy-duty needles (90/14-110/18), slow sewing speed, manual handwheel for thick seams. Ensure your machine is rated for heavy fabrics.
Leather and Vinyl
Problem: Material sticks to presser foot, leaves permanent needle holes.
Solution: Use Teflon or roller feet, leather needles with wedge points, tissue paper between foot and material. Never backstitch on leather.
Fuzzy Fabrics (Fleece, Velvet, Terry Cloth)
Problem: Lint accumulation clogs machine quickly, causing jams.
Solution: Clean machine every 15-30 minutes of sewing, use a needle with a larger eye, sew with nap direction.
Waterproof/Coated Materials
Problem: Material sticks to presser foot and feed dogs.
Solution: Use Teflon feet, tissue paper between layers, or specially designed non-stick feet.
Stitch-Specific Problems
Different stitch types can fail in different ways. Understanding stitch mechanics helps diagnose these issues.
Straight Stitch Problems
The straight stitch seems simple but has precise requirements:
- Skipped stitches: Usually needle-related (wrong type, damaged, or incorrectly inserted)
- Uneven stitch length: Check feed dog height and cleanliness; adjust presser foot pressure
- Thread breaking: Top tension too tight, rough spots in thread path, or poor quality thread
Zigzag Stitch Problems
Zigzag stitches add complexity with side-to-side needle movement:
- Uneven zigzag width: Timing issues with needle bar mechanism; may require professional adjustment
- Fabric puckering: Too much tension combined with width; reduce both tension and width
- Thread nests on bottom: Bobbin tension too loose for wide zigzag; tighten slightly
Buttonhole Stitch Problems
Buttonholes require perfect synchronization between forward/backward motion and width variation:
- Uneven sides: Fabric moving during stitching; use stabilizer and proper foot
- Stitches too dense/too loose: Adjust stitch density/length setting if available
- Machine jams at corners: Manual machines: slow down at corners; computerized: check sensor function
Decorative/Embroidery Stitch Problems
Complex stitches multiply potential issues:
- Distorted patterns: Fabric stretching during sewing; use stabilizer
- Thread breaks in complex patterns: Too much thread thickness variation; use same weight throughout
- Patterns not aligning: Feed dog issues or incorrect presser foot for decorative stitches
Note on Specialty Feet: Using the correct presser foot for each stitch type is not optional for quality results. A zigzag foot has a wider opening to accommodate side-to-side needle movement, while a straight stitch foot has a small hole that prevents fabric from being pushed down into the needle plate. Using the wrong foot can cause skipped stitches, puckering, or even needle breakage.
Advanced Troubleshooting: When Basic Fixes Don’t Work
If you’ve checked all the common issues and your machine still won’t sew properly, you may be dealing with more complex mechanical or timing problems.
Timing Issues
Timing refers to the precise synchronization between the needle’s movement and the hook’s rotation. When timing is off by even a millimeter, stitches won’t form. Causes include:
- Hitting a pin or thick seam: The most common cause of timing issues
- Worn parts: After years of use, gears and connections can wear, altering timing
- Previous repair attempts: Improper reassembly after cleaning or repair
Signs of timing issues:
- Consistent skipped stitches even with new needle and perfect threading
- Thread shredding or breaking at consistent intervals
- Unusual metallic clicking sounds from the hook area
- Needle hitting the needle plate or hook
Important: Timing adjustment is a professional repair. Attempting it yourself without proper tools and knowledge can permanently damage your machine.
Motor and Drive System Problems
The motor and drive system translate electrical power into mechanical motion:
Belt-Driven Machines
Older machines use rubber belts that can stretch, crack, or slip. Symptoms include:
- Needle moves slowly despite fast pedal pressure
- Inconsistent speed
- Squealing or slipping sounds
Direct-Drive Machines
Modern machines often have direct-drive systems. Problems include:
- Electronic motor control failure (computerized machines)
- Brushes wearing out in DC motors
- Circuit board failures affecting speed control
Electronic/Computer Control Failures
Computerized machines add convenience but also electronic failure points:
- Power supply issues: Check connections, try different outlet, inspect pedal cord
- Display errors: Refer to manual for specific error code meanings
- Button/control panel failures: Individual buttons may fail or become unresponsive
- Memory corruption: Some machines allow factory reset procedures
Preventive Maintenance Schedule
Regular maintenance prevents most sewing machine problems. Follow this schedule to keep your machine in optimal condition:
| Frequency | Task | Time Required | Importance |
|---|---|---|---|
| Before Each Project | Clean bobbin area, change needle, test stitch on scrap fabric | 5 minutes | High |
| After 8 Hours of Sewing | Deep clean bobbin area, feed dogs, tension discs; oil if required | 15 minutes | High |
| Monthly (Regular Use) | Complete cleaning, check all moving parts, verify timing sounds | 30 minutes | Medium |
| Every 6 Months | Professional servicing if used commercially or heavily | 1-2 hours | Medium |
| Annually | Full professional service including timing check and lubrication | 2-3 hours | High for frequent users |
| When Changing Fabric Type | Change needle type/size, adjust tension and pressure | 5 minutes | High |
When to Call a Professional
While many sewing machine issues can be resolved at home, some problems require professional attention. Know when to seek help to avoid causing further damage.
Seek Professional Help Immediately If:
- You see or smell smoke or electrical burning
- The machine makes grinding, scraping, or loud knocking noises
- The needle consistently hits the needle plate or hook
- The handwheel is difficult to turn or won’t turn at all
- There are visible broken parts or pieces
- Timing issues persist after basic troubleshooting
Choosing a Repair Technician
Not all repair technicians are equal. Follow these guidelines:
- Brand specialization: Choose a technician familiar with your brand
- Certifications: Look for factory-certified technicians for computerized machines
- Estimates: Get a written estimate before authorizing repairs
- Warranty: Ensure repairs come with a warranty (typically 90 days minimum)
- References: Ask for references or check online reviews
Repair vs. Replacement Decision Guide
Sometimes it’s more economical to replace than repair. Consider these factors:
| Factor | Favor Repair | Favor Replacement |
|---|---|---|
| Machine Age | Less than 10 years | More than 20 years (unless vintage/collectible) |
| Repair Cost | Less than 40% of replacement cost | More than 60% of replacement cost |
| Availability of Parts | Parts readily available | Parts discontinued or hard to find |
| Sentimental Value | Family heirloom or special significance | No special attachment |
| Frequency of Repairs | First major repair | Third or more repair in 2 years |
Frequently Asked Questions (FAQ)
- You hit a pin or zipper
- You notice skipped stitches
- You hear a “pop” sound while sewing
- You’re switching to a different fabric type
- Starting a new important project
- E1/E2/E3: Usually motor or sensor issues
- F1/F2/F3: Often related to foot pedal or power
- b/bL/bU: Bobbin-related errors
- d/d1/d2: Display or memory errors
- Test before buying: Sew with different stitches and speeds
- Check availability of parts: Some older machines have discontinued parts
- Consider repair costs: Factor in a professional service
- Research the model: Some have known issues or are particularly durable
- Thread jam: Check for tangled thread in bobbin area
- Needle damage: You may have hit something without realizing
- Timing knocked out: From hitting a thick seam or pin
- Lint accumulation: Critical mass reached during extended sewing
- Thread tail caught: The starting thread tail got pulled into mechanism
Conclusion: Mastering Your Sewing Machine
A sewing machine that won’t sew can be mystifying, frustrating, and discouraging. However, it’s rarely a mystery without a solution. By methodically checking the most common culprits—starting with the bobbin, then moving to the needle and top threading, assessing tension, and finally checking your machine’s specific settings and condition—you can solve this problem yourself in the vast majority of cases.
Remember these key principles:
- Start simple: 90% of problems are threading, needle, or bobbin issues
- Clean regularly: Lint is the silent enemy of smooth sewing
- Use quality supplies: Good thread and appropriate needles prevent countless problems
- Know your machine: Read the manual, understand its specific requirements
- Don’t force anything: Sewing machines are precise instruments; forcing indicates a problem
- Maintain perspective: Even professionals encounter machine issues; it’s part of sewing
You’ve now learned not just how to fix a non-sewing machine, but the core principles of how stitches are formed and what can disrupt that process. With this knowledge, you are better equipped to handle any issue your sewing journey throws at you. More importantly, you’ve gained the confidence to troubleshoot effectively, saving time, money, and frustration.
Happy sewing, and may your stitches always be perfect!
Final Pro Tip: Create a “sewing machine first aid kit” containing: spare needles (multiple types), quality thread in basic colors, spare bobbins, a small brush, tweezers, a seam ripper, and your machine’s manual. Keep it near your machine for quick troubleshooting.


