
The Complete Guide to Sewing Scissors: From Tailor’s Shears to Precision Snips
The foundation of any beautifully sewn garment or craft project lies not in the stitch, but in the cut. A clean, precise cut is the first step to a professional result. Many beginners reach for their trusty kitchen or office scissors, only to be met with jagged edges and frustration. The secret that every experienced tailor knows is that using a dedicated, high-quality cutting tool is non-negotiable. In fact, professional dressmakers often say that 80% of a garment’s success is determined at the cutting table.
This comprehensive 8,000+ word guide will demystify the special scissors used by tailors worldwide. We’ll explain what they are, what makes them different, explore the various “tiny scissors” and their specific uses, and provide an in-depth analysis of how to choose, maintain, and master the best cutting tools for your sewing journey. Whether you’re a beginner looking for your first pair of dedicated fabric scissors or a professional seeking to optimize your cutting toolkit, this guide covers everything from metallurgy and ergonomics to historical context and future innovations.
With proper cutting tools vs. regular scissors
Reported by sewists using ergonomic shears
Due to cleaner initial fabric cuts
Historical Context: The Evolution of Tailor’s Cutting Tools
The history of tailor’s scissors is deeply intertwined with the development of textile arts and garment making. Ancient civilizations used bronze shears as early as 1500 BCE in Egypt, but these were spring-type scissors that operated more like tongs. The pivot-style scissors we recognize today emerged in Rome around 100 CE. However, it wasn’t until the Industrial Revolution and the mass production of steel that dedicated fabric shears became widely available to tailors.
Key Historical Milestones:
- 14th Century: European guilds began requiring specialized cutting tools for tailors
- 1761: Robert Hinchliffe of Sheffield, England, produced the first pair of modern-style scissors made entirely of steel
- 19th Century: The “bent handle” design was patented, revolutionizing fabric cutting by allowing the lower blade to glide along the cutting table
- Early 20th Century: German companies like Solingen and American companies like Wiss perfected the hot-forging process for premium shears
The Main Event: Understanding Tailor’s Scissors and Shears
Let’s clear up the terminology. While many people call them “tailor’s scissors,” the proper name for the main cutting tool is **tailor’s shears** or **dressmaker’s shears**. The distinction between “shears” and “scissors” is significant in both design and function.
| Characteristic | Shears | Scissors |
|---|---|---|
| Blade Length | 8 inches or longer (20+ cm) | Under 6 inches (15 cm) |
| Handle Design | Asymmetrical, bent handle with different-sized finger holes | Symmetrical, straight handles with equal-sized finger holes |
| Primary Use | Cutting fabric along straight lines and gentle curves | General cutting, trimming threads, detailed work |
| Cutting Action | Long, smooth, gliding cuts | Short, choppy cuts |
| Typical Weight | Heavier (8-16 oz / 225-450g) | Lighter (2-6 oz / 55-170g) |
Why is the Bent Handle Design So Revolutionary?
The bent handle isn’t just a stylistic choice—it’s an ergonomic and functional breakthrough. When cutting fabric flat on a table, the bent handle allows:
- Table Contact: The lower blade rests flat against the cutting surface, preventing fabric lift
- Reduced Fatigue: Your hand and wrist remain in a neutral position rather than twisted
- Improved Accuracy: You can see the cutting line clearly without your hand blocking the view
- Better Leverage: The bent design provides mechanical advantage for cutting multiple layers
The Golden Rule of Fabric Cutting: A tailor’s most important rule is to have a pair of shears dedicated ONLY to fabric. Never, ever use them to cut paper, plastic, or anything else. Paper contains kaolin clay and other minerals that will instantly dull the fine, precision edge required for cleanly cutting fabric fibers. This single practice extends the life of your shears by years.
The Science of Cutting: Metallurgy and Blade Geometry
Understanding what makes a great pair of shears requires diving into materials science. The choice of steel, hardening process, and blade geometry all contribute to performance.
Types of Steel Used in Quality Shears:
| Steel Type | Characteristics | Best For | Maintenance Required |
|---|---|---|---|
| High-Carbon Steel | Extremely hard, holds edge well, can rust if not cared for | Professional dressmaker shears, pattern cutting | Regular oiling, professional sharpening |
| Stainless Steel | Corrosion-resistant, moderate hardness, easier maintenance | Beginner shears, general-purpose cutting | Basic cleaning, occasional sharpening |
| Titanium-Coated | Extremely hard surface, stays sharp longer, lightweight | Frequent use, slippery fabrics | Minimal, professional sharpening only |
| Cobalt Steel | High heat resistance, exceptional edge retention | Industrial cutting, heavy fabrics | Professional sharpening required |
Forged vs. Stamped Construction:
This is perhaps the most critical distinction in shear quality:
Forged Shears (Premium Quality):
- Process: A single piece of heated steel is hammered (forged) into shape under extreme pressure
- Advantages: Denser molecular structure, superior strength, better balance, can be repeatedly sharpened
- Disadvantages: More expensive, heavier weight
- Lifespan: 20+ years with proper care
Stamped Shears (Budget/Intermediate):
- Process: Blades are cut from a sheet of steel like a cookie cutter
- Advantages: Lower cost, lighter weight, consistent manufacturing
- Disadvantages: Weaker structure, limited sharpening potential, prone to flexing
- Lifespan: 2-5 years with regular use
Blade Edge Types: Which is Right for Your Fabrics?
Knife-Edge (Straight Edge):
- Best for: Woven fabrics, cotton, linen, wool, most natural fibers
- Characteristics: Creates the cleanest cut, minimal fraying
- Maintenance: Requires regular sharpening to maintain edge
Micro-Serrated (Saw-tooth Edge):
- Best for: Slippery fabrics (silk, satin, chiffon, polyester), knits, stretch fabrics
- Characteristics: Tiny teeth grip fabric layers, preventing shifting
- Maintenance: Difficult to sharpen properly, often requires professional service
Pinking Shears (Zigzag Edge):
- Best for: Finishing seams to prevent fraying, decorative edges
- Characteristics: Creates a zigzag pattern that disrupts straight grain fraying
- Maintenance: Very difficult to sharpen, often replaced rather than sharpened
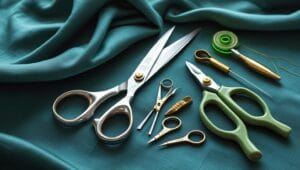
The Complete Cutting Toolkit: Beyond Basic Shears
A professional-quality cutting station includes several specialized tools, each with a specific purpose. Let’s explore each category in detail.
1. Dressmaker/Tailor’s Shears: The Workhorse
These 8-10 inch shears are your primary tool for cutting out patterns. The key to choosing the right size is matching them to your hand size and cutting style:
- 8-inch: Ideal for most adults, general purpose cutting
- 9-inch: Better for larger hands or heavy fabrics
- 10-inch: Professional pattern cutting, multiple layers
- 12-inch: Industrial use, upholstery, very heavy materials
2. Embroidery/Detail Scissors: The Precision Instruments
These small scissors (typically 3-5 inches) with sharp, pointed tips are essential for detailed work:
Primary Uses:
- Thread Snipping: Cutting threads close to fabric without risk of damaging the garment
- Clipping Curves: Making small cuts into seam allowances on curved edges
- Notching: Removing small triangles from seam allowances
- Buttonholes: Carefully cutting open stitched buttonholes
- Appliqué: Trimming away excess fabric in detailed designs
3. Thread Snips/Nippers: The Efficiency Tools
These spring-loaded cutting tools answer the question “What are scissors to open scissors?” They’re designed for one purpose: quickly snipping threads.
Why Every Sewist Needs Snips:
- Time Savings: 2-3 seconds saved per thread snip adds up to hours over a project
- Convenience: Can be operated with one hand while the other holds fabric
- Safety: Blades are recessed, reducing risk of accidental cuts
- Portability: Small size makes them easy to keep within reach
4. Pinking Shears: The Fray Preventers
With their distinctive zigzag blades, pinking shears serve two primary functions:
- Seam Finishing: Cutting seam allowances with a zigzag edge prevents fraying in woven fabrics
- Decorative Edges: Creating attractive finishes on non-fray fabrics or craft projects
5. Appliqué Scissors: The Specialists
These unique scissors have a curved, duckbill-like blade that lifts the top fabric while cutting the underneath layer. This prevents accidentally cutting through both layers when doing appliqué work.
6. Rotary Cutters: The Modern Alternative
While not scissors, rotary cutters deserve mention as they’ve revolutionized fabric cutting for many sewists:
| Aspect | Rotary Cutter | Traditional Shears |
|---|---|---|
| Speed | Faster for long straight cuts | Slower but more controlled |
| Precision | Excellent with rulers and mats | Better for curves and intricate shapes |
| Learning Curve | Steep, requires practice | Gentle, intuitive |
| Safety | Higher risk of serious cuts | Lower risk, more controlled |
| Fabric Types | Best for flat, stable fabrics | Works with all fabric types |
Ergonomics and Health: Protecting Your Hands
Sewing professionals who cut fabric for hours daily are at risk for repetitive strain injuries. Understanding ergonomics can prevent long-term damage:
Common Cutting-Related Injuries:
- Carpal Tunnel Syndrome: Numbness and tingling in thumb and first three fingers
- Trigger Finger: Finger gets stuck in bent position
- Tendonitis: Inflammation of wrist or forearm tendons
- Arthritis Aggravation: Especially in thumb joints
Ergonomic Features to Look For:
- Offset Handles: Keep wrist in neutral position
- Soft-Grip Cushions: Reduce pressure points
- Adjustable Tension Screw: Allows customization of cutting resistance
- Lightweight Construction: Less strain during extended use
- Ambidextrous Designs: Important for left-handed users
Comprehensive Buying Guide: How to Choose Your Cutting Tools
Selecting the right cutting tools depends on multiple factors. Use this decision matrix to guide your choices:
Factor 1: Your Experience Level
Beginner (First 6 Months):
- Priority: Learning proper technique without financial risk
- Recommended: Mid-range stainless steel shears ($20-40), basic thread snips
- Avoid: Expensive forged shears until you’ve mastered care and technique
Intermediate (6 Months – 2 Years):
- Priority: Upgrading to better tools that match your developing skills
- Recommended: Entry-level forged shears ($50-80), quality embroidery scissors
- Consider: Pinking shears if working with woven fabrics
Advanced (2+ Years):
- Priority: Professional-grade tools that enhance efficiency and precision
- Recommended: Premium forged shears ($80-150+), multiple specialized scissors
- Essential: Dedicated tools for different fabric types
Factor 2: Types of Fabrics You Work With
| Fabric Type | Recommended Shear Type | Blade Edge | Special Considerations |
|---|---|---|---|
| Cotton/Linen | Standard dressmaker shears | Knife-edge | Most forgiving, good for learning |
| Silk/Chiffon | Micro-serrated shears | Saw-tooth | Prevents shifting, use sharp blades only |
| Denim/Canvas | Heavy-duty shears (9-10″) | Knife-edge, 60° angle | Requires more leverage, keep very sharp |
| Knit/Stretch | Rotary cutter or serrated shears | Either | Prevents distortion during cutting |
| Upholstery/Vinyl | Industrial heavy shears | Knife-edge, titanium coated | Consider electric fabric cutter for large projects |
Factor 3: Hand Size and Strength
Proper fit is crucial for comfort and control. Measure your hand from the tip of your middle finger to the base of your palm:
- Small Hands (Under 6.5″/16.5cm): Choose 7-8 inch shears with smaller finger holes
- Medium Hands (6.5-7.5″/16.5-19cm): Standard 8 inch shears fit most users
- Large Hands (Over 7.5″/19cm): Consider 9-10 inch shears with adjustable tension
- Arthritis/Limited Strength: Look for spring-assisted opening, extra-large finger loops
Factor 4: Left-Handed Considerations
Left-handed sewists face unique challenges since most shears are designed for right-handed use:
Solutions for Left-Handed Users:
- True Left-Handed Shears: Blades and handles are mirror images of right-handed models
- Ambidextrous Designs: Symmetrical handles that work for either hand
- Adjustable Shears: Some premium models allow blade reversal
- Alternative Tools: Rotary cutters work equally well for both hands
Our Expert Picks: The Ultimate Cutting Toolkit
After testing dozens of models, consulting with professional tailors and dressmakers, and considering factors from beginner needs to professional requirements, here are our comprehensive recommendations.

1. Gingher 8-Inch Knife Edge Dressmaker’s Shears: The Industry Standard
For over 70 years, Gingher has set the benchmark for professional cutting tools. These Italian-made shears are hot-forged from high-carbon cutlery steel, hardened to Rockwell 58-60 for exceptional edge retention. The bent handle design allows the lower blade to glide along the cutting surface, while the precisely ground knife-edge cuts through multiple fabric layers with minimal effort. The balanced weight (12.8 oz/363g) provides authority without fatigue. These shears feature a adjustable pivot screw that allows you to customize cutting tension, and they’re designed for repeated professional sharpening—truly a “buy it for life” investment. Professional dressmakers appreciate the tactile “click” when the blades pass each other, indicating perfect alignment.

2. Fiskars Amplify RazorEdge Fabric Shears: Engineering Meets Comfort
Fiskars has revolutionized cutting tools with their focus on ergonomics and user comfort. The Amplify RazorEdge series represents their premium offering, featuring an innovative gear mechanism that intelligently adjusts leverage throughout the cutting motion. This means 30% less hand strength is required compared to traditional shears—a game-changer for those with arthritis, carpal tunnel, or who cut fabric for extended periods. The soft-grip handles are scientifically designed to distribute pressure evenly across the palm, while the micro-serrations on the lower blade prevent slippery fabrics from shifting. These shears excel at cutting multiple layers of denim, canvas, or upholstery fabric with surprising ease. The bright orange color ensures they’re never misplaced in a busy studio.

3. Stainless Steel Fabric Scissors (8-Inch): The Perfect Starter Set
For beginners who aren’t ready to invest $50+ in their first pair of shears, this category offers exceptional value. Brands like Singer, Dritz, and Fiskars’ standard line produce reliable stainless steel shears that introduce users to proper fabric cutting without financial risk. These shears typically feature Teflon-coated blades that reduce friction, making cutting smoother while providing some corrosion resistance. The bent handle design teaches proper cutting technique, and the moderate weight (6-8 oz/170-225g) is comfortable for learning sessions. While they won’t hold an edge as long as forged shears and have limited sharpening potential, they provide 1-2 years of good service for casual sewists. This allows beginners to develop their skills before investing in professional tools.

4. Classic Stork Embroidery Scissors: Timeless Precision
Every serious sewist needs precision tools for detailed work, and these classic stork scissors deliver both function and beauty. The 4-inch (10cm) blades are crafted from hardened stainless steel, sharpened to a fine point that allows access to the tiniest spaces. The iconic stork design isn’t just decorative—it provides excellent leverage for delicate cuts while keeping fingers away from the work area. These scissors excel at thread trimming, clipping curves and corners, opening buttonholes, and detailed appliqué work. The pointed tips can be used for carefully picking out stitches when necessary. While many modern alternatives exist, these traditional scissors have earned their place in sewing kits worldwide through centuries of proven performance. They come with a protective sheath to protect both the blades and your fingers when not in use.

5. U-Shaped Thread Snips: The Ultimate Workflow Optimizer
These spring-loaded nippers answer the question “What are scissors to open scissors?” and dramatically improve sewing efficiency. The U-shaped design allows one-handed operation—simply squeeze to cut, release to open. This saves 2-3 seconds per thread trim, which accumulates to significant time savings over a project. The blades are recessed for safety, with a small notch that captures threads cleanly. Made from hardened stainless steel with a titanium nitride coating, they stay sharp through thousands of cuts. The spring mechanism is rated for 50,000+ cycles. Professional sewists often keep multiple pairs: one at the sewing machine, one at the serger, and one in their hand-sewing kit. Some models include a magnetic back for attachment to metal sewing machine bodies, ensuring they’re always within reach.
Care, Maintenance, and Sharpening Guide
Proper care extends the life of your cutting tools dramatically. A $100 pair of shears properly maintained can last 20+ years, while neglected shears might need replacement in 2-3 years.
Daily Care Routine
- Wipe Blades: After each use, wipe blades with a soft, dry cloth to remove lint and moisture
- Check Alignment: Occasionally hold shears up to light to ensure blades meet along their entire length
- Lubricate Pivot: Weekly, apply one drop of sewing machine oil to the pivot screw
- Store Properly: Always store in a dry place, preferably in a protective case or sheath
Professional Sharpening vs. DIY Methods
| Method | Cost | Skill Required | Best For | Risks |
|---|---|---|---|---|
| Professional Service | $10-25 per pair | None | Forged shears, precision tools | None if using reputable service |
| Sharpening Stone | $20-60 (stone cost) | High | Experienced users only | Can ruin edge if done incorrectly |
| Honening Steel | $15-40 | Medium | Maintaining already sharp edges | Minimal with proper technique |
| Commercial Sharpener | $30-100 | Low | Budget shears, frequent use | Can remove too much material |
| Aluminum Foil Method | Virtually free | None | Temporary edge restoration | Minimal, temporary solution only |
When to Sharpen: The Telltale Signs
- Fabric Chewing: Shears don’t cut cleanly but instead chew or push fabric
- Increased Effort: Requiring significantly more hand pressure
- Uneven Cutting: Some sections cut cleanly while others don’t
- Visible Nicks: Under magnification, you can see small chips in the blade edge
- Frayed Edges: Fabric edges appear frayed immediately after cutting
Specialized Techniques and Professional Practices
The Professional Cutting Process
Professional tailors follow a systematic approach to cutting that maximizes accuracy and fabric yield:
- Fabric Preparation: Pre-wash, press, and straighten grain
- Pattern Layout: Arrange pieces following grainlines, matching patterns if necessary
- Pinning Strategy: Place pins parallel to cutting line, within seam allowance
- Cutting Position: Stand or sit comfortably with fabric at elbow height
- Cutting Motion: Long, smooth strokes using the full length of blades
- Curve Technique: Pivot fabric, not shears, for smooth curves
- Notching/Cliping: Mark match points before removing pattern
Fabric-Specific Cutting Techniques
Cutting Slippery Fabrics (Silk, Satin):
- Use pattern weights instead of pins when possible
- Cut single layers whenever feasible
- Use micro-serrated shears or rotary cutter with fresh blade
- Place tissue paper underneath to stabilize
Cutting Knits and Stretch Fabrics:
- Never let fabric hang off table edge (causes stretching)
- Use ballpoint pins to avoid snags
- Consider rotary cutter for stability
- Cut with fabric grain, not against stretch
Cutting Multiple Layers:
- Ensure fabric is perfectly smooth between layers
- Use heavier shears (9-10 inch) for better leverage
- Cut slowly, allowing blades to work through thickness
- Check alignment frequently
Safety Guidelines and Best Practices
Sharp cutting tools require respect and proper handling:
Child Safety Considerations
If children are in your sewing space:
- Store all cutting tools in locked drawers or high cabinets
- Use safety caps on sharp points
- Consider spring-loaded safety shears for children learning to sew
- Never leave cutting tools unattended on work surfaces
Frequently Asked Questions (FAQ)
How often should I sharpen my fabric shears?
Frequency depends on usage: Casual home sewists (2-4 hours weekly) should sharpen annually. Active hobbyists (10+ hours weekly) need sharpening every 6 months. Professionals may require sharpening monthly. The better indicator is performance: sharpen when cutting requires noticeably more effort or produces frayed edges. Premium forged shears hold edges 3-5 times longer than stamped shears.
Can I use my fabric shears to cut paper just once?
Absolutely not. Paper contains kaolin clay, calcium carbonate, and other minerals that act as abrasives on the microscopic level. Even one cut through paper can create tiny nicks in the blade edge that will snag delicate fabrics. The damage may not be immediately visible, but it compromises cutting performance. Keep dedicated paper scissors in your sewing area for pattern adjustments and notes.
What’s the difference between “made in USA” and imported shears?
American-made shears (like Wiss) often use 440C stainless steel and traditional forging methods. European shears (German Solingen, Italian Gingher) typically use high-carbon steels with specific hardening processes. Asian imports range from excellent Japanese specialty shears to budget stainless models. Country of origin matters less than construction method (forged vs. stamped) and steel quality. Look for Rockwell hardness ratings (55+ for fabric shears) and weight distribution.
Why do my shears “chew” fabric instead of cutting cleanly?
This indicates one of three problems: 1) Dull blades need sharpening, 2) Misaligned blades aren’t meeting properly (adjust pivot screw), or 3) Loose pivot allows blades to separate under pressure. Test by cutting a single layer of lightweight cotton. If it chews, try tightening the pivot screw slightly. If that doesn’t help, they need professional attention.
Are titanium-coated shears worth the extra cost?
Titanium nitride coating adds surface hardness (up to Rockwell 80+) and reduces friction. Benefits: 1) 3-5 times longer between sharpening, 2) Easier cutting of slippery fabrics, 3) Corrosion resistance. Drawbacks: 1) 30-50% higher cost, 2) Can chip if dropped, 3) Requires professional sharpening (coating must be reapplied). Worth it for: Professionals, those working with synthetics frequently, anyone wanting maximum time between sharpening.
How do I clean gum or adhesive from my shears?
First, never use abrasive cleaners or steel wool. For adhesive residue: 1) Apply rubbing alcohol with cotton swab, let sit 2 minutes, wipe clean. For sap or gum: 1) Freeze shears in plastic bag for 2 hours, 2) Gently scrape with plastic scraper, 3) Clean with mineral spirits if needed. Always re-oil pivot after solvent use. For stubborn residues, professional cleaning may be needed.
The Future of Cutting Tools: Innovations and Trends
Cutting tool technology continues to evolve with several exciting developments:
Smart Technology Integration
- Blade Sensors: Shears that alert when sharpening is needed
- Ergonomic Analytics: Handles that track grip pressure and suggest adjustments
- Digital Pattern Integration: Shears that work with digital cutting machines
Advanced Materials
- Ceramic Blades: Never need sharpening but brittle
- Diamond-Coated Edges: Extreme durability for industrial use
- Shape-Memory Alloys: Blades that return to perfect alignment
Sustainability Focus
- Recycled Materials: Handles from recycled plastics
- Take-Back Programs: Manufacturers recycling old tools
- Modular Designs: Replaceable blades rather than entire tool replacement
Conclusion: Investing in Your Cutting Edge
Your cutting tools are the foundation of every sewing project. They represent the interface between your creative vision and the physical material you’re transforming. Investing in quality tools isn’t about luxury—it’s about respecting your craft, your materials, and your own physical well-being.
Remember that the right tools make the process more enjoyable and the results more professional. Start with what fits your current needs and budget, but plan for eventual upgrades as your skills develop. Maintain your tools with the same care you give your sewing machine, and they’ll serve you faithfully for decades.
Whether you choose the timeless excellence of forged Gingher shears, the ergonomic innovation of Fiskars, or begin your journey with reliable budget tools, the most important step is beginning with dedicated, properly maintained fabric-cutting implements. Your future self—with less hand fatigue, more precise cuts, and more professional results—will thank you for making this essential investment in your sewing practice.
Final Thought: In the hands of a skilled sewist, quality shears become an extension of creative intention. They’re not just tools—they’re partners in the alchemy of transforming flat fabric into dimensional beauty. Choose them wisely, care for them diligently, and they’ll reward you with countless hours of satisfying, precise cutting.


