
Sewing Machine Troubleshooting: The Ultimate Step-by-Step Guide to Fixing Broken Threads, Skipped Stitches, and Jams
You’re in the creative zone, your project is coming together beautifully, and then it happens: the thread snaps, the machine starts skipping stitches, or it jams into a tangled mess. This sudden halt is one of the most maddening experiences for any sewist. Your first thought might be that your machine is broken and needs a costly repair.
However, as sewing machine experts with over 30 years of combined experience, we can tell you a crucial secret: **over 95% of common sewing machine problems are not major mechanical failures.** They are simple setup issues that you can diagnose and fix yourself in under five minutes. Before you panic or book a trip to a repair shop, follow this comprehensive, step-by-step diagnostic guide to solve virtually any sewing machine problem.
The Golden Rule of Troubleshooting: Your First Four Steps
No matter what specific sewing defect you’re facing—broken thread, skipping stitches, or jamming—always perform these four steps first, in this exact order. This systematic approach will solve the vast majority of issues regardless of your machine brand (Singer, Brother, Janome, Bernina, etc.) or the type of sewing you’re doing.
Step 1: Change the Needle
This is the number one fix for most sewing problems. Needles are consumable items that wear out much faster than most sewists realize. After just 6-8 hours of sewing, the point becomes dull and can develop microscopic burrs that are invisible to the naked eye but disastrous for your stitching. A dull needle will:
- Snag and break thread by catching on fabric fibers
- Cause skipped stitches by not piercing the fabric cleanly to meet the bobbin hook
- Damage delicate fabrics like silk or chiffon
- Create uneven stitch lengths due to inconsistent penetration
- Generate excessive heat that weakens synthetic threads
Needle Selection Guide: Match your needle to both your fabric type and thread weight. For denim, use a Jeans needle (size 90/14 or 100/16). For knits, use a Ballpoint or Stretch needle. For leather, use a Leather needle with a chisel point. For general sewing, a Universal needle works well.
Step 2: Completely Re-thread the Machine
Don’t just pull the thread through or check the existing threading. Take both the top thread and the bobbin thread completely out of the machine. This is crucial because:
- Thread can develop invisible weak spots from previous tension issues
- Dust or oil residue can accumulate on thread path surfaces
- Improper initial threading may have missed a crucial guide
Proper Re-threading Procedure:
- Turn the handwheel toward you to raise the needle to its highest position
- Lift the presser foot lever completely (THIS IS CRITICAL – with the presser foot up, the tension discs are open)
- Remove the spool and bobbin completely
- Follow your machine’s numbered guides precisely – don’t skip any
- Ensure the thread goes between the tension discs (you should feel slight resistance)
- Re-insert the bobbin according to your machine’s specific bobbin system (drop-in vs. front-loading)
Step 3: Deep Clean the Bobbin Area and Feed Dogs
Lint and tiny thread clippings are your machine’s number one enemy. They accumulate in critical areas where they can:
- Absorb lubrication oils and turn into abrasive paste
- Cause friction that leads to thread breaking and jams
- Interfere with bobbin rotation causing tension inconsistencies
- Block proper needle bar movement leading to skipped stitches
Cleaning Procedure:
- Remove the needle plate (consult your manual for specific instructions)
- Take out the bobbin case entirely
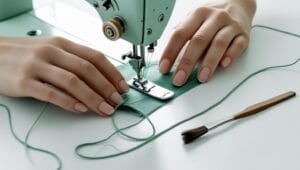
- Use a small, stiff brush (preferably one that came with your machine) to clean out all visible lint
- Clean between the feed dogs using a toothbrush or specialized cleaning brush
- Gently wipe the race hook (where the bobbin case sits) with a lint-free cloth
- NEVER use canned air – it blows lint deeper into the machine’s mechanics
Step 4: Verify Thread Quality and Compatibility
Not all thread is created equal, and thread quality issues cause more problems than most sewists realize:
- Old thread becomes brittle and weak due to humidity changes and UV exposure
- Low-quality thread has inconsistent thickness that causes tension fluctuations
- Overwound bobbins create excess tension leading to breaking
- Wrong weight thread for your needle size causes poor stitch formation
Thread Quality Test: Unwind about 12 inches of thread and pull it firmly between your fingers. High-quality thread will feel smooth and strong. Poor quality thread will feel fuzzy, have visible variations in thickness, or break easily.

Essential Tool: High-Quality Needle Variety Pack
Using the wrong or a dull needle is the #1 cause of sewing problems. Investing in a variety pack from a brand like Schmetz or Organ ensures you always have the correct, sharp needle for any project, from denim to delicate knits. Schmetz needles are precision-engineered in Germany with specially hardened steel that lasts longer and creates cleaner stitches. The variety pack typically includes sizes 70/10, 80/12, and 90/14 with both universal and ballpoint types, covering 95% of common sewing projects.
Pro Tip: Change your needle at the start of every major project, or after every 8 hours of sewing. Mark your calendar or set a reminder. The small investment in fresh needles prevents countless hours of frustration and potential fabric damage.
Check Price on AmazonComprehensive Problem-Solving Guide: From Basic to Advanced Issues
Before We Begin: Always start with the four golden steps above. If you’re still experiencing problems, use this comprehensive guide to diagnose your specific issue. Bookmark this page for future reference – it’s designed to be your permanent sewing machine troubleshooting resource.
Section 1: Thread Breaking Problems – Complete Analysis
Thread breaking is the most common complaint among sewists, but it’s usually the easiest to fix. Understanding where and when the thread breaks provides crucial diagnostic information.
1.1 Top Thread Breaking at the Needle
When the top thread breaks right at or above the needle eye, you’re dealing with localized friction or weakness:
| Symptom | Likely Cause | Solution |
|---|---|---|
| Thread breaks with a sharp, clean snap | Excessive upper tension | Reduce tension dial by 1-2 numbers |
| Thread frays before breaking | Burr on needle eye or thread path | Change needle, check for rough spots on guides |
| Breaks only with certain fabrics | Needle too small for fabric density | Increase needle size (e.g., from 80/12 to 90/14) |
| Breaks at high speeds | Thread too weak for machine speed | Use higher quality thread or reduce sewing speed |
1.2 Bobbin Thread Breaking
Bobbin thread issues often indicate problems with the bobbin case or bobbin tension:
CAUTION: Adjusting bobbin tension should be your last resort, not your first response. Modern machines with drop-in bobbins rarely need bobbin tension adjustment. If you suspect bobbin tension issues, try a different bobbin first – sometimes bobbins become slightly warped or unbalanced.
1.3 Thread Breaking at Specific Points in Stitching
The timing of thread breaks can reveal hidden problems:
- Breaking at the beginning of seams: Usually indicates the needle is hitting the throat plate or the thread isn’t properly behind the needle bar thread guide.
- Breaking when reversing: Often caused by improper thread take-up lever timing or issues with the reverse mechanism.
- Breaking at fabric layers: The needle is deflecting when hitting multiple layers or thick seams. Use a walking foot for even feeding.
- Breaking randomly: Most likely poor quality thread with weak spots or inconsistent thickness.
1.4 Special Cases: Decorative and Heavy Threads
Metallic, heavy rayon, or other decorative threads require special handling:
Metallic Thread Solutions:
Use a metallic needle (has a larger eye and special coating), reduce tension by 30-40%, sew at half speed, and use thread conditioner if necessary.
Heavy Weight Thread (e.g., for topstitching):
Use a topstitching needle (size 100/16 or 110/18), thread only through the first few guides, and consider using a thread stand for smoother feeding.
Section 2: Skipped Stitches – Complete Diagnostic Guide
Skipped stitches occur when the needle and bobbin hook fail to form a proper lockstitch at one or more points. This problem has more potential causes than thread breaking, requiring systematic diagnosis.
2.1 The Physics of Skipped Stitches
Understanding stitch formation helps diagnose skipping:
- The needle descends through the fabric, creating a loop of thread on one side
- The bobbin hook must catch this loop at precisely the right moment
- If the needle is bent, dull, or wrong type, the loop forms incorrectly or in the wrong position
- If timing is off (even slightly), the hook misses the loop
- Result: No stitch formed = skipped stitch
2.2 Fabric-Specific Skipping Solutions
| Fabric Type | Skipping Cause | Solution |
|---|---|---|
| Knit/Stretch Fabrics | Needle pushes fabric aside instead of piercing | Use ballpoint or stretch needle, reduce presser foot pressure |
| Leather/Vinyl | Hole closes behind needle preventing loop formation | Use leather needle (chisel point), use Teflon foot, increase stitch length |
| Silk/Chiffon (Delicate) | Needle too large, fabric distortion | Use microtex needle (size 60/8 or 70/10), use tissue paper under fabric |
| Denim/Canvas (Heavy) | Needle deflection, insufficient penetration | Use jeans needle (size 100/16), slow sewing speed, use hump jumper |
| Waterproof/Synthetic | Static electricity, needle heating | Use titanium-coated needle, anti-static spray, reduce speed |
2.3 Machine-Specific Skipping Issues
Singer Machines Skipping Stitches
Singer machines, especially older mechanical models, often experience skipping due to:
- Timing issues: The hook-to-needle timing can drift with heavy use
- Needle bar height: Incorrect needle bar positioning prevents proper loop formation
- Solution: For timing issues, this generally requires professional adjustment. However, first ensure you’re using Singer-approved needles (Singer needles have a slightly different shaft shape)
Brother Computerized Machines Skipping
Brother’s computerized models might skip due to:
- Sensor issues: The thread break sensor might be overly sensitive
- Software glitches: Occasionally, a reset solves skipping
- Solution: Unplug machine for 5 minutes to reset electronics, ensure you’re using Brother-branded bobbins (they’re precisely engineered for their bobbin cases)
Janome/Elna Skipping Solutions
These machines are generally reliable but may skip when:
- Using non-Janome feet: Some presser feet alter needle position slightly
- Solution: Always use Janome-approved accessories, especially for decorative stitches
Bernina/Viking (High-End) Skipping
Ironically, high-end machines can be more sensitive to:
- Thread quality: They’re engineered for perfect stitches with perfect materials
- Needle positioning: The tolerance is extremely precise
- Solution: Use only recommended threads (Madeira, Gütermann) and change needles every 4-6 hours of sewing
2.4 Advanced: Diagnosing and Fixing Timing Issues
WARNING: Timing adjustment is an advanced repair. If you’re not comfortable with mechanical adjustments, take your machine to a professional. Incorrect timing adjustment can permanently damage your machine.
Timing refers to the synchronization between the needle’s movement and the bobbin hook’s rotation. When timing is off by even a millimeter, skipped stitches result.
Signs of Timing Issues:
- Skipped stitches occur randomly, not just with specific fabrics
- Thread breaks frequently with a distinctive “pop” sound
- Machine makes unusual clicking or grinding noises
- Stitches are inconsistent even with perfect threading and new needle
Basic Timing Check (Mechanical Machines):
- Remove needle plate, bobbin case, and presser foot
- Hand-turn the wheel toward you to lower and raise the needle
- Watch the bobbin hook: as the needle begins to rise from its lowest point, the hook should pass through the needle’s thread loop approximately 1-2mm above the needle eye
- If the hook passes too high, too low, or misses the loop entirely, timing needs adjustment

Essential Tool: Professional Sewing Machine Maintenance Kit
Lint is the silent killer of sewing machines, causing up to 70% of all performance issues. This comprehensive kit includes specialized tools for deep cleaning: precision screwdrivers for removing needle plates, bent-nose tweezers for extracting thread jams from tight spaces, miniature brushes for bobbin race cleaning, and lint removal tools designed specifically for sewing machines. Regular use prevents 90% of timing issues caused by lint buildup interfering with mechanical movement.
Pro Tip: Clean your machine after every 8 hours of sewing, or at the end of every project. Make it part of your sewing ritual – just like changing needles. The 5 minutes spent cleaning saves hours of troubleshooting later.
Check Price on AmazonSection 3: Bird’s Nests and Thread Jams – Complete Prevention Guide
The dreaded “bird’s nest” – that tangled mess of thread under your fabric – is perhaps the most visually dramatic sewing problem. Despite appearing complex, it usually has simple causes.
Key Insight: Although the tangled mess appears on the bottom of your fabric, it’s almost always caused by a problem with the **top thread tension**. The bobbin hook is pulling up massive loops of unrestrained top thread because there’s insufficient upper tension holding it back.
3.1 The 5 Most Common Causes of Bird’s Nests
-
Threading with Presser Foot Down (The #1 Cause)
When the presser foot is down, the tension discs are engaged (closed). If you thread the machine in this state, the thread rests on TOP of the discs rather than BETWEEN them. Result: No tension control = instant bird’s nest when you start sewing.
-
Incorrect Bobbin Direction
Every bobbin system has a specific direction the thread must unwind. For drop-in bobbins (common in newer machines), the thread usually unwinds counterclockwise. For front-loading bobbins (common in older machines), it’s usually clockwise. Check your manual – getting this wrong causes immediate jamming.
-
Starting Without the Needle Thread Under the Presser Foot
If you begin sewing without pulling both thread tails (top and bobbin) behind and under the presser foot, the initial stitches have nothing to anchor them. The loose thread gets sucked into the bobbin area.
-
Bobbin Case Not Fully Seated
With front-loading machines, if the bobbin case isn’t clicked fully into position, the entire tension system is bypassed. You’ll hear a distinctive “click” when it’s properly seated.
-
Severely Damaged Needle
A bent or badly damaged needle can’t form a proper thread loop, causing erratic bobbin hook interaction that leads to tangling.
3.2 Step-by-Step Bird’s Nest Recovery
Step 1: Don’t Pull!
Resist the urge to yank the fabric out. This can bend the needle, damage the bobbin case, or break timing gears. Instead:
Step 2: Cut Top Thread
Use scissors to cut the top thread near the spool. This releases tension on the upper thread.
Step 3: Remove Needle Plate
Take off the needle plate (usually 1-2 screws). This gives you access to the tangled mass.
Step 4: Remove Bobbin Case
Take out the entire bobbin case with the tangle still attached. This is easier than trying to pick it out piece by piece.
Step 5: Cut and Remove Tangles
With the bobbin case removed, use small scissors or a seam ripper to carefully cut away the tangled thread. Work slowly to avoid damaging the bobbin case mechanism.
Step 6: Clean and Reassemble
Clean any remaining lint, replace the needle (it’s likely damaged), re-thread completely with presser foot UP, and test on scrap fabric.
3.3 Preventing Future Bird’s Nests
Pro Prevention Technique: Before starting any seam, hold both thread tails (top and bobbin) to the back or side for the first 3-4 stitches. This provides the necessary resistance for proper stitch formation until the feed dogs take over fabric movement.
Section 4: Needle Breaking – Causes and Prevention
A broken needle is more than just an inconvenience – it’s a safety hazard and can indicate serious machine issues. Understanding why needles break prevents future occurrences and potential machine damage.
4.1 The 8 Primary Causes of Needle Breakage
| Cause | Identification | Prevention |
|---|---|---|
| Hitting Pins | Clean break, often with pin marks on needle | Remove pins before they reach needle, use magnetic pin catcher |
| Pulling Fabric | Needle bends then breaks, usually at an angle | Let feed dogs move fabric, guide don’t pull |
| Wrong Needle Size | Breaks in thick seams or multiple layers | Match needle size to fabric weight (heavier fabric = larger needle) |
| Bent Needle Hitting Throat Plate | Clicking sound before breaking, needle marks on plate | Change needles regularly, check for straightness |
| Incorrect Needle Installation | Breaks immediately or at high speed | Push needle fully up, flat side to back (usually) |
| Timing Issues | Needle hits bobbin hook or case | Professional timing adjustment needed |
| Wrong Presser Foot | Needle hits foot, especially with zigzag or decorative stitches | Use correct foot for stitch type, ensure needle clears foot |
| Excessive Speed on Tough Materials | Needle overheats and becomes brittle | Slow down for thick materials, use appropriate needle type |
4.2 Safety First: When a Needle Breaks
SAFETY PROTOCOL: When a needle breaks: 1. Immediately turn off and unplug the machine 2. Wear safety glasses while removing broken pieces 3. Check for and remove ALL needle fragments from bobbin area 4. Inspect throat plate for damage (replace if chipped) 5. Check bobbin hook for nicks (professional repair if damaged) 6. Test machine slowly on scrap fabric before resuming project
4.3 Specialty Needles for Problem Fabrics
Different fabrics require different needle technologies:
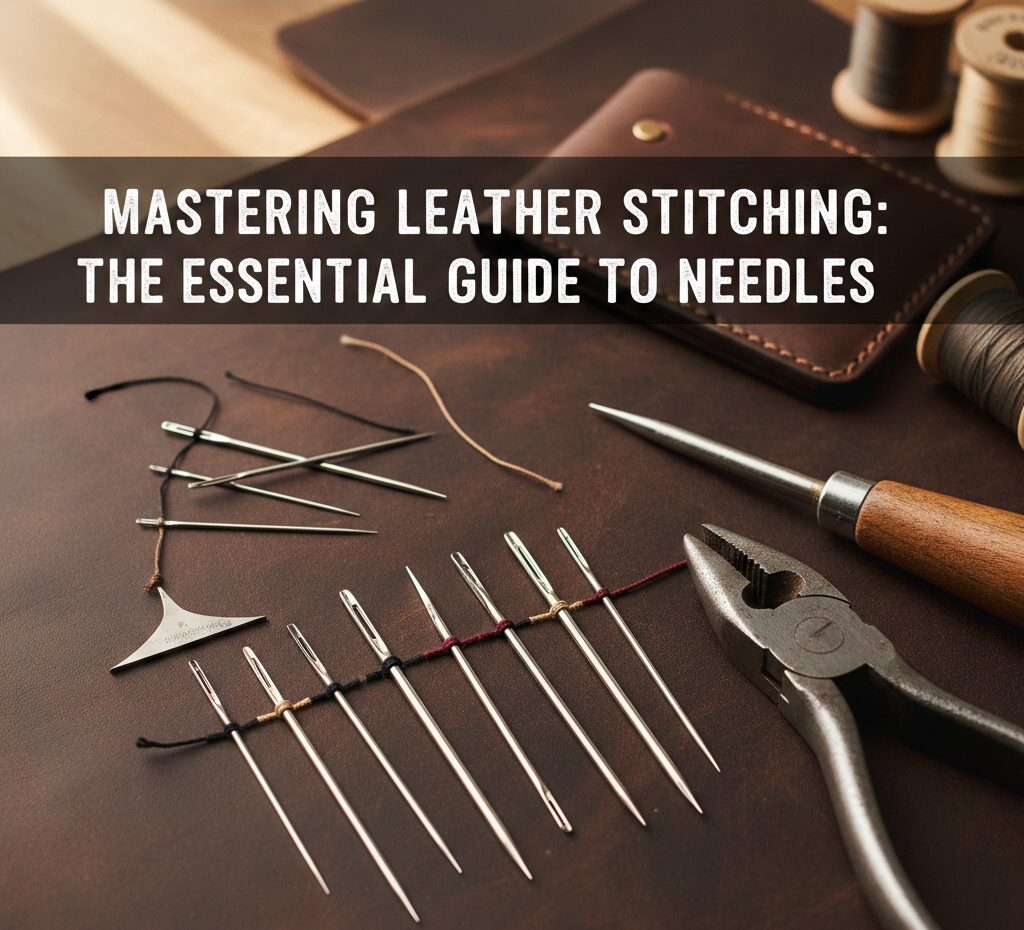
Leather Needles: Chisel point cuts rather than pierces
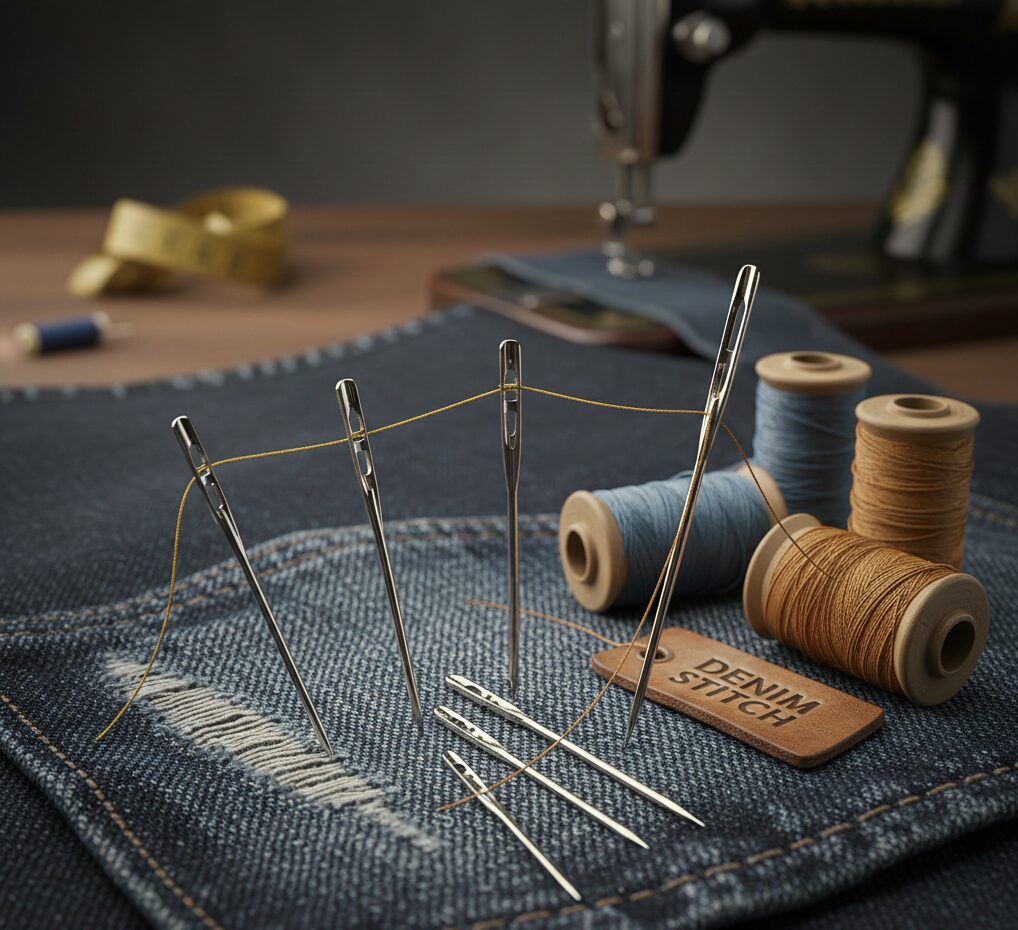
Jeans Needles: Extra sharp point for dense fabrics
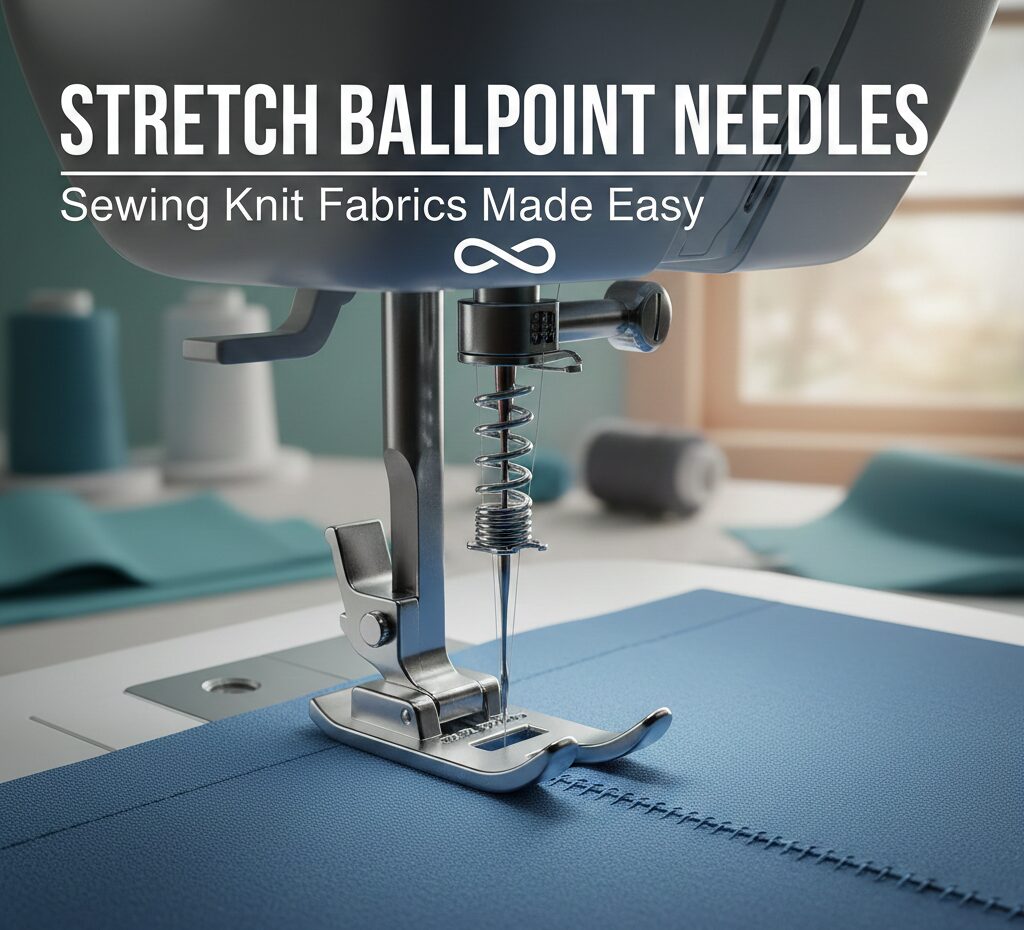
Ballpoint Needles: Rounded tip pushes between knit fibers
Section 5: Tension Troubleshooting – The Complete Master Guide
Tension issues plague sewists at all levels. Understanding tension is understanding the heart of your sewing machine’s operation.
5.1 How Tension Actually Works
Sewing machine tension is a balancing act between two forces:
- Upper tension: Controlled by the tension dial/discs, pulling thread back
- Bobbin tension: Controlled by a small spring on the bobbin case, providing resistance
- The perfect stitch: Occurs when these forces are balanced, meeting exactly in the middle of the fabric layers
5.2 Reading Your Stitches – The Diagnostic Chart
| Stitch Appearance | Diagnosis | Solution |
|---|---|---|
| Top thread visible on bottom | Upper tension too tight OR bobbin too loose | Reduce upper tension 1-2 numbers first |
| Bobbin thread visible on top | Upper tension too loose OR bobbin too tight | Increase upper tension 1-2 numbers first |
| Thread loops on either side | Both tensions too loose | Increase both tensions slightly |
| Fabric puckering | Both tensions too tight | Reduce both tensions slightly |
| Uneven tension along seam | Thread catching, lint in tension discs | Clean tension discs with unwaxed dental floss |
5.3 Advanced Tension Techniques
Tension Disc Cleaning Procedure:
- Unthread machine completely
- Raise presser foot to open discs
- Use a 6-inch piece of unwaxed dental floss
- Gently work floss between tension discs
- Repeat with clean sections until no lint appears
- Never use oil or lubricants on tension discs
Bobbin Tension Adjustment (Last Resort):
WARNING: Only adjust if you’re experienced and have ruled out all other causes
- Remove bobbin case from machine
- Locate small tension screw on bobbin case
- Make TINY adjustments (1/8 turn maximum)
- Righty-tighty (clockwise) increases tension
- Lefty-loosey (counterclockwise) decreases tension
- Test after each micro-adjustment
5.4 Fabric-Specific Tension Settings
Different materials require different tension approaches:
- Sheers/Delicates: Reduce both tensions slightly (3.5 instead of 4)
- Knits/Jerseys: Slightly looser upper tension prevents seam popping
- Leather/Vinyl: Slightly tighter tension ensures stitch security
- Quilting (Multiple Layers): May need increased tension to penetrate layers
- Decorative Stitches: Often require different tension than straight stitch

Professional Tool: Precision Screwdriver Set
When you need to make minor adjustments to bobbin tension, presser foot pressure, or remove needle plates, having the right tools is essential. This precision screwdriver set includes the exact sizes needed for most sewing machine adjustments, with magnetic tips to prevent losing tiny screws. The anti-static handles protect electronic components in computerized machines. Remember: only make adjustments you understand completely, and always test on scrap fabric first.
Note: Most home sewists will never need to adjust bobbin tension. Focus on proper threading and needle selection first. This tool is for those rare cases when everything else has been tried.
Check Price on AmazonSection 6: Machine-Specific Troubleshooting Guide
Different brands and types of machines have unique characteristics and common issues. Here’s a brand-by-brand guide:
6.1 Singer Troubleshooting Guide
Singer Heavy Duty Models (4411, 4423, 4452)
Common Issues:
- Loud operation: Normal for these powerful motors
- Feed dog marks on delicate fabrics: Reduce presser foot pressure
- Timing drift with heavy fabrics: Have professionally checked annually
Singer Quantum Stylist (9960) & Computerized Models
Common Issues:
- Error codes: Usually threading-related, consult manual
- Touch screen unresponsive: Power cycle machine
- Automatic needle threader not working: Ensure needle is at highest position
6.2 Brother Troubleshooting Guide
Brother CS6000i/CS7000i
Common Issues:
- Bobbin winding issues: Ensure bobbin is properly seated on winder
- Automatic thread cutter not working: May need sensor cleaning
- Buttonhole problems: Use stabilizer, check automatic buttonhole foot engagement
Brother PQ1500SL/Quilting Machines
Common Issues:
- High speed skipping: Use quality thread, reduce speed slightly
- Even feed/walking foot alignment: Ensure proper installation
- Extended use overheating: Allow cooling breaks every 2 hours
6.3 Janome/Elna Troubleshooting
Janome Magnolia & HD Models
Common Issues:
- Bobbin thread catching: Unique bobbin case design requires precise insertion
- Slow starting: May need motor brush replacement (professional service)
- Stitch quality issues: Janome machines are sensitive to needle brand – use Janome or Organ needles
6.4 Bernina/Viking/Husqvarna (High-End Machines)
Common High-End Machine Issues
Special Considerations:
- Computerized features not working: Often require software updates from dealer
- Stitch regulator issues: May need sensor calibration
- Expensive repairs: Always use authorized service centers
- Thread and needle requirements: These machines work best with premium supplies
6.5 Vintage Machine Restoration and Troubleshooting
Vintage machines (pre-1970) have different considerations:
Vintage Machine Common Issues:
- Frozen mechanisms: May need penetrating oil and gentle persuasion
- Rubber parts deterioration: Motor belts, wheel tires may need replacement
- Electrical safety: Have wiring inspected before use
- Oil types: Use only sewing machine oil, never 3-in-1 or WD-40
Viking/Husqvarna 1000 Series
These classic machines are workhorses but need special care:
- Oil regularly: They have multiple oiling points that must be maintained
- Gear issues: Plastic gears in some models may need replacement
- Still valuable: Many vintage machines sew better than modern economy models
Section 7: Specialty Sewing Problems and Solutions
7.1 Quilting-Specific Issues
Quilting presents unique challenges with multiple fabric layers and extended sewing sessions:
| Quilting Problem | Causes | Solutions |
|---|---|---|
| Fabric shifting/layer separation | Insufficient basting, wrong foot | Use walking foot, baste every 4-6 inches |
| Thread breaking in thick seams | Needle too small, poor thread quality | Use 90/14 or 100/16 needle, high-quality thread |
| Uneven stitch length through layers | Presser foot pressure inconsistency | Adjust presser foot pressure, use even feed foot |
| Machine overheating during long sessions | Continuous heavy use | Take 15-minute breaks every 2 hours |
7.2 Embroidery Machine Troubleshooting
EMBROIDERY MACHINE SPECIFIC: Never use regular sewing thread in embroidery machines. Embroidery thread is specially designed to withstand high-speed stitching and has less lint. Using the wrong thread can damage the machine’s tension system and needle assembly.
7.3 Serger/Overlocker Problems
Sergers have additional complexity with multiple threads and loopers:
Common Serger Issues:
- Looper thread breaking: Usually incorrect threading path
- Fabric not feeding: Differential feed adjustment needed
- Knife not cutting: Dull blades or incorrect positioning
- Always re-thread in correct order: Consult manual for specific sequence
7.4 Free-Motion Quilting Problems
Free-motion quilting requires dropping feed dogs and manual control:
- Uneven stitch length: Practice consistent hand speed
- Fabric not moving smoothly: Use quilting gloves, check table surface
- Thread breaking: Use free-motion or quilting needle, reduce top tension
- Remember: Drop feed dogs AND use darning/free-motion foot
Section 8: Preventive Maintenance Schedule
Preventing problems is always better than fixing them. Follow this maintenance schedule:
| Frequency | Maintenance Task | Time Required |
|---|---|---|
| After every project (or 8 hours of sewing) |
Change needle, clean bobbin area, brush out feed dogs | 3-5 minutes |
| Monthly (or 40 sewing hours) |
Deep clean: remove needle plate, clean tension discs, oil if required | 15-20 minutes |
| Every 6 months | Professional servicing if heavy use, otherwise annual | 1-2 hours (professional) |
| Annual | Full professional service: timing check, gear inspection, electrical safety | 2-3 hours (professional) |
8.1 Oil or Not to Oil?
CRITICAL INFORMATION: Modern computerized machines often require NO OILING by the user. They may have permanently lubricated bearings or specific oiling points that should only be serviced by professionals. Check your manual! Oiling the wrong parts can damage electronic components and create sticky messes that attract more lint.
8.2 Storage Best Practices
Proper storage prevents many problems:
- Cover your machine when not in use to prevent dust accumulation
- Store in moderate humidity – avoid damp basements or hot attics
- Unplug when not in use to prevent electrical issues
- Remove needles for long-term storage to prevent corrosion in the needle bar
- Wind bobbins halfway for storage to prevent thread memory issues
Section 9: When to Call a Professional
Despite your best efforts, some problems require professional attention:
SEEK PROFESSIONAL HELP FOR: 1. Electrical issues (sparks, burning smell, non-responsive power) 2. Timing adjustment (unless you’re experienced) 3. Gear replacement (broken or stripped gears) 4. Computerized machine error codes that won’t clear 5. Major impact damage (dropped machine) 6. Needle bar or hook replacement 7. Motor issues (unusual noises, inconsistent speed) 8. Any issue that makes you uncomfortable to attempt repair
9.1 Choosing a Repair Technician
Not all repair shops are equal:
- Brand certification: For computerized machines, brand-certified technicians have specific training
- Experience with your machine type: Vintage machine specialists vs. modern computerized experts
- Clear pricing: Get estimates in writing before authorizing work
- Turnaround time: Good shops communicate realistic timelines
- Warranty on repairs: Reputable shops guarantee their work
Section 10: Ultimate Troubleshooting Flowchart
Use this comprehensive flowchart approach to any sewing problem:
Step A: Immediate Response
Stop sewing. Don’t force anything. Assess the situation calmly.
Step B: Initial Diagnosis
Identify the specific problem: Thread breaking? Skipped stitches? Bird’s nest? Needle break? Unusual noise?
Step C: The Golden Four
Perform the four essential steps in order: 1. Change needle, 2. Re-thread completely, 3. Clean bobbin area, 4. Check thread quality.
Step D: Fabric-Specific Considerations
Are you sewing a problematic fabric? Knit? Leather? Sheer? Multiple layers? Adjust needle and settings accordingly.
Step E: Machine-Specific Factors
Consider your machine’s brand, age, and type. Consult the brand-specific section above.
Step F: Test on Scrap Fabric
Always test fixes on scrap fabric of the same type and layers as your project.
Step G: Professional Assessment
If problem persists after systematic troubleshooting, consider professional help.
Frequently Asked Questions
A: Reverse stitching often has different timing or tension mechanisms. Check that your machine’s reverse function is engaging fully. Some machines have a separate tension setting for reverse. Also, ensure you’re not pulling the fabric while reversing – let the feed dogs work.
A: This is usually one of three things: 1) The machine wasn’t properly threaded from the last time you used it, 2) A thread fragment is jammed in the bobbin area from your last session, or 3) The needle is damaged from being left in the down position. Re-thread completely, clean thoroughly, and change the needle.
A: Needle manufacturers recommend every 6-8 hours of sewing. For perspective: A simple garment might take 2-3 hours, so change after 2-3 garments. A quilt might take 40+ hours, so change needles 5-6 times during the project. Dull needles cause most stitch quality issues, so when in doubt, change it out. Needles are cheap; ruined fabric is expensive.
A: Technically yes, but you’ll have inferior results. Universal needles are a compromise – they work okay on many fabrics but excel on none. For knits, ballpoint needles prevent runs. For denim, jeans needles penetrate cleanly. For leather, special needles cut rather than tear. For sheers, smaller needles prevent damage. The right needle makes sewing easier and results better.
A: Each brand has its own error code system. Generally: E1-E9 often indicate threading issues. F1-F9 may indicate sensor problems. Numbers like 3, 5, or 8 often indicate the machine needs to be reset. Always check your manual first. Most common fix: Turn off, unplug for 5 minutes, re-plug, turn on. If persistent, consult a dealer.
A: Vintage machines (pre-1970) are often excellent quality, all-metal construction that lasts decades. They’re generally easier to repair but harder to find parts for. They require more maintenance (regular oiling) but often sew through thicker materials than modern home machines. If you enjoy mechanical things and basic maintenance, they’re wonderful. If you want plug-and-play convenience, modern machines are better.
Conclusion: Your Path to Stress-Free Sewing Mastery
The journey from frustrated sewist to confident troubleshooter begins with understanding one fundamental truth: your sewing machine is a precise mechanical instrument, not a mysterious black box. By systematically addressing the most common issues – starting with the golden four steps of needle change, proper re-threading, thorough cleaning, and quality thread verification – you empower yourself to solve over 95% of sewing problems without professional intervention.
Remember that prevention is always superior to repair. Establish a regular maintenance routine, match your needles and thread to your fabric, and listen to your machine. Unusual noises, changes in sound, or subtle variations in stitch quality are your machine’s way of communicating that something needs attention.
This comprehensive guide has equipped you with knowledge spanning basic thread breaks to advanced timing issues, from Singer to Bernina, from delicate silks to heavy denim. Bookmark this resource, share it with sewing friends, and refer back to it whenever challenges arise. Your growing troubleshooting skills will save you money, reduce frustration, and most importantly, keep your creative projects flowing smoothly from concept to completion.
Final Pro Tip: Keep a sewing journal. Note the fabric type, needle used, thread brand, tension settings, and any issues encountered for each project. Over time, you’ll build a personalized reference that makes troubleshooting even faster. Happy sewing!


