
How to Read Sewing Patterns: The Ultimate Visual Guide
Opening a sewing pattern envelope for the first time can feel like unfolding a map written in a foreign language. You are greeted by delicate tissue paper covered in mysterious lines, arrows, triangles, and technical jargon that can intimidate even the most enthusiastic beginner.
Many new sewists assume that sewing is 90% stitching and 10% cutting. The reality is quite the opposite. The success of your project is determined long before you sit down at your machine. It is determined by how well you decipher the “blueprint” provided in the pattern envelope.
Patterns are standardized. Once you learn the “code,” you can sew anything from a simple tote bag to a complex wedding dress. This comprehensive 8000+ word guide will break down the hieroglyphics of the sewing world so you can cut with confidence and create garments that actually fit.
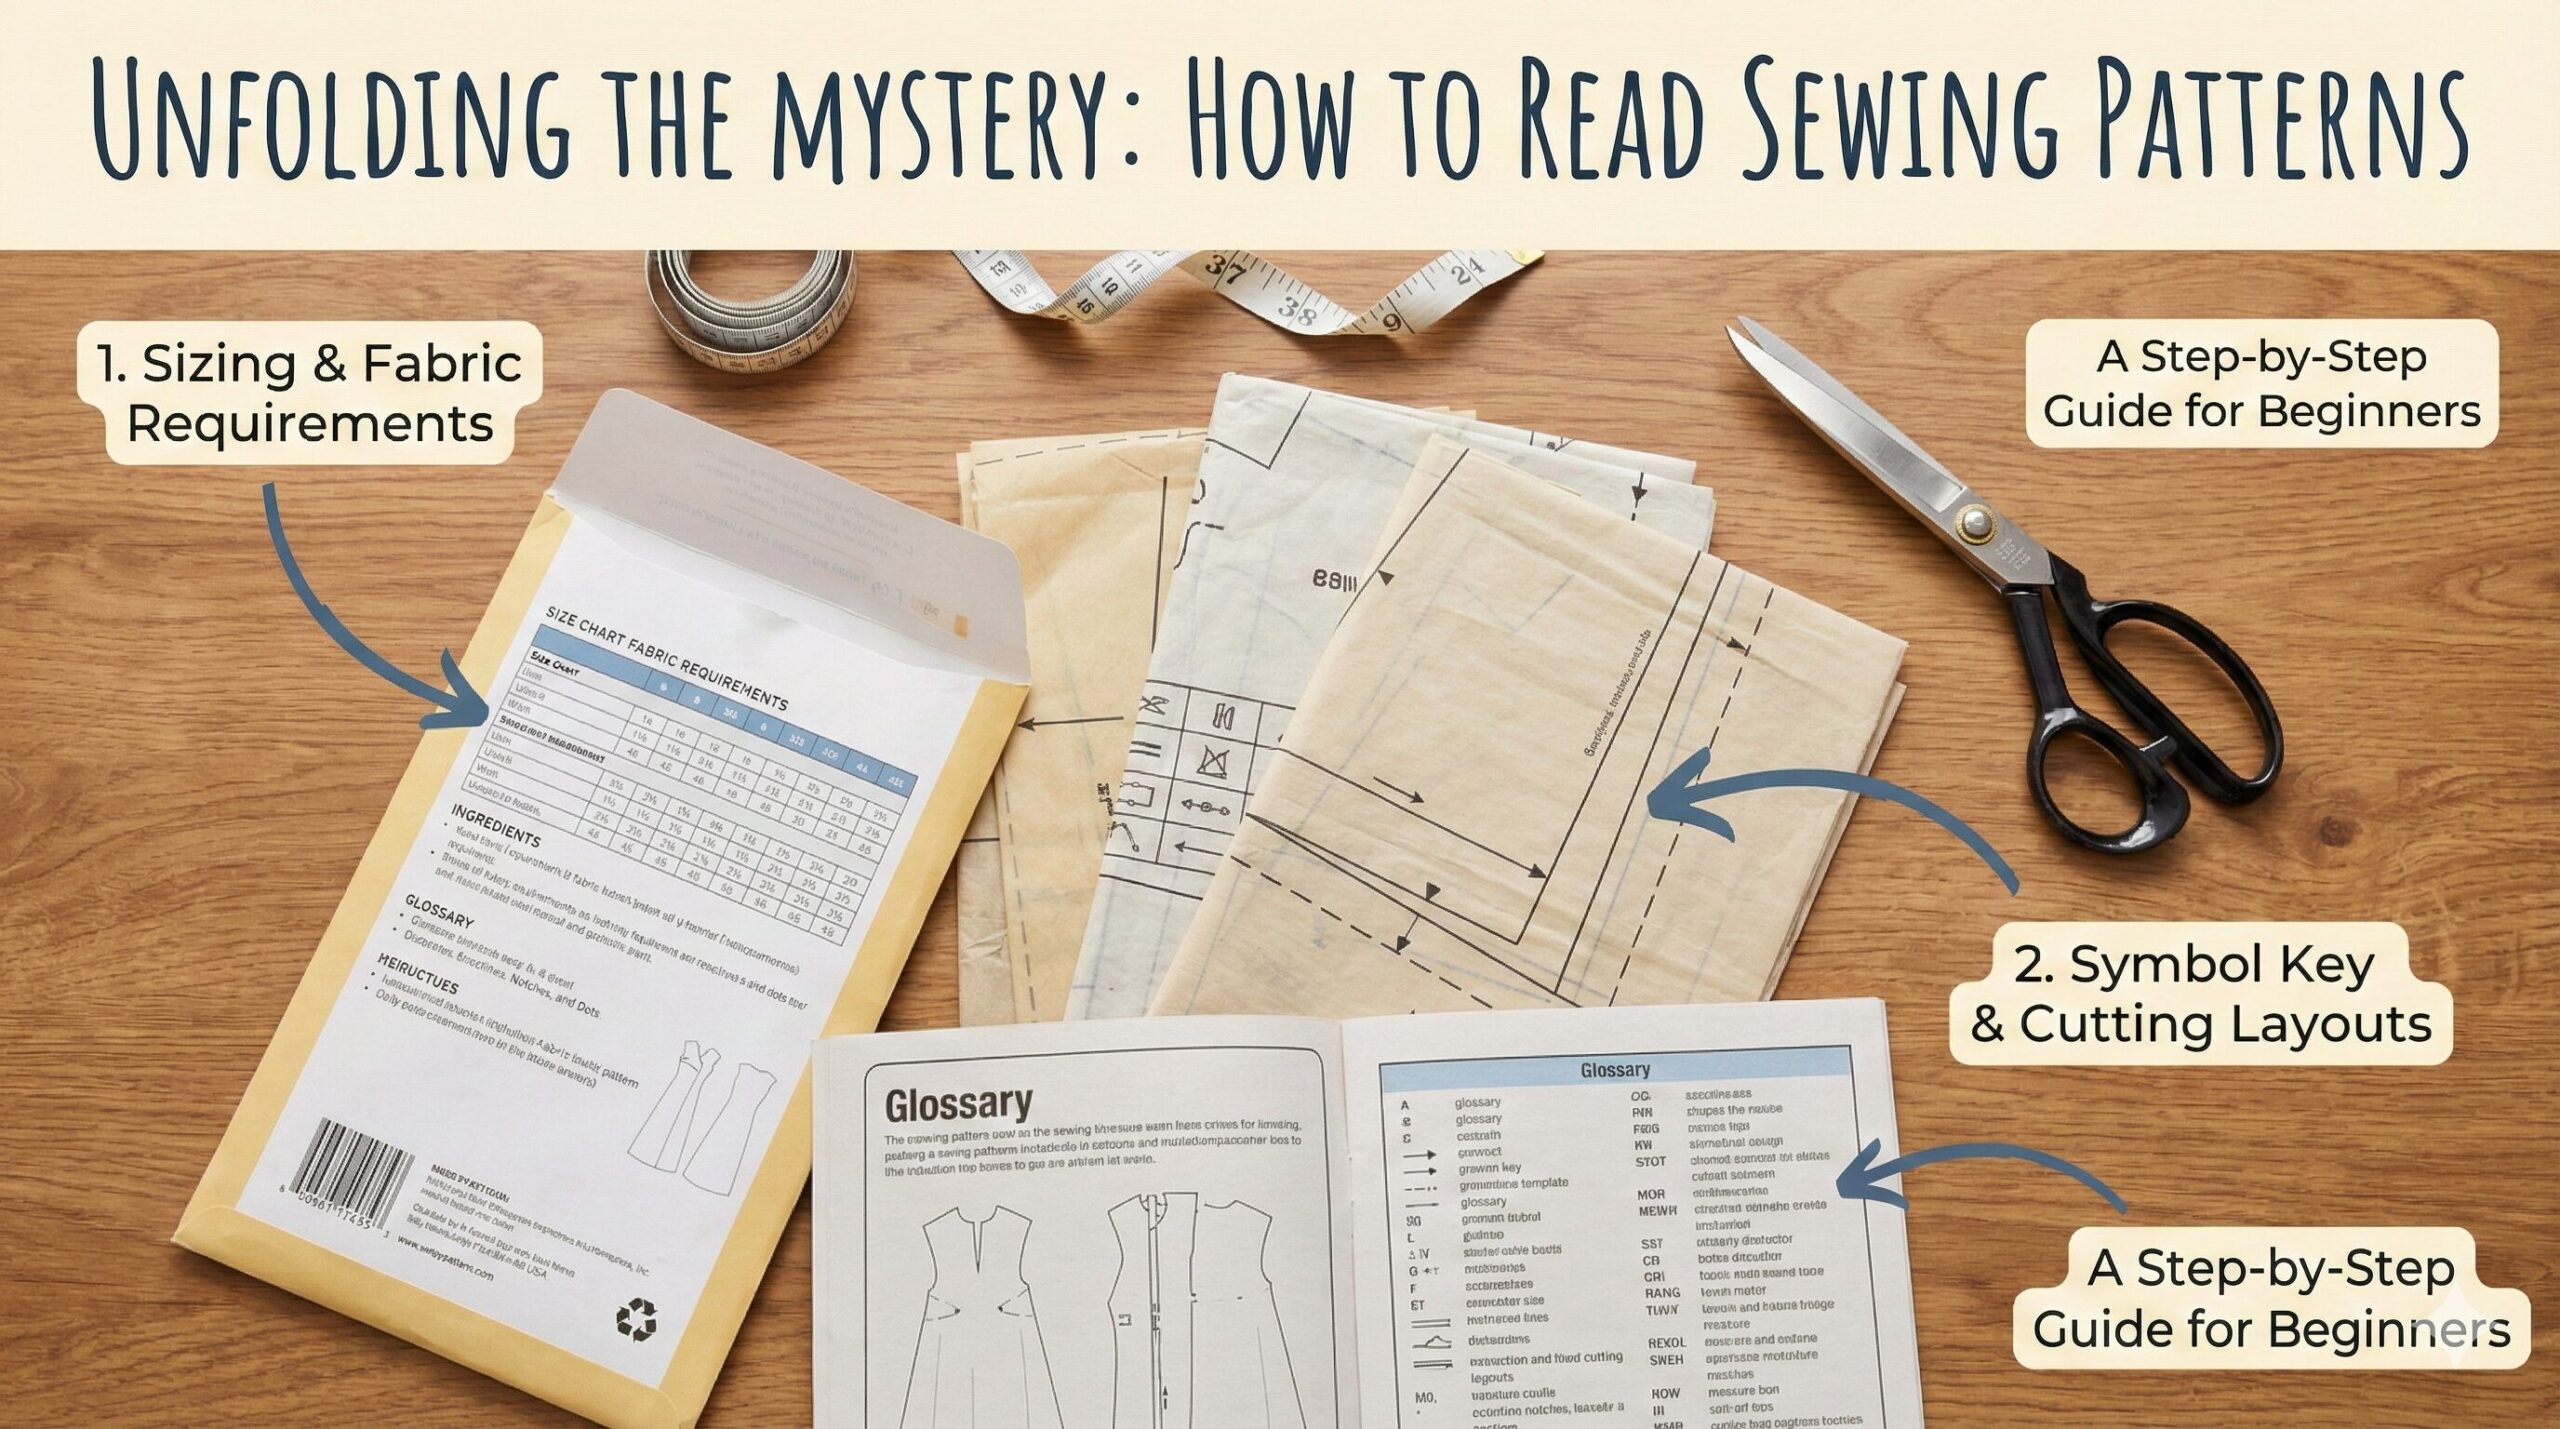
1. The Envelope: Contains the “Menu.” It tells you fabric requirements, sizing measurements, notions needed, and line drawings of the finished garment.
2. The Instruction Sheet: The “Recipe.” It gives you the step-by-step construction order, cutting layouts, and glossary of terms.
3. The Tissue (Pattern Pieces): The “Template.” These are the actual shapes you pin to your fabric, marked with critical alignment symbols.
1. Decoding the Envelope (Before You Buy)
Most mistakes happen before you even open the package. The back of the pattern envelope is the most critical planning tool you have. It is the “sales pitch” and the “technical specification” rolled into one. If you ignore the back of the envelope, you will likely buy the wrong fabric or the wrong size.
Sizing vs. Vanity Sizing
This is the number one reason beginners quit sewing: Garments that are too small.
Sewing pattern sizes are NOT the same as ready-to-wear store sizes. In a retail store, “Vanity Sizing” has shifted numbers downward over the decades to make customers feel better. A size 8 in a store today might be a size 14 in a sewing pattern.
The Rule: Ignore the size number on the front. Look at the Body Measurements Chart on the back.
- Bust: Measure around the fullest part of your chest.
- Waist: Measure around your natural waist (the smallest part of your torso, usually near the belly button).
- Hips: Measure around the fullest part of your bottom.
Once you have these numbers, circle the corresponding size on the envelope. If you fall between sizes (which most people do), choose the size based on the garment type. For a skirt, choose by your hip measurement. For a blouse, choose by your bust measurement.
💡 Glossary: “Finished Garment Measurements”
You will often see two charts: “Body Measurements” and “Finished Garment Measurements.” The difference between these two numbers is called Ease.
If your bust is 36″ and the finished garment is 38″, there is 2″ of ease. This is comfortable. If the finished garment is 36.5″, it will be very tight. Checking the finished measurements prevents you from sewing a garment that is uncomfortably snug.
Fabric Selection: Wovens vs. Knits
The envelope will list “Suggested Fabrics.” This is not a suggestion; it is a requirement for the drape of the pattern.
- Woven Fabrics: These do not stretch (e.g., Cotton, Linen, Denim). They are easier to sew for beginners.
- Knit Fabrics: These stretch (e.g., Jersey, Spandex). They require special handling, often involving a zig-zag stitch or a serger.
If a pattern says “For Stretch Knits Only,” it relies on negative ease (the fabric stretching around your body) to fit. If you make it out of cotton, you won’t be able to put it on.
The Notions List
“Notions” refers to everything you need to complete the project besides the fabric and the machine. The envelope lists exactly what you need so you don’t have to run back to the store.
Common notions include zippers (pay attention to the length), buttons (pay attention to the diameter), elastic, interfacing, and thread. Always buy high-quality thread to prevent jamming.
2. The Tissue: Reading the Symbols
When you unfold the tissue paper, you are looking at the “Template.” These pieces are covered in symbols that tell you exactly how to place the template on your fabric. Ignoring these will result in a garment that twists, pulls, or hangs incorrectly.
The Grainline Arrow ↔
This is the most important symbol on the sheet. It is a long, straight line with arrows on both ends. This line must run parallel to the selvage edge of your fabric (the finished factory edge).
Why? Fabric is woven with a “grain.” If you cut slightly crooked, the pant leg or sleeve will twist around your limb when washed.
Place on Fold ⤯
A bracketed line with arrows pointing toward the edge. You place this edge exactly on the fold of the fabric.
Why? Patterns usually only give you half a bodice or half a skirt to save paper. When you cut on the fold and open the fabric, you get one full, perfectly symmetrical piece.
Notches (Triangles) ▲
Little triangles along the cutting line. These are matching points. You match a single notch to a single notch, and a double notch to a double notch.
Why? They tell you which front piece connects to which back piece. Always cut these outward (away from the pattern) so you don’t accidentally snip into your seam allowance.
Adjustment Lines ══
Two parallel lines running across the pattern. This is the “Lengthen or Shorten Here” line.
Why? If you are tall or petite, you cannot just add length at the hem. You must add it here to ensure the waistline and hip curves stay in the correct place on your body.
Dart Lines △
Diamond or triangular shapes with lines converging to a point. These indicate where to sew darts that shape fabric to body contours.
Why? Darts create three-dimensional shaping in flat fabric. They’re essential for fitted garments like blouses, dresses, and pants.
Buttonhole Markings □
Rectangular marks with a line through them, often accompanied by dots at each end.
Why? These show exact buttonhole placement. The line indicates orientation (vertical or horizontal) and the dots mark start/end points.
3. Essential Tools for Pattern Work
Handling delicate tissue paper requires specific tools. Using kitchen scissors or heavy books as weights is a recipe for inaccuracy. To get professional results, you need to upgrade your cutting game.
Scissors vs. Rotary Cutters
Traditionally, sewists pinned the paper to the fabric and cut around it with shears. While this works, lifting the fabric with the lower blade of the scissors can distort the layers, leading to jagged edges.
The modern method is Rotary Cutting. A rotary cutter is like a pizza cutter for fabric. It allows you to cut flat on the table, ensuring absolute precision. However, you cannot use pins with a rotary cutter—you must use pattern weights.
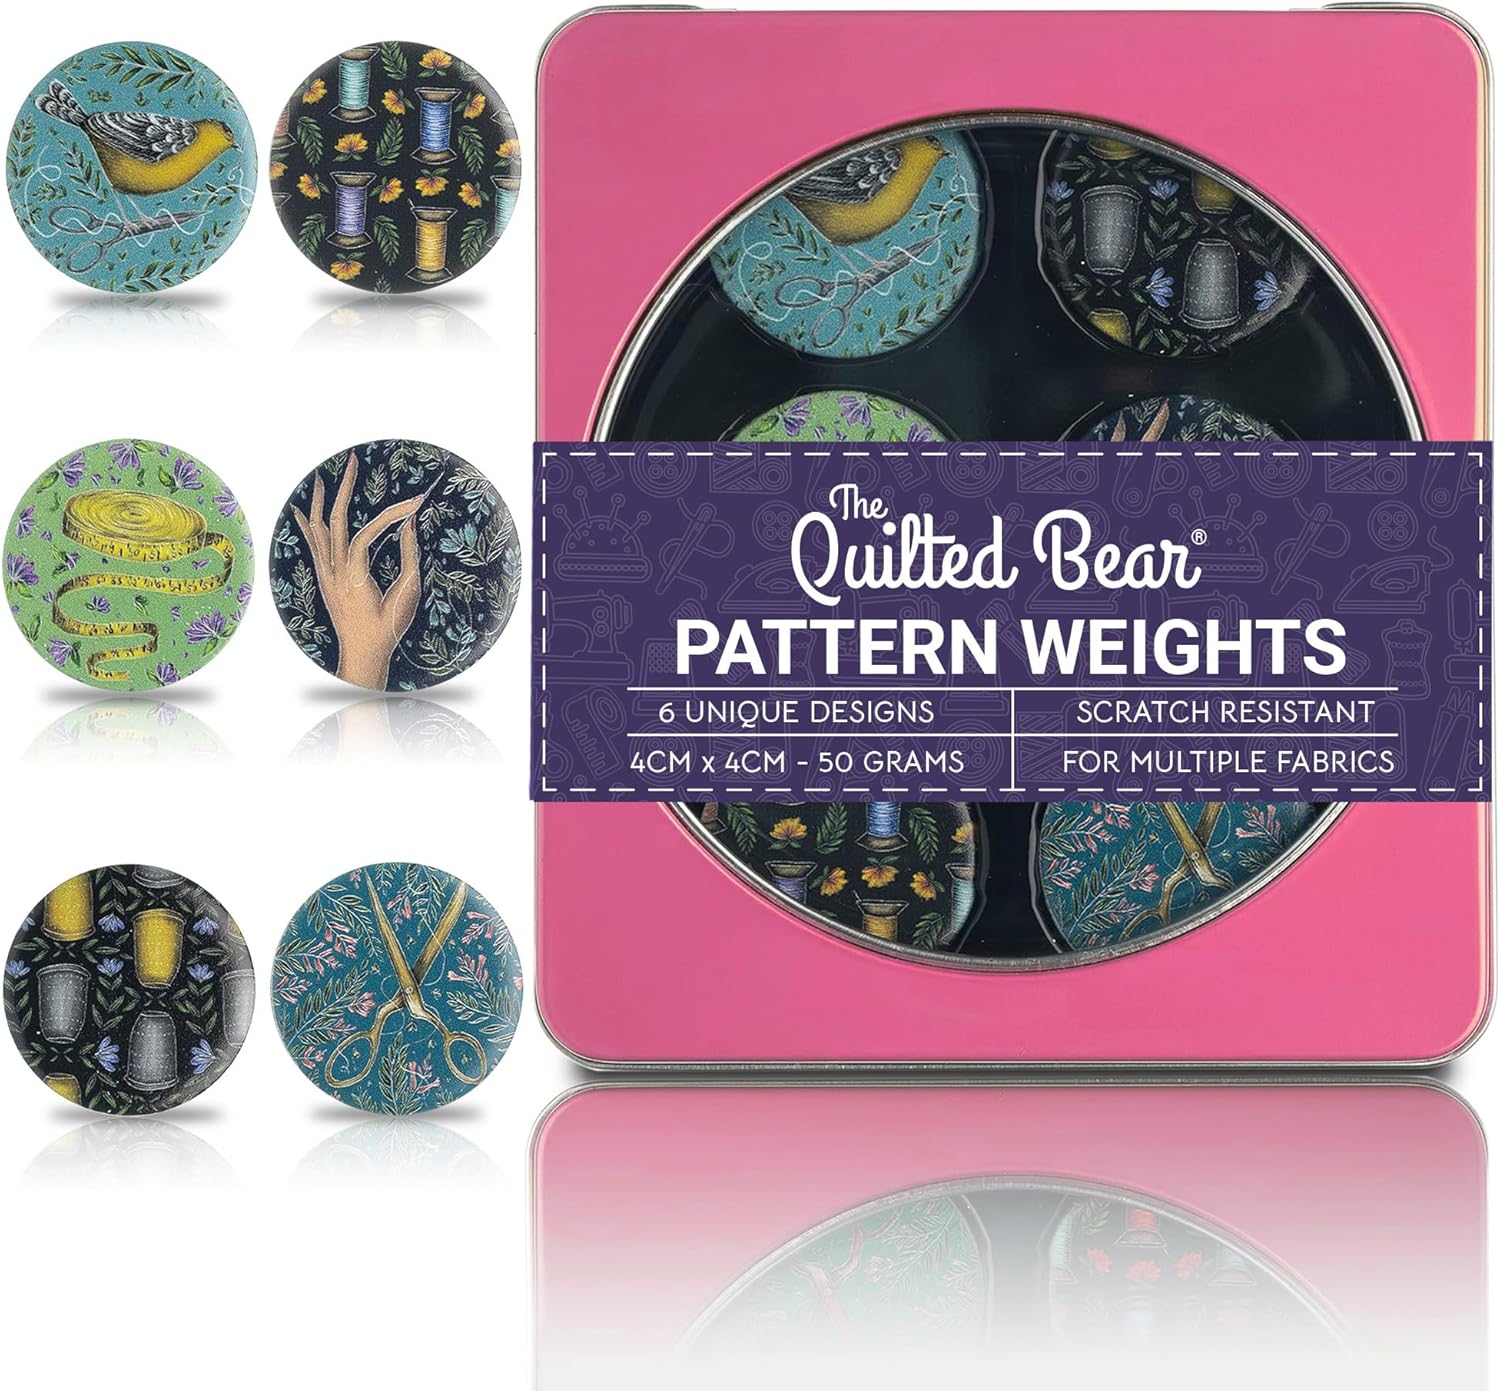
Sewing Pattern Weights
Stop using pins that wrinkle your tissue paper and distort the line. Pattern weights hold the paper flat and allow you to cut faster with a rotary cutter. They also prevent you from poking holes in delicate fabrics like silk or satin.
Check Price on AmazonIf you choose the rotary path, a Self-Healing Cutting Mat is non-negotiable. If you use a rotary cutter on a dining table, you will ruin the table and dull the blade instantly.
4. The Cutting Layout: Maximizing Efficiency
Inside the instruction sheet, you will find “Cutting Layouts.” These are diagrams showing you the most efficient way to arrange the pieces on your yardage to minimize waste.
Pay attention to the Fabric Width (usually 45″ or 60″). The layout changes depending on how wide your bolt of fabric is.
Directional Prints (Nap): If your fabric has a print that goes one way (like trees or little people standing up), or if it is a velvet/corduroy with a “nap,” you must use the “With Nap” layout. This ensures all pattern pieces are oriented the same way. If you flip a piece upside down to save space, the front of your shirt might look darker than the back because the velvet pile is running in the opposite direction.
5. Transferring Markings
Once you cut the fabric, don’t remove the pattern tissue immediately! You need to transfer those internal markings (darts, pocket placements, buttonholes) to the fabric.
You can use tailor’s chalk, but for precision, a tracing wheel and carbon paper are the gold standard. This creates a temporary line on the wrong side of the fabric that guides your sewing machine needle.

Clover Chacopy Tracing Paper & Wheel
This allows you to “trace” the lines from the pattern paper directly onto the wrong side of your fabric without damaging it. Essential for darts, pleats, and buttonhole placement.
Check Price on Amazon6. Modern Patterns: Using Digital PDFs
The sewing world has evolved. Many indie designers now sell PDF Patterns that you download and print at home. While the symbols are the same, the preparation is different.
The Layer Function: High-quality PDF patterns allow you to select “Layers” in Adobe Reader. This means you can uncheck all the sizes you don’t need and print only your specific size lines. This eliminates the visual clutter of 10 different dashed lines intersecting each other.
Tiling: You will print the pattern on standard Letter or A4 paper. You then have to trim the edges and tape the pages together to form the full pattern sheet. It takes time, but it’s instant gratification compared to waiting for shipping.
7. Troubleshooting: When Things Don’t Line Up
Sometimes, even if you cut perfectly, the pieces don’t seem to fit. Before you panic, check these common issues.
Are you sewing with the correct allowance? Most commercial patterns (Big 4) use 5/8″ (1.5cm). Many Indie patterns use 3/8″ (1cm) or 1/2″ (1.2cm). If you sew a 5/8″ pattern with a 1/2″ seam, the garment will be inches too big.
- Did you wash your fabric? Fabric shrinks. If you cut before washing, your finished shirt might turn into a crop top after the first laundry cycle.
- Did you press the tissue? Pattern paper comes folded in tiny envelopes. Those creases distort the shape. Use a dry iron on low heat to flatten the pattern pieces before cutting.
- Machine Tension: If seams are puckering, it distorts the fit. Check our jamming guide here.
8. Comprehensive Pattern Alteration Techniques
No pattern will fit perfectly straight out of the envelope. Understanding pattern alterations is the key to creating garments that fit your unique body shape. The average person needs at least 2-3 adjustments to any commercial pattern.
Common Fit Issues and Solutions
Full Bust Adjustment (FBA)
When: Pattern fits shoulders but strains across bust.
How: Slash pattern from armhole to bust point, spread to add width and length.
Adds: 0.5-2 inches of bust room while maintaining shoulder fit.
Small Bust Adjustment (SBA)
When: Excess fabric pooling at bust area.
How: Slash pattern from armhole to bust point, overlap to reduce width/length.
Removes: 0.5-1.5 inches for better contouring.
Broad Back Adjustment
When: Fabric pulls across shoulder blades.
How: Add width to back pattern piece only, from shoulder to waist.
Adds: 0.25-1 inch across upper back.
Lengthening and Shortening Patterns
Never add or remove length at the hem only. This distorts the garment’s proportions. Use the “lengthen/shorten here” lines provided on the pattern.
Mark Adjustment Lines
Find the parallel lines marked on your pattern. If none exist, add them 3-4 inches below the armhole for tops, or 5-7 inches below the waist for pants/skirts.
Cut and Spread/Overlap
Cut completely through the pattern along the lines. For lengthening, spread the pieces apart by the needed amount. For shortening, overlap them by the needed amount.
Tape and True
Tape the pieces to fresh paper. Redraw any lines that became discontinuous (side seams, darts, etc.) to create smooth curves again.
9. Pattern Grading: Moving Between Sizes
If your measurements fall into different sizes (e.g., bust = size 12, hips = size 16), you need to grade between sizes. This creates a custom pattern that fits all your measurements.
| Body Area | Grading Technique | Transition Points | Tools Needed |
|---|---|---|---|
| Bust to Waist | Blend from larger bust size to smaller waist size | Underarm to waistline | French curve, grading ruler |
| Waist to Hip | Blend from smaller waist to larger hip size | Waistline to hipline | Hip curve ruler, flexible curve |
| Neck/Shoulders | Use smaller size for better fit | Shoulder seam only | Shoulder template |
| Sleeves | Match to armhole size | Cap height and bicep | Sleeve curve template |
Step-by-Step Grading Process
- Trace Original Pattern: Always work on a traced copy, never the original tissue.
- Mark Size Lines: Use a highlighter to mark the different size lines you’ll be following.
- Create Transition Points: Mark where you’ll switch from one size to another (usually at bust point, waist, hips).
- Draw New Cutting Line: Using a curved ruler, draw a smooth line connecting the different size outlines.
- Check Symmetry: Ensure both sides of center-front/center-back pieces are symmetrical.
- Test with Muslin: Make a test garment to verify the grading worked correctly.
10. Pattern Storage and Organization Systems
Proper pattern storage saves time, prevents damage, and makes your sewing space more efficient. A well-organized system can cut your project prep time in half.
Commercial Pattern Storage
Use: Clear plastic envelopes or gallon-size zipper bags.
Label: Pattern number, brand, size range, date used.
Store: In filing boxes or magazine holders by garment type.
PDF Pattern Storage
Digital: Cloud backup (Google Drive, Dropbox) with organized folders.
Physical: Printed copies in labeled envelopes with digital backup noted.
Organization: By designer, garment type, difficulty level.
Tissue Pattern Preservation
Reinforce: Iron tissue pieces between sheets of wax paper to strengthen.
Trace: Create permanent copies on pattern paper or Swedish tracing paper.
Store Flat: In large flat drawers or hanging in garment bags.
Recommended Storage Products

Clear Pattern Storage Envelopes
These heavy-duty clear envelopes protect tissue patterns from tearing and allow you to see contents at a glance. Perfect for organizing commercial patterns by category. Acid-free and tear-resistant.
Check Price on Amazon11. Commercial vs. Indie Pattern Differences
Understanding the differences between commercial patterns (Simplicity, McCall’s, Vogue, Butterick) and independent patterns can dramatically affect your sewing experience and results.
| Feature | Commercial Patterns | Indie Patterns |
|---|---|---|
| Sizing | Standardized sizing, larger size ranges (4-24+), multi-size nested | Often limited size ranges, may offer separate files for different size groups |
| Instructions | Standardized symbols, minimal text, assumes some sewing knowledge | Detailed step-by-step instructions, often with photos/video tutorials |
| Seam Allowances | Usually 5/8″ (1.5cm) for Big 4, included in pattern | Varies by designer (often 3/8″ or 1/2″), usually included |
| Pattern Markings | Standardized symbols, minimal notches, basic grainlines | Often more detailed markings, multiple notches for matching |
| Design Style | Trend-focused, broad appeal, traditional silhouettes | Niche styles, unique details, often modern/retro fusion |
| Community Support | Limited, official help lines rarely used | Strong online communities, designer often personally responsive |
When to Choose Each Type
- You’re a true beginner needing to learn standardized symbols
- You need a wide size range (especially plus sizes)
- You want classic, timeless styles
- You’re on a tight budget (sales bring prices down to $1.99)
- You prefer printed tissue over PDF assembly
- You want detailed, beginner-friendly instructions
- You’re looking for specific, niche styles
- You prefer supporting small businesses
- You want instant download access
- You appreciate modern sizing and fit
12. Pattern Envelope Symbols Explained
The front and back of pattern envelopes contain coded information that tells you everything about the garment variations included. Learning this visual language helps you choose patterns wisely.
View Letters (A, B, C, D)
Different design variations included in one pattern. Each letter corresponds to a specific view shown in line drawings. Check which views you’re interested in before purchasing.
Fabric Requirement Bars
Colored bars showing fabric amounts for different sizes. The darkest bar shows the most fabric needed. Match your size to the correct bar color in the chart.
Difficulty Indicators
Look for “Easy,” “Average,” or “Advanced” designations. Some patterns use scissors icons (1-4 scissors indicating difficulty). Start with 1-scissor patterns as a beginner.
Recommended Fabrics Icons
Small icons indicate fabric types: woven symbol, knit symbol, stretch symbol. Some show “with nap” or “without nap” requirements. These are not suggestions—they’re requirements.
13. Seam Allowance Variations by Brand
One of the most common mistakes is using the wrong seam allowance. Each pattern company has its own standard, and indie designers vary even more. This table shows the variations:
| Pattern Company | Standard Seam Allowance | Hem Allowance | Special Notes |
|---|---|---|---|
| Simplicity | 5/8″ (1.5cm) | 1-2″ (2.5-5cm) | Includes hem allowance in pattern pieces |
| McCall’s | 5/8″ (1.5cm) | 1-2″ (2.5-5cm) | Some vintage patterns use 1/2″ |
| Vogue | 5/8″ (1.5cm) | 1.5-2.5″ (4-6cm) | Often includes couture techniques with different allowances |
| Butterick | 5/8″ (1.5cm) | 1-2″ (2.5-5cm) | Some Basics patterns use 1/2″ |
| Burda | 1.5cm (5/8″) | 2-4cm (3/4-1.5″) | Includes seam allowance in magazine patterns |
| Japanese Patterns | 1cm (3/8″) | 2-3cm (3/4-1″) | Often no seam allowance included—must be added |
| Indie PDF Patterns | Varies (usually 1/2″) | 1-1.5″ (2.5-4cm) | ALWAYS check pattern instructions |
14. Muslin/Toile Making for Perfect Fit
A muslin (also called a toile) is a test garment made from inexpensive fabric. It’s the single most important step for achieving perfect fit, yet most home sewists skip it.
Why Make a Muslin?
- Test Fit: Identify needed alterations before cutting expensive fabric.
- Practice Techniques: Try new construction methods risk-free.
- Check Design: Verify you like the style on your body.
- Save Time: Fixing fitting issues in muslin is faster than fixing finished garments.
- Save Money: Prevents ruining expensive fashion fabric.
Muslin Fabric Selection
Weight Matching
Choose muslin fabric with similar weight and drape to your fashion fabric. Testing a silk dress in quilting cotton won’t give accurate results.
Cost Effective
Use old bedsheets, thrifted fabric, or inexpensive muslin. Don’t waste money on expensive fabric for testing.
Color Considerations
Use light-colored fabric so you can see markings clearly. White or light gray works best for drawing alteration lines.
Muslin Construction Process
- Cut Basic Pieces: Cut only main body pieces (front, back, sleeves). Skip facings, linings, pockets initially.
- Transfer Key Markings: Mark bust points, waistlines, darts, notches with removable marker.
- Baste Together: Use long basting stitches (4.0-5.0mm length) for easy removal.
- Try On: Wear with appropriate undergarments. Stand naturally, don’t “suck in.”
- Pin Adjustments: Pin out excess fabric, mark where to add more.
- Transfer Changes: Remove muslin, mark alterations on pattern pieces.
- Make New Muslin: For complex alterations, make a second muslin to verify changes.
15. Pattern Hacking and Customization
Pattern hacking is the art of modifying existing patterns to create new designs. It’s how you move beyond following instructions to creating truly original garments.
- Change sleeve length (long to short, short to long)
- Add or remove pockets
- Change neckline shape (crew to V-neck, add collar)
- Lengthen or shorten hemlines
- Combine two patterns (bodice from one, skirt from another)
Advanced Pattern Manipulation Techniques
Dart Manipulation
Move dart positions (bust darts to waist, waist darts to French darts). Learn dart rotation techniques to maintain shaping while changing design lines.
Princess Seam Conversion
Convert darted bodice to princess seam bodice. This involves slashing pattern from armhole/neckline to bust point and adding seam allowance.
Adding Fullness
Add gathers, pleats, or godets to create volume. Slash and spread technique allows controlled addition of fullness where needed.
16. Pattern Sizing for Plus-Size Bodies
Plus-size pattern fitting requires special considerations. Standard pattern grading doesn’t always account for the way bodies change shape at larger sizes.
Common Plus-Size Fitting Issues
| Issue | Causes | Solutions |
|---|---|---|
| Armhole Gaping | Excess fabric in front armhole area | Rotate excess to bust dart, add forward shoulder adjustment |
| Back Neck Gap | Excess fabric at back neckline | Add rounded back adjustment, deeper neck curve |
| Front Hem Rise | Front hem rides up, back hangs down | Full tummy adjustment, add length to center front |
| Sleeve Tightness | Bicep area too tight | Full bicep adjustment, add width to sleeve cap |
Plus-Size Pattern Recommendations
- Separate pattern pieces for cup sizes (A/B, C/D)
- Detailed finished measurement charts
- Multiple back width options
- Adjustment lines marked on pattern pieces
- Designs with princess seams (easier to fit than darts)
- Patterns designed specifically for plus sizes (not just graded up)
17. Children’s Pattern Specifics
Children’s patterns have unique considerations due to growth, comfort, and safety requirements. Understanding these differences ensures successful kids’ garment sewing.
Key Differences in Children’s Patterns
Growth Allowance
Children’s patterns include 1-2 inches of ease for growth. Never make children’s garments skin-tight—they need room to move and grow.
Comfort Features
Look for patterns with: elastic waists, roomy armholes, soft finishes (no scratchy seams), easy closures (snaps, elastic).
Safety Considerations
Avoid: drawstrings at hood/neck (strangulation risk), small buttons (choking hazard), flammable fabrics for sleepwear.
Children’s Pattern Sizing Systems
| System | How It Works | When to Use |
|---|---|---|
| Age-Based | Pattern marked “Size 4” for 4-year-old | Quick reference, but measure child for accuracy |
| Height-Based | Pattern marked “Height 40-42 inches” | More accurate than age, still need chest/waist measures |
| Measurement-Based | Pattern provides chest/waist/height ranges | Most accurate, requires taking child’s measurements |
18. Historical Pattern Differences
Vintage and historical patterns follow different conventions than modern patterns. Understanding these differences is essential for successful vintage sewing.
Key Historical Pattern Characteristics
Smaller Seam Allowances
Pre-1970s patterns often use 1/4″ or 3/8″ seam allowances. This requires more precise sewing but creates cleaner finishes.
Different Ease Standards
Vintage patterns have less ease than modern ones. A 1950s dress fits closer to the body than a 2020s dress of the same measurements.
Assumed Sewing Knowledge
Instructions are minimal, assuming you know techniques like understitching, staystitching, and interfacing application.
Unique Notions
May require vintage-specific notions like dress weights, bone casings, or specific types of interfacing no longer common.
Working with Vintage Patterns
- Measure Pattern Pieces: Vintage sizing differs dramatically. Measure the pattern pieces (minus seam allowance) to determine actual finished size.
- Make a Muslin: Always make a test garment. Vintage patterns often need more adjustments than modern ones.
- Research Techniques: Look up construction techniques mentioned but not explained (e.g., “tailor’s tacks,” “pad stitching”).
- Modernize Carefully: You can update construction methods, but maintain design integrity for authentic look.
- Handle with Care: Vintage tissue is often brittle. Reinforce with iron-on interfacing before use.
19. Sustainable Pattern Use
Sustainable sewing practices extend to pattern use. By adopting eco-friendly pattern habits, you reduce waste and create a more sustainable sewing practice.
Pattern Preservation
Trace patterns instead of cutting originals. Use Swedish tracing paper or medical exam paper (recyclable, reusable).
Zero-Waste Layouts
Plan cutting layouts to minimize fabric waste. Use scrap fabric for testing, muslins, or small pattern pieces.
Digital Patterns
Choose PDF patterns to reduce paper waste. Print only the size you need using the layers feature.
Sustainable Pattern Tools

Swedish Tracing Paper
This durable, translucent paper is perfect for tracing patterns without damaging originals. It’s reusable, sewable (you can baste it to fabric), and environmentally friendly. Create permanent pattern copies that last for years.
Check Price on Amazon20. Pattern Math and Geometry
Understanding the mathematics behind pattern drafting helps you make better alterations and create custom patterns. You don’t need to be a math whiz—just understand a few key concepts.
Essential Pattern Math Concepts
Seam Allowance Math
When altering patterns, remember that adding 1″ to a pattern piece adds 2″ to the finished garment (seam allowance on both sides).
Circle Skirt Formula
Radius = waist measurement ÷ (2 × π). This calculates where to cut the waist hole in a circle skirt pattern.
Grading Between Sizes
Commercial patterns typically grade up 1.5″ between sizes at bust/hips, 1″ at waist. Knowing this helps with custom grading.
Pattern Geometry Principles
| Geometric Concept | Pattern Application | Tools Needed |
|---|---|---|
| Right Angles | Creating straight grainlines, ensuring pattern pieces are square | L-square, 90° triangle |
| Curves | Drawing armholes, necklines, sleeve caps | French curve, hip curve, flexible curve |
| Parallel Lines | Adding seam allowances, creating pleats/tucks | Parallel ruler, quilting ruler with grid |
| Symmetry | Ensuring left/right pattern pieces match | Tracing wheel, pattern paper |
21. Digital Pattern Software and Tools
Digital pattern tools revolutionize how we work with patterns. From PDF assembly apps to full pattern drafting software, technology makes pattern work faster and more accurate.
Essential Digital Pattern Tools
PDF Assembly Apps
Peek-a-Pattern: iOS app that helps align and tape PDF patterns. Shows overlapping edges for perfect matching.
Pattern Printer: Desktop software that organizes and prints PDF patterns efficiently.
Pattern Drafting Software
Wild Ginger Cameo: Entry-level software for basic pattern drafting and alterations.
Optitex/CLO: Professional 3D pattern software used in industry (expensive but powerful).
Organization Apps
Evernote/OneNote: Digitize pattern instructions, notes, and fabric swatches.
Airtable/Notion: Create databases of your pattern collection with searchable fields.
Working with Digital Patterns
- Check Scale: Always print the test square to verify your printer is scaling correctly.
- Use Layers: Take advantage of PDF layers to print only your size.
- Assemble Methodically: Tape rows first, then join rows together.
- Consider Copy Shop Printing: For large patterns, consider having them printed at a copy shop on large format paper.
- Back Up Files: Store digital patterns in cloud storage with organized folder structure.
22. Pattern Testing and Quality Assessment
Not all patterns are created equal. Learning to assess pattern quality before purchasing saves time, money, and frustration.
Red Flags in Pattern Quality
- No finished garment measurements provided
- Vague or missing seam allowance information
- Poorly drawn or missing notches
- Instructions with steps like “sew front to back” without specifying how
- No test photos or only photos on dress forms (not real people)
- Pattern pieces that don’t line up when taped together
- Missing pattern pieces for views shown on envelope
How to Research Pattern Quality
- Check Pattern Reviews: Sites like PatternReview.com offer detailed user reviews.
- Look for Sew-Alongs: Bloggers who document their sewing process reveal pattern issues.
- Search Social Media: Instagram hashtags (#patternname) show real results.
- Join Online Communities: Facebook groups dedicated to specific pattern companies.
- Contact the Designer: Ask specific questions before purchasing.
23. Advanced Pattern Symbols and Markings
Beyond basic symbols, advanced patterns include specialized markings for professional techniques. Understanding these elevates your sewing to couture level.
Staystitching Lines
Dashed lines just inside seam allowance. Indicates where to sew staystitching to prevent stretching on curves (necklines, armholes).
Understitching Lines
Lines on facings/interfacings showing where to understitch to keep facings from rolling to the right side.
Ease Notches
Two notches close together indicate where to distribute ease when setting in sleeves or matching curved seams.
Roll Lines
Lines on collar/lapel patterns showing where fabric should roll naturally. Essential for proper collar construction.
Balance Marks
Small dots or crosses showing where pattern pieces should align vertically (shoulder to hem balance).
Bias Indicators
Arrows showing true bias direction (45° from grainline). Used for cutting bias strips or applying bias binding.
24. Pattern Storage and Archiving Systems
A well-organized pattern collection saves time and prevents damage. Professional systems protect your investment and make pattern selection efficient.
Professional Pattern Storage Solutions
Flat File Storage
Architect’s flat files provide large, flat drawers perfect for tissue patterns. Each drawer can hold multiple patterns organized by type.
Rolling Rack System
Hang traced patterns on hangers in a garment rack. Use clear garment bags to protect patterns and see contents.
Digital Cataloging
Photograph or scan pattern envelopes and pieces. Create a searchable database with fabric requirements, size ranges, and notes.
Pattern Organization Categories
| Category System | How to Organize | Best For |
|---|---|---|
| By Garment Type | Tops, bottoms, dresses, outerwear, accessories | General sewists, varied projects |
| By Difficulty Level | Beginner, intermediate, advanced | Skill-based sewing, teaching others |
| By Season | Spring/summer, fall/winter, year-round | Seasonal sewists, capsule wardrobes |
| By Pattern Company | Simplicity, Vogue, indie designers | Collectors, those who prefer certain brands |
25. Pattern Economics: Cost Analysis and Value
Understanding the economics of pattern purchasing helps you build a cost-effective collection that maximizes your sewing budget.
Pattern Cost Comparison
| Pattern Type | Average Cost | Value Factors | Cost per Use |
|---|---|---|---|
| Commercial (Big 4) | $5-$25 (sales $1.99-$5.99) | Multiple views, extensive sizing | $0.50-$2.00 if used 5+ times |
| Indie PDF | $8-$20 | Detailed instructions, community support | $1.60-$4.00 if used 5+ times |
| Vintage/Collector | $10-$100+ | Historical accuracy, unique designs | Varies widely based on usage |
| Drafting Software | $300-$5,000+ | Unlimited custom patterns | $1-$10 per pattern if used extensively |
- Buy on Sale: Big 4 patterns go on sale regularly at JoAnn, Hobby Lobby, and online.
- Bundle Purchases: Many indie designers offer bundle discounts.
- Swap or Borrow: Join pattern swap groups or borrow from sewing friends.
- Invest in TNT Patterns: “Tried and True” patterns you use repeatedly are worth premium prices.
- Consider Cost per Wear: A $20 pattern used for 10 garments worn 50 times each = $0.04 per wear.
26. Professional Pattern Industry Insights
Understanding how patterns are created provides insight into their limitations and possibilities. The pattern industry has evolved dramatically in recent decades.
Pattern Development Process
Design and Sketching
Designers create sketches based on trends, customer feedback, and brand aesthetic. Multiple views are developed from one base design.
Pattern Drafting
Professional pattern drafters create the initial pattern using either digital software or manual drafting techniques.
Grading
Pattern graders create all sizes from the base size using specialized software or manual grading rules.
Testing and Fit Models
Patterns are sewn by sample makers and tested on fit models representing the target size range. Adjustments are made based on fit sessions.
Instruction Writing
Technical writers create step-by-step instructions, often working with illustrators to create clear diagrams.
Production
Final patterns are printed, cut, folded, and packaged with instructions and envelopes.
27. Future Trends in Pattern Design
The pattern industry is evolving rapidly with technology. Understanding these trends helps you prepare for the future of sewing.
Augmented Reality Patterns
AR apps that overlay pattern pieces on fabric via smartphone camera, showing exactly where to cut.
3D Virtual Fitting
Software that creates a 3D avatar of your body for virtual fitting before sewing.
AI-Powered Customization
Artificial intelligence that suggests pattern alterations based on your measurements and fit preferences.
Block Libraries
Subscription services providing access to basic block patterns that can be customized for any design.
28. Comprehensive FAQ Section
These are called “nested sizes.” They allow you to choose and cut exactly your size, or grade between sizes if your measurements fall between lines. The lines are typically 1/4″ to 1/2″ apart, representing the difference between consecutive sizes.
“With nap” means all pattern pieces must be oriented in the same direction. This applies to fabrics with a directional print, pile (like velvet), or sheen that looks different when rotated. The “with nap” layout uses more fabric because pieces can’t be flipped upside down.
Check the pattern instructions or envelope back. Commercial patterns usually include it. Indie patterns should state clearly. If uncertain, measure a straight edge on the pattern—if it measures exactly the finished size, seam allowance isn’t included. Always verify before cutting.
Vintage patterns were drafted for different undergarments (girdles, corsets), different posture standards, and different ease preferences. Additionally, bodies have changed shape over generations due to nutrition and lifestyle changes. Always make a muslin with vintage patterns.
Easy patterns typically have: fewer pieces, simple silhouettes, minimal fitting, clear instructions with basic techniques. Advanced patterns include: many pieces, complex construction, extensive fitting, specialized techniques, minimal instructions assuming knowledge.
With proper handling (tracing instead of cutting originals, storing flat or rolled), tissue patterns can last 20+ years. Reinforced patterns (ironed to interfacing or traced to sturdier paper) can last a lifetime. Digital patterns last indefinitely with proper backup.
Conclusion: Practice Makes Perfect
Reading sewing patterns is a skill that improves with repetition. Start with a simple pajama pant or tote bag pattern to get used to the symbols without worrying about complex fitting. Before long, you’ll be hacking patterns, mixing and matching sleeves, and creating your own custom designs.
Sewing is 50% preparation and 50% stitching. Master the preparation, and the stitching will be a breeze.
Ready to set up your sewing space for success? Check out our guide on the Best Sewing Tables to keep your patterns flat, organized, and ready to cut.


