
What is a Serger? The Complete Guide to Professional Seam Finishing and Garment Construction
Have you ever examined the interior seams of a high-quality store-bought t-shirt, pair of leggings, or even premium bed linens? You’ll notice the edges are impeccably finished with a series of strong, interlooped threads that completely prevent any fabric fraying. This hallmark of professional garment construction isn’t achieved with a standard sewing machine alone. It’s the specialized work of a machine called a serger, known internationally as an overlocker.
In the world of sewing and textile craftsmanship, adding a serger to your toolkit represents one of the most significant leaps toward achieving truly professional, durable, and commercially viable results. As sewing experts with decades of experience in both home sewing and industrial garment production, we understand the transformative power of this machine. This comprehensive 8,000+ word guide will provide an exhaustive exploration of sergers: from their fundamental mechanics and historical evolution to practical applications, maintenance, and their crucial role in global textile industries including Bangladesh’s massive garment sector.
The Complete Definition: Understanding What a Serger Actually Does
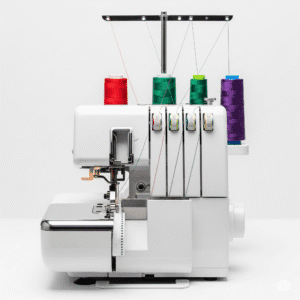
A serger is a specialized sewing machine designed to perform three critical functions simultaneously, creating professional-quality seams in a single pass. Unlike conventional sewing machines that use a bobbin and single needle mechanism, sergers employ multiple threads (typically 3, 4, or 5) working in concert with loopers and a cutting blade to achieve results that would require multiple steps on a regular machine.
- It Stitches a Seam: Using either one or two needles and two looping mechanisms called “loopers” instead of a traditional bobbin, it creates a strong, flexible seam. The looper threads interlock with the needle threads, forming a chain-like stitch that has natural stretch and durability.
- It Trims the Fabric Edge: Equipped with a built-in rotating blade (or sometimes two blades), the serger precisely trims the raw seam allowance just milliseconds before the needles insert their stitches. This ensures perfectly even seam allowances and eliminates bulk.
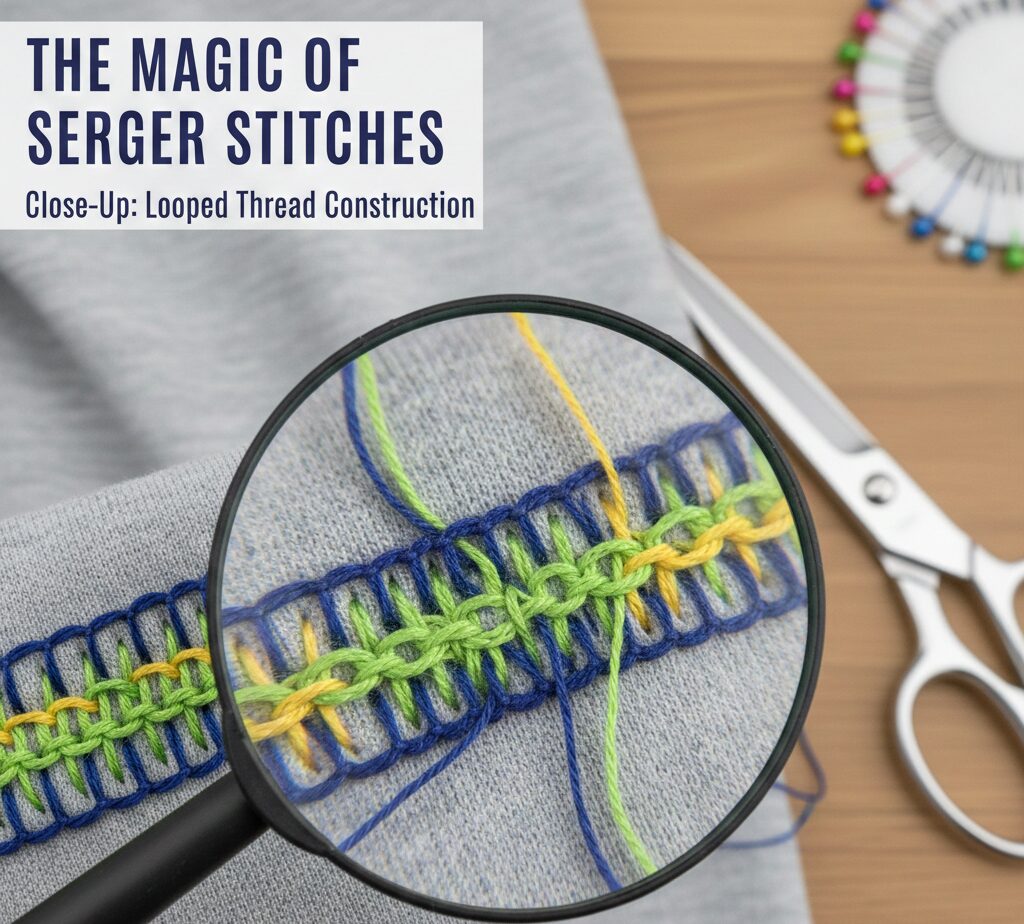
- It Overcasts the Edge: The looper threads wrap around this newly trimmed fabric edge, completely encasing it in a tight web of thread. This creates a clean, finished edge that is virtually impossible to fray, even after repeated washing and wearing.
The symphony of these three simultaneous actions produces a perfectly constructed, trimmed, and finished seam in one efficient operation. This revolutionary efficiency explains why sergers form the absolute backbone of the global garment industry, from fast fashion production lines to haute couture ateliers, including the massive and highly skilled textile industry centered in Dhaka, Bangladesh—the world’s second-largest apparel exporter.
Essential Distinction: A serger is a companion to a regular sewing machine, not a replacement. While sergers excel at seam finishing and construction, they cannot perform tasks like topstitching, sewing buttonholes, installing zippers, or decorative stitching. Your conventional sewing machine remains essential for these construction steps, making the two machines perfect partners in a complete sewing setup.
Historical Evolution: From Industrial Revolution to Home Studio
The serger’s development parallels the industrialization of garment manufacturing. The first patent for an overlocking mechanism was filed in 1881 by the Merrow Machine Company in the United States. Initially, these were single-thread machines used primarily for finishing blankets. As the ready-to-wear industry exploded in the early 20th century, the demand for faster, more efficient seam finishing grew exponentially.
The 1950s saw the introduction of the first true multi-thread sergers in industrial settings. These machines dramatically reduced production time while improving garment durability. However, it wasn’t until the 1980s that sergers became accessible to home sewists, thanks largely to Japanese manufacturers like Juki and Brother who developed scaled-down, user-friendly versions. Today, technological advancements have brought features like air threading, differential feed, and computerized controls to home models, bridging the gap between industrial capability and domestic accessibility.
Serger vs. Sewing Machine: Fundamental Technical Differences
While both machines create stitches, they are fundamentally different tools engineered for distinct purposes. Understanding these differences is crucial for leveraging each machine’s strengths effectively.
| Feature | Regular Sewing Machine | Serger/Overlocker |
|---|---|---|
| Stitch Formation | Uses needle thread and bobbin thread to create a “lockstitch” | Uses 2-5 cone threads with needles and loopers to create “chainstitch” or “overlock stitch” |
| Cutting Mechanism | No cutting blade; requires separate trimming | Built-in rotating blade trims fabric before stitching |
| Speed | Typically 600-900 stitches per minute | 1,300-1,700+ stitches per minute (industrial models reach 9,000) |
| Thread Supply | Small spools (200-500 yards) and bobbin | Large cones (1,000-5,000 yards each) |
| Stitch Flexibility | Limited stretch in lockstitch | Naturally stretchy stitches ideal for knits |
| Primary Functions | Construction, embellishment, buttonholes, zippers | Seam finishing, edge overcasting, rolled hems, flatlocking |
| Learning Curve | Moderate; intuitive for beginners | Steeper; requires understanding of threading and tension |
Mechanical Deep Dive: How Sergers Actually Work
The serger’s magic lies in its unique mechanical system. Unlike the rotary hook and bobbin system of conventional machines, sergers use loopers—metal components that move in elliptical patterns to catch threads and form loops. Here’s the precise sequence:
- Fabric Feeding: The fabric enters through feed dogs and is guided under the presser foot toward the cutting area.
- Simultaneous Trimming: As fabric approaches the needles, a rotating blade (positioned just before the needle entry point) trims the edge to the exact width of the seam allowance.
- Needle Penetration: One or two needles (depending on stitch type) penetrate the fabric, inserting their threads.
- Looper Action: The upper and lower loopers swing in synchronized opposition. The lower looper catches the needle thread(s) first, then the upper looper catches the lower looper’s thread, creating an interlooped chain.
- Stitch Formation: This interlooping continues as fabric advances, creating a continuous chain of stitches that both joins fabric layers and encases the trimmed edge.
- Differential Feed (if equipped): Advanced sergers have two sets of feed dogs with independent speed controls. This allows for perfect handling of stretch fabrics without distortion and can create decorative gathering effects.

1. The Beginner’s Choice: Brother 1034D 3/4 Thread Serger
For over two decades, the Brother 1034D has remained the gold standard for first-time serger buyers, and its enduring popularity is well-deserved. This reliable, affordably-priced 3/4 thread serger combines industrial-grade performance with home-sewist accessibility. Its legendary color-coded threading pathway with illustrated guides takes the intimidation out of initial setup—a crucial feature for beginners daunted by serger threading complexity. As a true workhorse capable of handling everything from delicate chiffons to medium-weight denim, it provides exceptional value while offering essential features like adjustable cutting width, differential feed for knits, and easy conversion to rolled hemming. The 1034D’s consistent performance and widespread user base mean abundant online tutorials and community support are readily available.
Check Price on AmazonComprehensive Stitch Types and Their Applications
Modern sergers are remarkably versatile, capable of creating numerous stitch types for different applications. Understanding these stitches expands your creative possibilities dramatically.
3-Thread Overlock Stitch
The most basic serger stitch uses one needle and two loopers. It creates a narrow, flexible finish ideal for lightweight to medium-weight fabrics. The 3-thread configuration uses less thread than 4-thread stitches, making it economical for large projects. This stitch is perfect for finishing seams on woven fabrics where maximum flexibility isn’t required.
4-Thread Safety Stitch
This is essentially two rows of stitching in one operation: a 3-thread overlock alongside a 2-thread chainstitch. The result is an extremely secure seam that combines the flexibility of an overlock with the security of a chainstitch. This is the workhorse stitch for most garment construction, especially for woven fabrics that will undergo stress.
2-Thread Flatlock Stitch
Created using one needle and the lower looper only, this stitch produces a flat seam with decorative looper thread visible on the right side. When pulled open flat, it creates a ladder-like appearance ideal for activewear, reversible garments, and decorative topstitching. Flatlocking minimizes bulk, making it perfect for areas prone to chafing.
Rolled Hem
By adjusting settings and sometimes changing the foot, sergers can create tiny, narrow rolled hems perfect for delicate fabrics like chiffon, organza, and lightweight linens. This creates a professional finish on scarves, napkins, bridal veils, and sheer curtains. The serger wraps the fabric edge completely in thread, creating a durable, nearly invisible hem.
Coverstitch (on Coverstitch Machines)
While technically created by a different machine type (coverstitch machines), many modern sergers offer coverstitch capabilities or convertible functions. Coverstitching creates the familiar double- or triple-row parallel stitching seen on the hems and necklines of ready-to-wear knit garments. It provides professional stretch hems that lie flat without tunneling.
Do You *Need* a Serger? Comprehensive Analysis
While you can certainly sew without a serger, this machine becomes essential for achieving specific results and working efficiently with particular fabrics. Let’s examine various sewing scenarios to determine when a serger transitions from “nice-to-have” to “essential.”
A Serger is an Essential Investment If…
- You Specialize in Knit Fabrics: If your sewing revolves around t-shirts, leggings, activewear, swimwear, jersey dresses, or any stretchy fabric, a serger is non-negotiable. It creates the perfect elastic seam that stretches with the fabric without breaking—something conventional lockstitches simply cannot achieve reliably.
- You Pursue Professional-Level Finishes: A serged edge is the unmistakable hallmark of commercially produced garments. It elevates projects from “homemade” to “professionally handmade” and ensures longevity through countless washes without fraying or seam failure.
- You Value Production Efficiency: Time studies show sergers can reduce construction time for knit garments by 60-70%, as they combine multiple steps into one operation. For crafters producing items for sale or those with limited sewing time, this efficiency gain is substantial.
- You Work with Sheer or Delicate Fabrics: The rolled hem function creates perfect narrow hems on chiffon, voile, organza, and other delicate materials that are challenging to hem conventionally.
- You Create Home Decor Items: Sergers excel at finishing edges on curtains, pillowcases, table linens, and bedding—items that undergo frequent washing and need durable seam finishes.
- You Teach Sewing or Run a Small Business: For sewing instructors, pattern testers, or small-scale manufacturers, a serger is essential equipment that enables professional results and efficient production.
You Might Delay Your Serger Purchase If…
- You Are in the Early Stages of Learning: Mastering basic construction techniques on a conventional machine first provides essential foundation skills. Adding a serger too early can overwhelm beginners with its complexity.
- You Primarily Quilt: Traditional quilting relies on precise straight stitching and doesn’t typically utilize serger finishes. While sergers can join quilt-as-you-go blocks or finish quilt edges, they’re not primary quilting tools.
- Your Budget is Extremely Limited: While entry-level sergers are reasonably priced, the additional cost of thread cones, specialized needles, and potential accessories might strain a very tight budget.
- You Have Severe Space Constraints: Sergers require dedicated space with room for large thread cones to hang freely. Very small sewing areas might not accommodate both a sewing machine and serger comfortably.
- You Primarily Do Historical Costuming: Many historical garments require finishes authentic to their period, which typically don’t include serged edges. Hand-finished seams or specific machine stitches might be more appropriate.
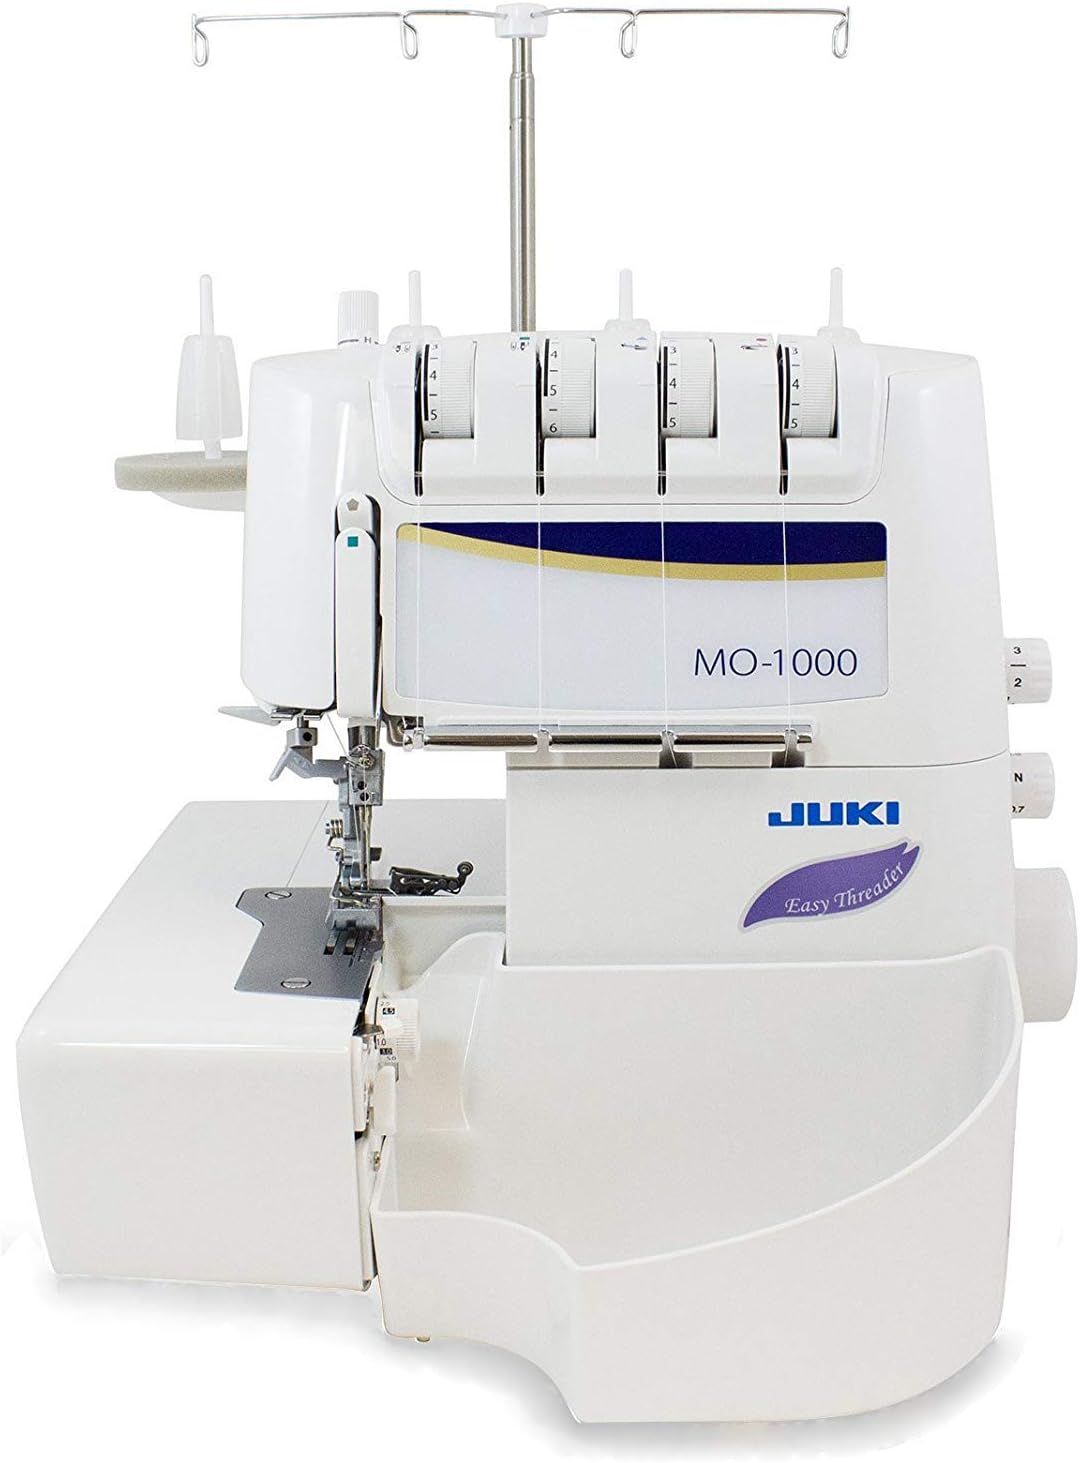
2. The Air-Threading Revolution: Juki MO-1000 Serger
The single greatest challenge for serger users—beginners and experts alike—is threading the loopers. Juki’s MO-1000 with air-threading technology eliminates this frustration entirely. With the simple push of a button, precisely directed jets of air transport threads through the machine’s internal pathways, achieving perfect threading in seconds rather than minutes. This technological leap represents a significant price increase over basic models, but the convenience is transformative, especially for those who frequently change threads or teach sewing classes where rethreading demonstrations occur regularly. Beyond its revolutionary threading system, the MO-1000 offers exceptional stitch quality, robust construction, and the reliability Juki is known for in both industrial and home settings.
Check Price on AmazonKey Features to Consider When Buying a Serger
Not all sergers are created equal. Understanding key features will help you select the perfect machine for your needs and budget.
Number of Threads
2-Thread: Limited capability, primarily for flatlocking and decorative work. Rare as standalone machines.
3-Thread: Good for basic overlocking on lightweight to medium fabrics. Economical thread usage.
4-Thread: The standard for most home sewists. Creates secure safety stitch for garment construction.
5-Thread: Less common; creates a safety stitch with extra reinforcement.
3/4-Thread Convertible: Most versatile option. Can switch between 3-thread (for lightweight fabrics) and 4-thread (for stronger seams) configurations.
Differential Feed
This feature includes two sets of feed dogs with independent speed controls. When the front and back feeds move at different speeds, you can:
- Prevent Stretching: On knits, differential feed can compensate for fabric stretch during sewing
- Create Gathers: By making the front feed dogs move faster than the back ones
- Ease Fabric: For easing sleeves into armholes or creating decorative effects
Cutting Width Adjustment
The ability to adjust how much fabric is trimmed allows for different seam allowances and decorative effects. Most sergers offer 2-7mm width adjustments.
Stitch Length Control
Adjustable stitch length (typically 0.5-4mm) allows customization for different fabric weights and effects.
Rolled Hem Capability
Many sergers can convert to create narrow rolled hems, either through adjustments alone or with a special foot.
Threading Systems
Manual Threading: Standard on most machines; requires patience and good eyesight.
Color-Coded Pathways: Helpful visual guides for beginners.
Air/Jet Threading: High-end feature that threads loopers with air pressure.
Easy-Path Threading: Simplified pathways that reduce threading complexity.
Presser Feet Included
Standard serger feet include: overlocking foot, rolled hem foot, blind hem foot, piping foot, gathering foot, and elastic application foot. More specialized feet increase versatility.
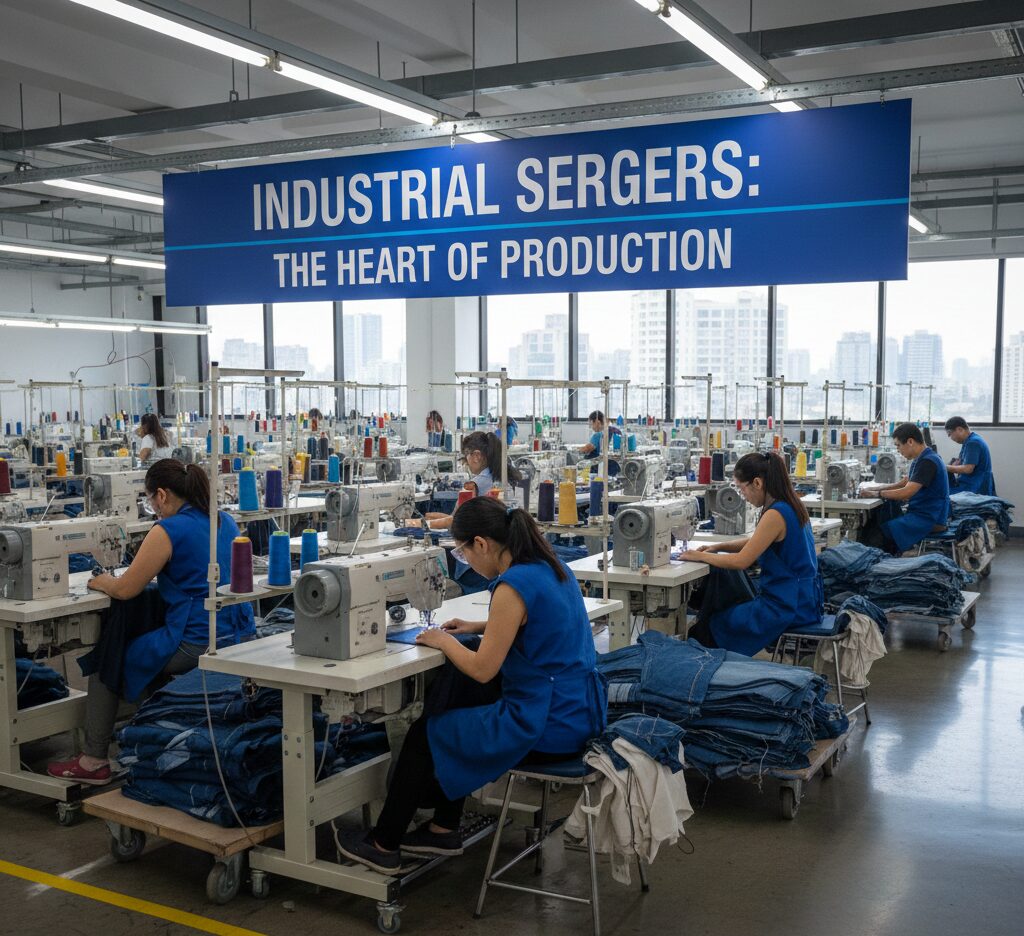
The Global Industrial Perspective: Sergers in Bangladesh’s Garment Industry
Bangladesh stands as the world’s second-largest apparel exporter, with the ready-made garment (RMG) sector accounting for approximately 84% of the country’s total exports. Within this massive industry, sergers are not merely tools—they are the backbone of production efficiency and quality control.
Dhaka’s garment factories operate thousands of industrial sergers, primarily from brands like Juki, Brother, and Pegasus. These industrial machines differ from home models in several key ways:
- Speed: Industrial sergers operate at 7,000-9,000 revolutions per minute, compared to 1,300-1,700 for home models
- Durability: Built for 24/7 operation with minimal maintenance
- Specialization: Often dedicated to specific tasks (side seams only, sleeve setting only, etc.)
- Automation: Many feature automatic thread trimmers, backtackers, and programmable patterns
The skill of Bangladeshi serger operators is internationally recognized. Many undergo extensive training to master the machines’ capabilities, with experienced operators able to thread machines blindfolded and maintain perfect tension across various fabric types from delicate chiffons to heavy denims. This expertise contributes directly to Bangladesh’s competitive advantage in the global apparel market.
Complete Serger Setup and Threading Masterclass
Threading Your Serger: Step-by-Step Guide
Proper threading is critical for serger operation. While each model differs slightly, the general principles remain consistent:
- Prepare Your Thread Cones: Place cones on holders, ensuring they unwind freely without tangling. Use cone holders with adjustable tension if available.
- Follow Color-Coded Pathways: Most modern sergers have colored guides matching colored dots on the machine. Follow these precisely.
- Thread in Correct Order: Always thread upper looper first, then lower looper, then needles. This sequence prevents threads from catching on already-threaded parts.
- Use Thread Nets: For slippery threads, place small nets over cones to prevent unrolling and tangling during high-speed sewing.
- Check Tension Dial Settings: Before threading, set all tension dials to normal (usually marked with a line or specific number).
- Engage Tension Discs: Ensure each thread is properly seated between its tension discs before proceeding.
- Thread Loopers Carefully: Use tweezers or a loop threader for difficult looper eyes. Ensure threads pass through all guides.
- Needle Threading: Thread needles from front to back, using automatic needle threader if equipped.
- Test Stitch: After threading all positions, test on fabric scraps, adjusting tensions as needed.
Understanding and Adjusting Tension
Serger tension adjustment is often the most intimidating aspect for new users. Each thread (upper looper, lower looper, left needle, right needle) has its own tension dial. Here’s how to diagnose and correct tension issues:
| Symptom | Likely Cause | Solution |
|---|---|---|
| Loops on fabric surface | Upper looper tension too loose | Increase upper looper tension slightly |
| Loops on fabric underside | Lower looper tension too loose | Increase lower looper tension |
| Fabric edge not fully wrapped | Needle tension too tight or looper tensions unbalanced | Decrease needle tension, balance looper tensions |
| Puckered seams | Overall tension too tight | Decrease all tensions slightly |
| Stretchy fabric not feeding properly | Differential feed incorrect for fabric | Adjust differential feed ratio |
3. Serger Thread & Needles: The Foundation of Quality Stitches
Sergers consume thread at approximately four times the rate of conventional sewing machines, making cone thread (typically 1,000 to 5,000 yards per cone) essential for economical operation. Begin with four cones of high-quality polyester or polyester-wrapped cotton thread in neutral colors like ecru, medium grey, and black—these will blend with approximately 80% of fabrics. Serger-specific needles (System ELx705 or 130/705H) are engineered to withstand the high-speed, high-impact operation of sergers without breaking or overheating. Unlike universal sewing machine needles, serger needles have specially shaped shanks and eyes that facilitate smooth passage through loopers. For specialty fabrics, maintain appropriate needle varieties: ballpoint for knits, sharp for wovens, and chrome or titanium-coated for synthetic materials that generate more friction.
Check Price on AmazonAdvanced Serger Techniques and Creative Applications
Decorative Serging
Sergers aren’t just for seam finishing—they’re creative tools. Try these decorative techniques:
- Contrast Threading: Use different colored threads in each position for striped effects
- Metallic or Specialty Threads: Use decorative threads in loopers only (less tension stress)
- Wide Woolly Nylon: Create textured edges with woolly nylon in loopers
- Lettuce Edges: Stretch fabric as you serge for a decorative wavy edge on knits
- Flatlock Decorative Seams: Use contrast thread and position seams to show on garment right side
Specialty Applications
Elastic Application: Using a special foot, sergers can apply elastic while stretching it, perfect for waistbands and cuffs.
Cording: Insert decorative cording into the seam as you serge for piped edges.
Ruching: Use differential feed to create evenly gathered effects.
Quilt-As-You-Go: Join quilt blocks with decorative serger stitches.
Bag Making: Create professional, durable seams for tote bags, backpacks, and reusable shopping bags that withstand heavy loads.
Lingerie Construction: Perfect for delicate fabrics and elastic application on underwear and bras.
Reversible Garments: Use flatlock stitches to create seams that look finished on both sides.
Maintenance and Troubleshooting: Keeping Your Serger in Peak Condition
Regular maintenance is crucial for a serger’s high-speed operation. Follow this comprehensive schedule to prevent issues and ensure longevity.
Daily/Weekly Maintenance
- Brushing Out Lint: After every project, use a small brush to remove lint from the looper area, tension discs, and feed dogs. Compressed air can be used carefully.
- Checking the Blade: Inspect the cutting blade for dullness or nicks. Dull blades cause fabric to push rather than cut, leading to uneven edges.
- Wiping Down: Use a soft cloth to wipe exterior surfaces, removing dust and oil.
Monthly Maintenance
- Oil According to Manual: Apply only serger-specific oil to points specified in your manual. Over-oiling attracts lint; under-oiling causes wear.
- Check Tension Spring Function: Ensure tension discs are clean and springs move freely.
- Inspect Needle Plate: Look for burrs or scratches that could snag fabric.
Common Troubleshooting Issues
| Problem | Possible Causes | Solutions |
|---|---|---|
| Skipped Stitches | Dull/bent needle, incorrect needle type, improper threading, poor fabric feed | Replace needle, ensure proper insertion, rethread completely, check feed dog height |
| Thread Breaking | Tension too tight, burred needle plate/loopers, poor quality thread, incorrect threading path | Reduce tension, inspect for burrs, use quality thread, verify threading path |
| Uneven Cutting | Dull blade, blade misalignment, improper fabric guiding | Replace blade, adjust blade position, use both hands to guide fabric evenly |
| Fabric Not Feeding | Presser foot pressure too light, feed dogs clogged, differential feed disengaged | Increase presser foot pressure, clean feed dogs, check differential feed setting |
| Excessive Noise/Vibration | Loose screws, lack of lubrication, unbalanced placement on table | Tighten external screws, lubricate as manual specifies, place on stable, level surface |
Frequently Asked Questions About Sergers
Choosing Your First Serger: Final Recommendations
Your ideal first serger depends on your budget, sewing goals, and tolerance for technical learning.
For the Absolute Beginner on a Budget
Choose a reliable, widely-used 3/4 thread convertible model like the Brother 1034D. Its vast user community means endless free tutorials and troubleshooting help online. Prioritize machines with clear, color-coded threading guides.
For the Intermediate Sewist Ready to Invest
Look for a 3/4 or 4/5 thread machine with differential feed (essential for knits) and easy rolled-hem conversion. Brands like Juki, Baby Lock, and Janome offer excellent mid-range models with better stitch quality and durability than entry-level options.
For the Advanced Hobbyist or Semi-Professional
Consider machines with air-threading or other advanced threading aids, wider stitch width capabilities, and more robust construction. Look at the higher-end lines from Baby Lock (like the Evolution) or Juki’s MO series. These represent a significant investment but offer near-industrial performance.
Pro Tip: Buy from a Dealer if Possible While online prices can be attractive, purchasing from a local dealer often includes a free introductory lesson, warranty support, and sometimes even free lifetime classes. The initial setup and hands-on instruction can be invaluable for new serger owners.
Conclusion: The Serger as a Transformative Tool
A serger is more than just another sewing machine accessory; it’s a gateway to a new level of craftsmanship. By mastering this powerful tool, you gain the ability to produce garments and projects with durability, polish, and efficiency that rival ready-to-wear. The initial investment of time and money is repaid many times over in the satisfaction of creating truly professional finishes, the joy of effortlessly sewing stretch fabrics, and the hours saved on tedious seam finishing.
From the bustling garment factories of Bangladesh producing clothing for the world to the quiet home studios of passionate makers, the serger remains an indispensable engine of textile creation. Whether you’re finishing a simple t-shirt or constructing an elaborate gown, the clean, durable overlock stitch elevates your work, whispering a secret to those who understand such things: here is something made with care, made to last, and made with the knowledge of true craft.
Embrace the learning curve, respect the mechanics, and let your serger open new creative possibilities in your sewing journey. The perfect seam awaits.


